The Form Template Layout window allows full and flexible customization.
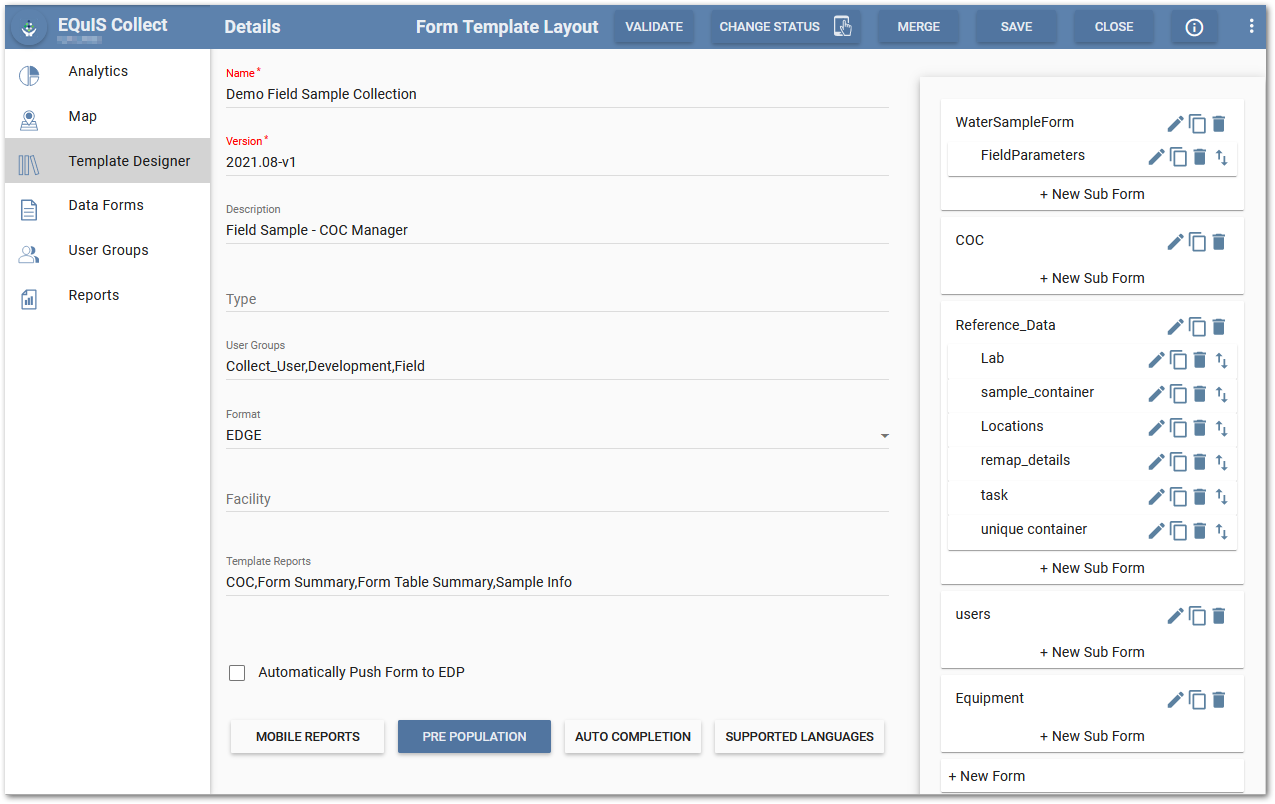
The Form Template Layout consists of the following features:
•Main template details on the left side of the page.
•Options to Save, Close, Validate or Change Status of the template are at the top of the frame. The Merge button can be used to merge the template with other Collect templates.
•Building forms and subforms (with their associated fields) on the right side of the page.
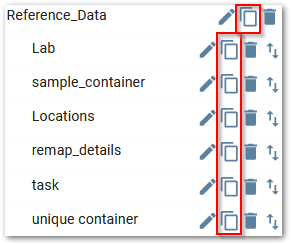
Tip: Copy and Reorder Data Forms 1.Forms and their child subforms can be copied within a template and child subforms can be copied within a parent form by clicking the Copy button. All fields and formulas will be copied from the original form to the new form copy. Fields with formulas that reference the form itself will be updated with the copied form name. This functionality allows users to more easily duplicate and modify forms.
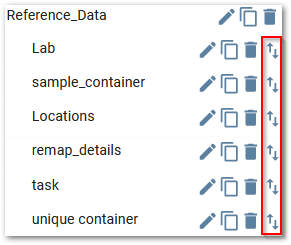
2.Subforms can be rearranged by dragging/dropping or using the Move button.
|
|---|
Template Details
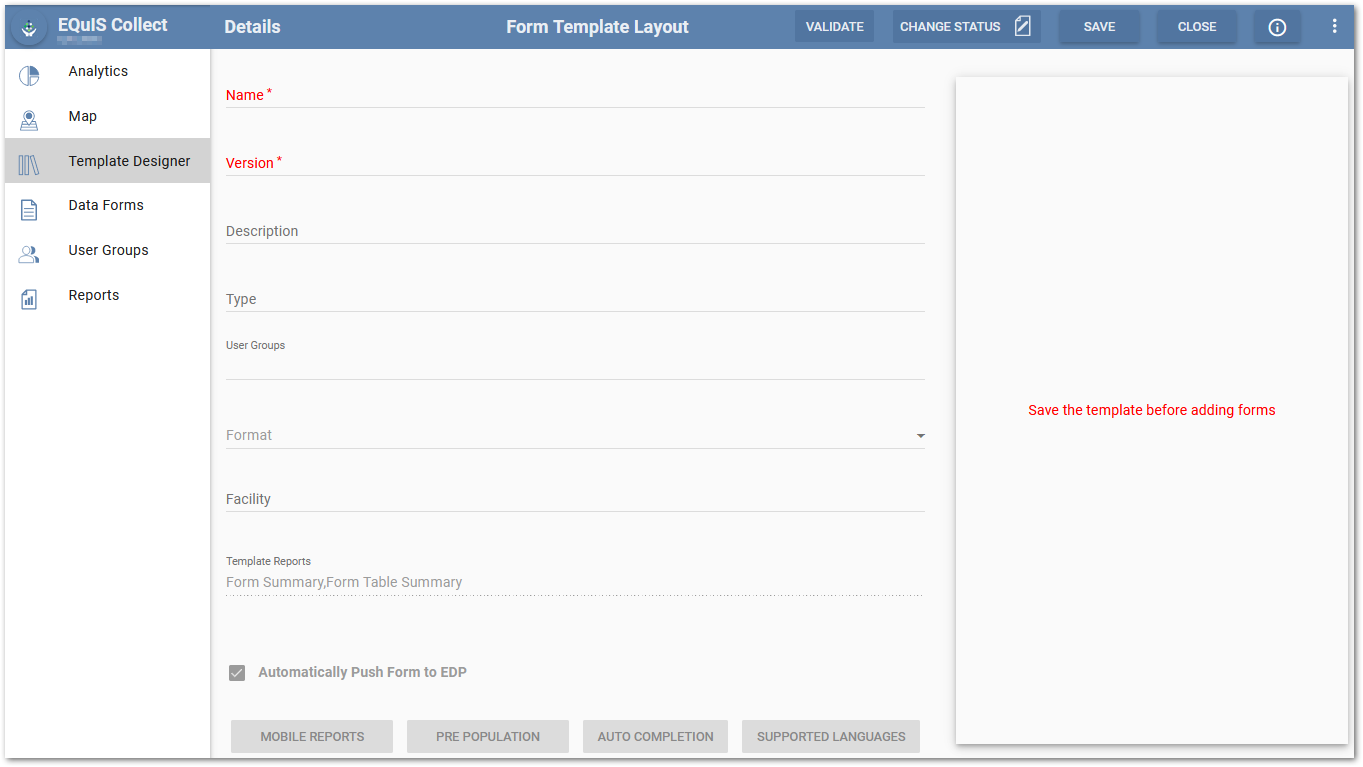
When creating a new template, complete the following details. Note that field names with red text and followed by an asterisk (e.g., Name*) denotes required fields.
•Name – Template title, as specified by the user creating the template. Title should be clear and concise.
Note: The name of a template cannot be changed once the template is published. |
|---|
•Version – Version number, as specified by the user creating the template. While developing a template, a good practice is to increment the version number.
•Description – Summary description of the template. The description should provide sufficient detail to allow the user to understand the purpose of the template and subsequent data forms.
•Type – Template type, as specified by the user creating the template. Provide consistent template types to assist users of the Collect Mobile app and meaningful analytics.
•User Groups – User groups to which the template has been assigned. This field allows for distribution of the template to specific users, as part of a designated group. See the User Groups article for more detail.
•Format – Template format, selected by drop-down menu. Collect Enterprise allows full flexibility of the EDD formats used to design a template. Any EQuIS format may be used (e.g., Geology EDD, EDGE, EFWEDD, EQEDD) or None. Selecting None allows the user to fully customize from scratch the format to be used with the template, based on the tables and sections available in the database Schema. If the specified format is not correctly setup in the ST_CONFIG table, a warning message is displayed.
Tip: Best Practices for Changing an EDD Format 1.Select New Form Template in the Template Designer. 2.Select Copy Template and choose the template that contains the EDD format that will be changed. A copy of the template will automatically open in the Details window. 3.Set the Format field to the desired EDD format to use for the copied template. A warning message is displayed, stating: "Changing the format will delete all mappings in the template. Do you want to change the format?". 4.Select Yes to set the selected format for the template or select No to cancel the format change. 5.Click Save to save the template. 6.Redefine the data mappings for each form section of the template. See the Data Mapping on Collect Forms article for more information. 7.Once data mappings have been redefined, change the status of the template to Test and confirm that all data mappings are working as expected. 8.If all data mappings are working correctly, set the status of the template to Published to be used in production.
Utilizing the View Template Preview tool of the original template can ease the process of reconfiguring the data mappings by referencing the data mappings used in the previous EDD format. See the Collect Enterprise Template Designer article for more information about how to access the View Template Preview option. |
|---|
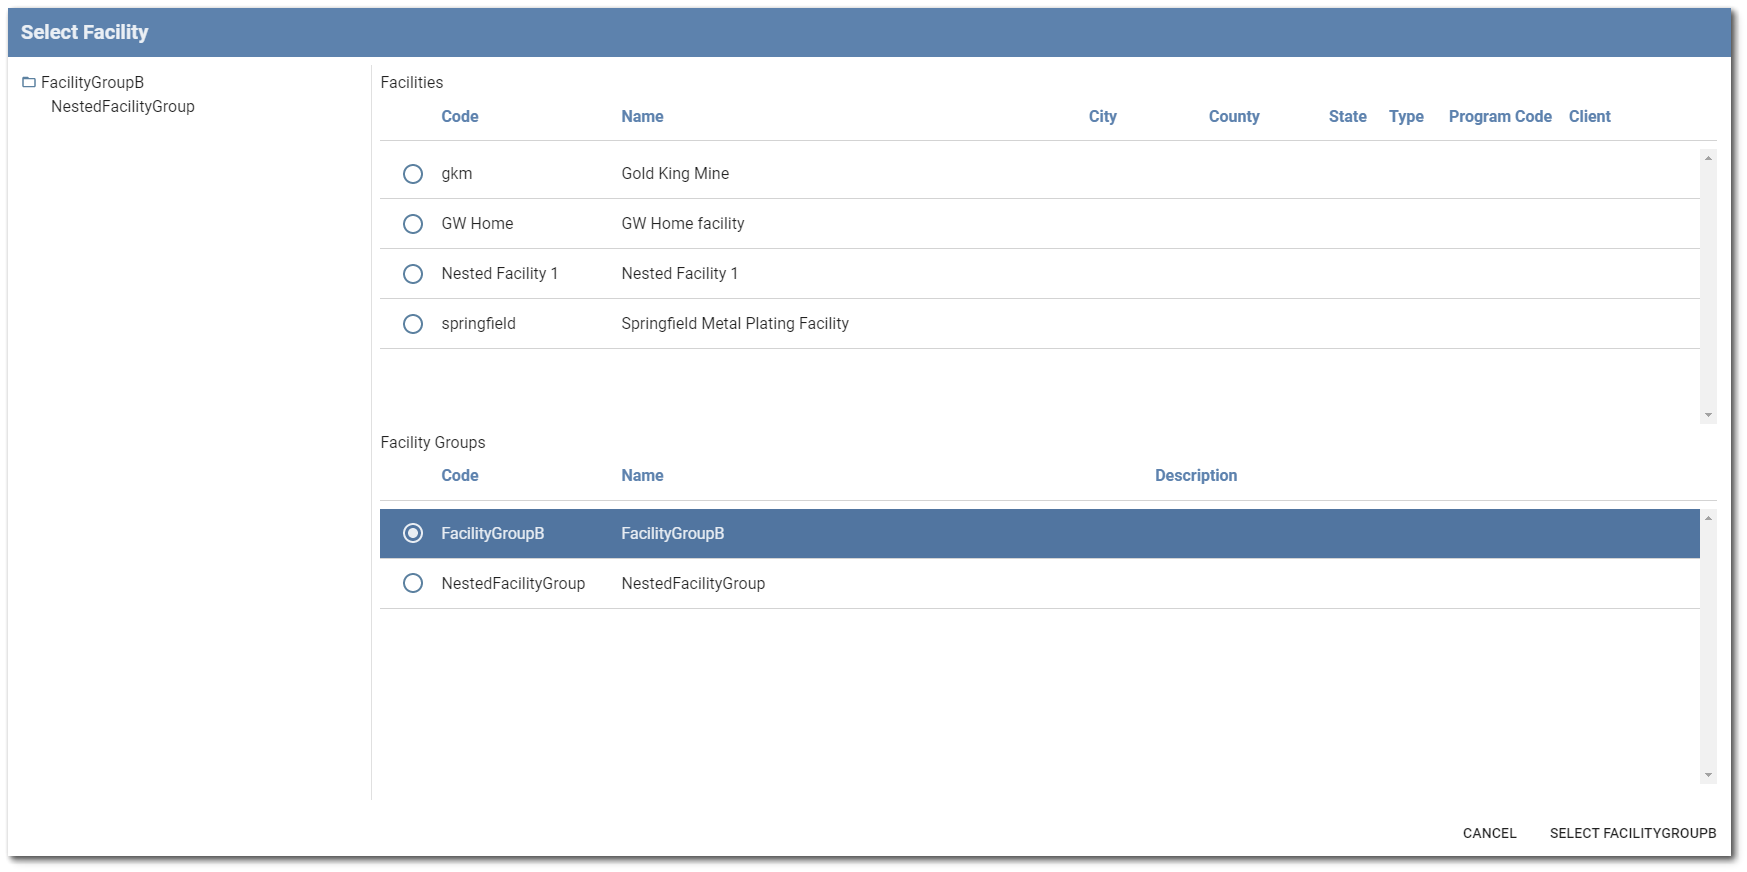
•Facility – Assign template to a facility or facility group. Selecting this box will open a Select Facility window. The currently selected session facility will be displayed for selection. If the user is in a facility group that contains several sub-facilities or nested facilities, a drop-down will display the facility group and all sub-facility options within the group. A template assigned to a facility group will be available to all sub-facilities of that group. An unassigned template will be available to all facilities. Facility specific templates will also require facility defined user permissions.
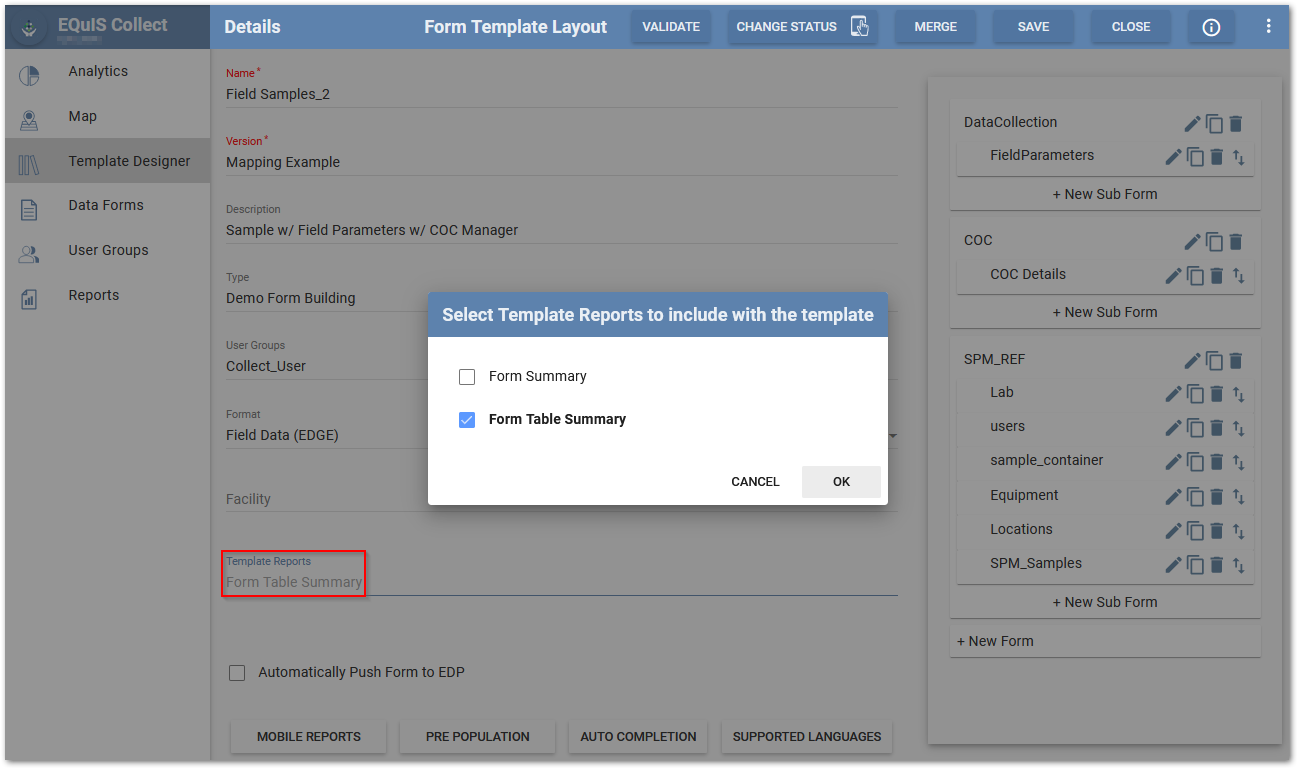
•Template Reports – Select which template reports (e.g., Form Summary, Form Table Summary, COC, etc.) are enabled (i.e., checked) and available with for published templates. It is possible to select all template reports, some template reports, or no template reports. If no template reports are selected, the Reports button will not be displayed for any of the forms associated with the template in Collect Mobile.
•Automatically Push Form to EDP – When a known EQuIS format is selected, the Automatically Push Form to EDP check box is selected by default. This data processing option will automatically sign and submit the Collect EDD on the mobile device and upload to the EQuIS 7 database via EDP. By default, this setting remains selected for new templates and templates copied from the same server, but not templates that have been uploaded.
•Automatically Push Form to Remote EDP – When a known EQuIS format is selected, the Automatically Push Form to Remote EDP check box is enabled if the ST_CONFIG table is configured for remote third party databases. By default, this setting remains selected for new templates and templates copied from the same server, but not templates that have been uploaded. See the Using Collect with EQuIS 6.x Databases article for more information about how to use this feature.
•Mobile Reports Button – The Mobile Reports button is used to assign a report to a template. See the Mobile Reports article for more details. The Mobile Reports button is shaded blue when reports have been loaded to the template.
•Pre Population Button – Forms can be pre-populated with data and then made available on the Collect Mobile app. The Pre Population button is shaded blue when data has been loaded to the template. See the Pre-Population of New Form article for more details.
•Auto Completion Button – The Auto Completion button is used to set parameters for completing Data Forms automatically. The Auto Completion button is shaded blue when a Data Form has been configured to be completed automatically. For configuration details, see the Auto Completion Settings in Collect Templates article.

After the template details have been entered, select the Save button to be able to build forms and add fields.
A more detailed explanation of the form building process is in the Collect Forms and Fields chapter. The Add Forms article describes the process of adding new forms to the newly created template. The Fields article describes how fields can be added, edited, moved, copied, or deleted from a form.
Validate Template
The Validate button can be applied to ensure that the template does not contain errors. When selected, the Validate button checks the following:
•The template has form name(s) and fields in that form.
•Each field has a field name and caption.
•Formulas for each attribute, and all fields, are checked to ensure that the fields referenced in the formulas exist in the template for the following:
▪all forms within the template
▪all plots/reports embedded in the template
Any errors found in the validation check are prompted to the user in a separate dialog noting the field and associated error.
Templates are automatically validated when switching from Edit status to Test Mode or upon attempting to Publish a template. If any errors are found when switching the template status, the error dialog will appear. A template with errors will still be allowed to enter Test Mode status but cannot be Published. All errors must be resolved prior to publishing a template.
Note: The Validate button does not check or validate Data Mapping. There is a separate Validate button within the Data Mapping dialog. |
|---|