Template Designer
Forms used in the Collect Mobile app can be designed and built using Collect Enterprise. Form templates are designed and then published to be accessible on the Collect Mobile app. A template is a collection of pre-defined forms that contains fields with various attributes, data mapping to an EQuIS format, formulas (as needed), and possibly pre-populated with data. A new template can be created entirely from scratch or can be based on an existing template.
Templates should be tested before they are published so that they can be modified without having to create a new template with each change. Templates in Test mode can be modified, but data captured from these forms will not be pushed to the database. Test mode should be used exclusively for testing the functionality of a template, prior to the template being published, and not for field data collection purposes. All Data Forms and collected data associated with a template will be deleted when the template is edited, which includes when publishing the template. See the Publish Forms on Mobile App article for more information. A published template may be disabled, but a disabled template cannot be re-enabled and set to Publish.
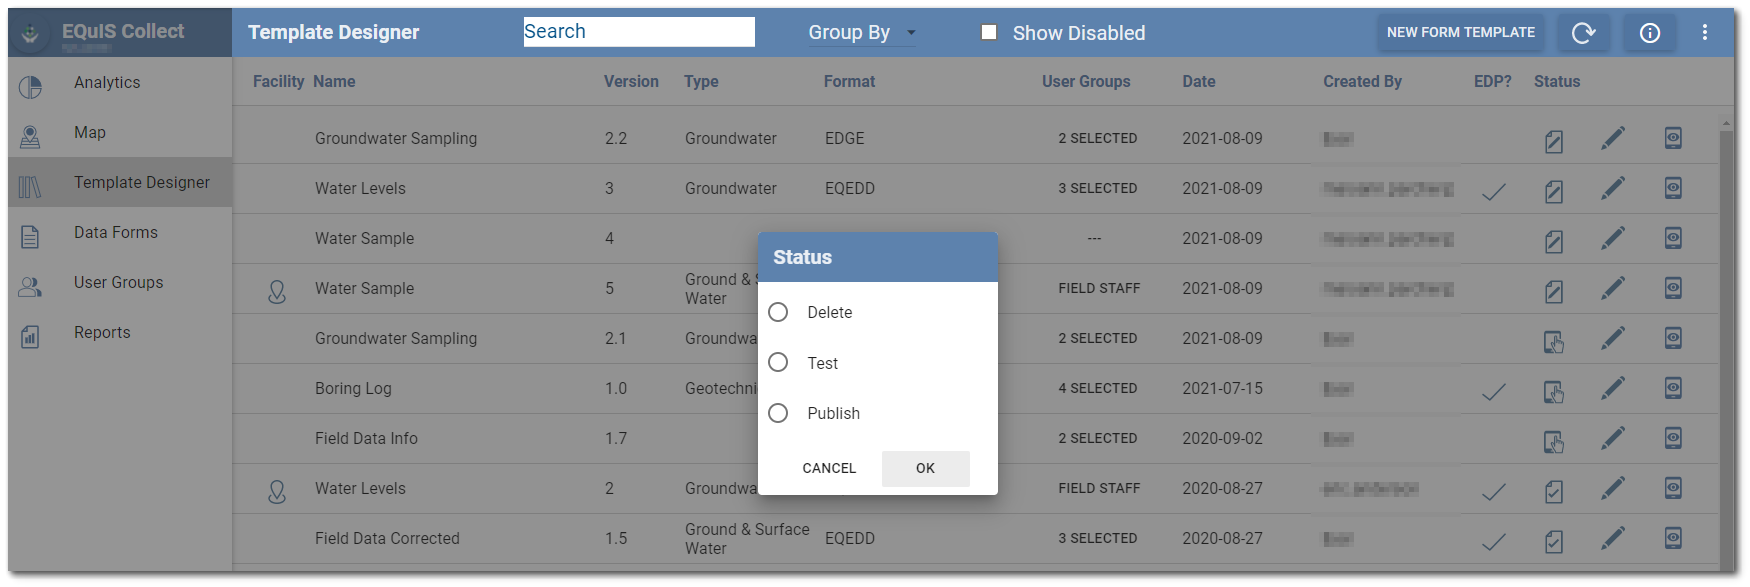
The Template Designer page provides a status summary of all templates available in the database and is used to create new templates or edit existing templates.
Note: A template on Collect Enterprise cannot be opened or edited by more than one user. If a user has opened or is editing a template, the template will be locked to all other users. If another user attempts to access the template, they will receive a message notifying them that “[User Name] is editing this template.” Once the user who is editing closes the template (by using the Close button), the lock on the template will be removed and other users will be able to access and edit the template. If the user who is editing happens to close their browser, or their browsers fails (shuts down on them) without exiting the template, the template will be locked for 2 minutes before the lock is removed. |
|---|

For each template, the following information is provided:
•Facility – If a template has been assigned to a specific facility or facility group, the respective icon will be displayed. Hovering over the facility icon will display the facility name in the tooltip. Unassigned templates are available to all facilities and do not display an icon. Templates assigned to facilities will only be visible when the Collect Enterprise Dashboard is set to that facility or no facility.
•Name – Template title, as specified by the user creating the template.
•Version – Version number, as specified by the user creating the template.
•Type – Form type, as specified by the user creating the template.
•Format – Template format; frequently a specified EQuIS EDD format.
•User Groups – User groups to which the template has been assigned. Hovering over the user groups of a template row will show which user groups are assigned to the template. Clicking on the assigned user group for that template record will open a Groups dialog. The Groups dialog allows user groups to be added or removed from the template and displays the user group code, user group description, and user group facility, if a facility is assigned to a user group. If a session facility or session facility group is configured, only user groups associated with the selected facility or user groups not associated with a facility are displayed.
•Date – Date of template creation or last edited.
•Created By – Name of user who created the template.
•EDP? – Check appears if the template is set to automatically process EDDs through EDP.
•Status – Template status denoted by one of the following icons: Design ![]() , Testing
, Testing ![]() , Published
, Published ![]() , or Disabled
, or Disabled ![]() .
.
Note: Templates must be set to Published for a data form to be able to be marked Complete, including using the Auto Completion functionality. See the Form Template Layout article for more information. |
|---|
•Editing – The Edit ![]() icon allows further editing of the template until it is published.
icon allows further editing of the template until it is published.
•Preview – The Preview ![]() icon displays the structure of how the template will appear on the Collect Mobile app.
icon displays the structure of how the template will appear on the Collect Mobile app.
Note: User groups that have been assigned to a template, unless otherwise deselected, will remain assigned to the template regardless of the configured session facility. The session facility will dictate which user groups are visible. To remove facility specific user groups from a template requires navigating to the specific facility that the user groups belong to, or clearing the session facility. |
|---|
The Refresh ![]() button in the right corner of the Template Designer page header allows the user to refresh the page without having to refresh the site or switch between Collect Enterprise pages (e.g., Template Designer to User Groups and back).
button in the right corner of the Template Designer page header allows the user to refresh the page without having to refresh the site or switch between Collect Enterprise pages (e.g., Template Designer to User Groups and back).
Filter or Group
Each of the columns in the view window can be filtered alphabetically or chronologically. The mouse cursor changes from the default arrow to a pointer when hovering over selectable items on the Template Designer page.
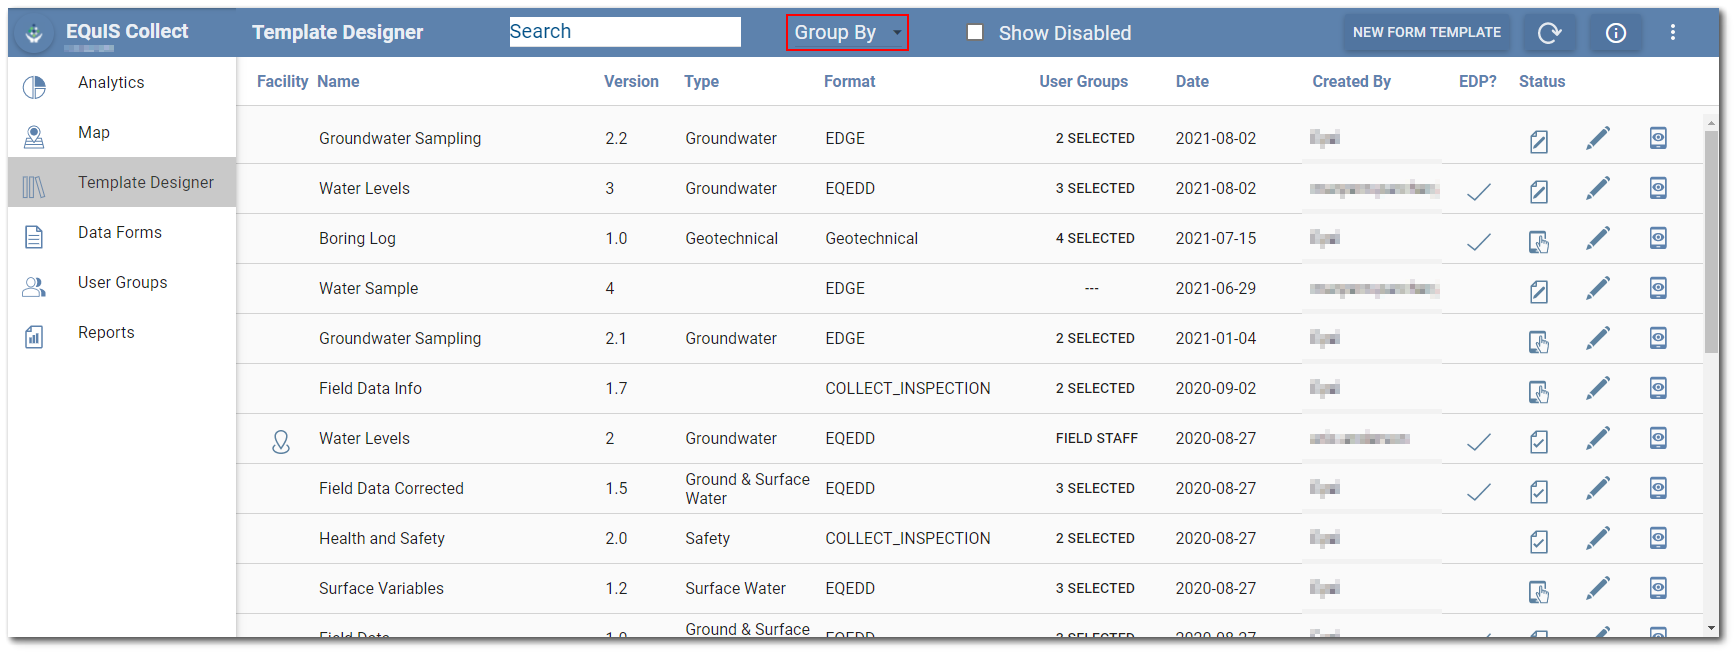
The templates can also be organized based on the categories in the Facility, Type, Format, Date, Created By or Status columns. To organize the templates, click the Group By selector button at the top of the page to open a drop-down menu and choose the desired column.

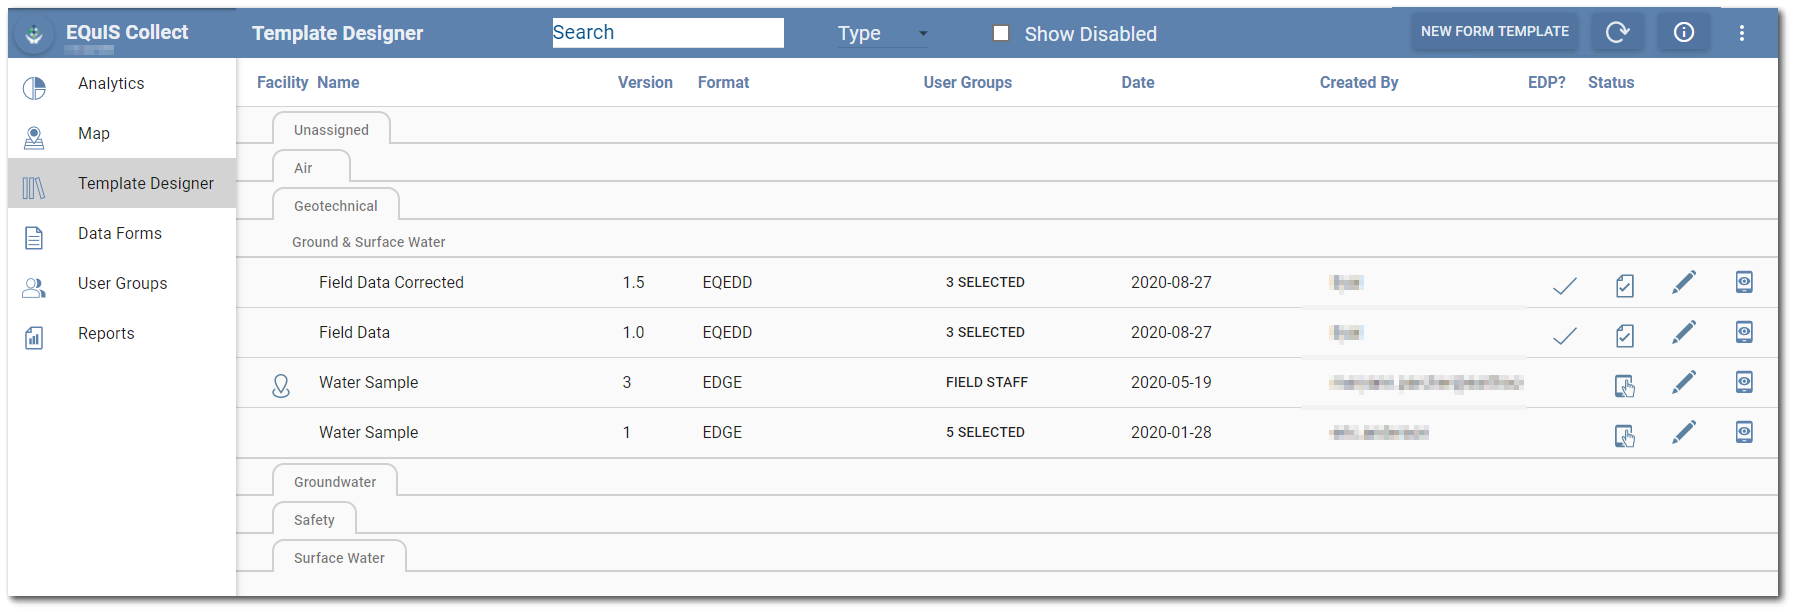
The view will change when organizing the templates to a file folder like setup.

Each tab of the folders will display the values used from the column. If there is blank/unassigned category in the selected column the folder will display with an Unassigned tab. Clicking on each of the tabs will open that folder view to see the templates available in that folder.
Note: Once a column is chosen for folder sorting, it is removed from the columns that are viewed in the folders view, as the folder tabs now display the selected column values. |
|---|
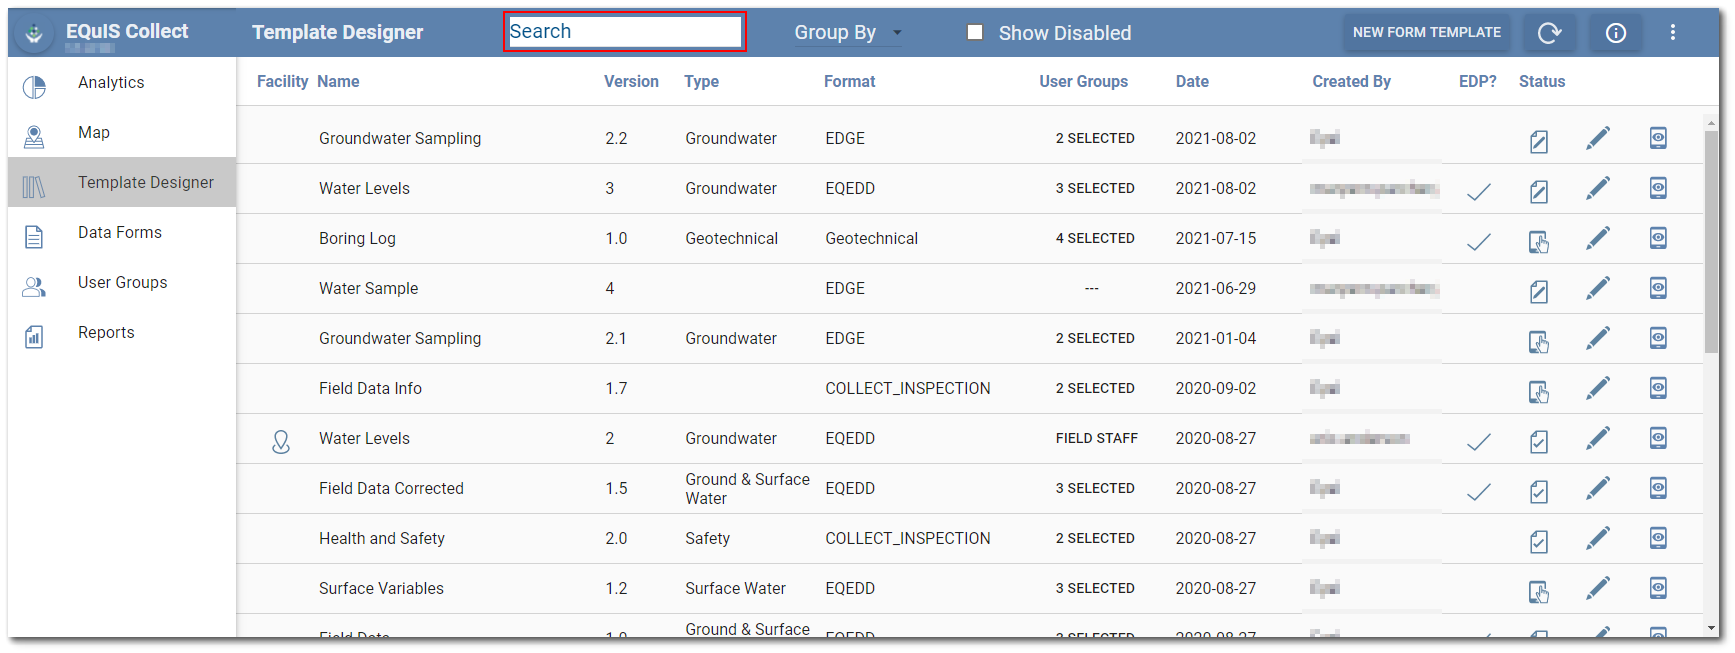
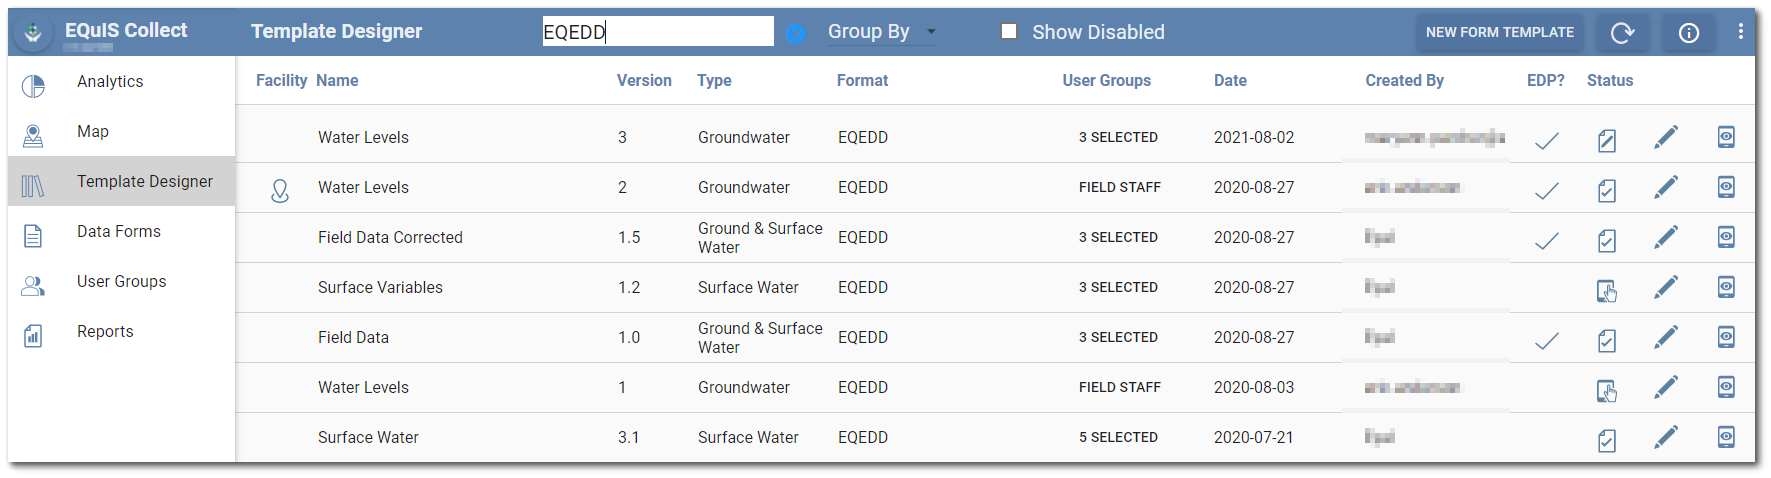
Search
The Search box can be used to filter the templates. Type into the search field. The display of templates will be limited to the search string.
User Groups
The user group status shows which groups are currently assigned to the template. To change or add user groups, click on the user name(s) in the user group column for the desired template. The Groups window opens showing all available user groups. Check the boxes for the desired user groups and select the OK button.

Status
The Status column contains an icon that displays the status of the template. The template status can be:
•Design ![]() – By default, a new template has a Design status. Data Forms cannot be created using a template in Design status. A template in Design status can be edited or deleted.
– By default, a new template has a Design status. Data Forms cannot be created using a template in Design status. A template in Design status can be edited or deleted.
•Testing ![]() – Data Forms can be created using a template in Testing status; however, such data forms must be used for testing purposes only. A template in Testing status can be edited or deleted. A template can be switched interchangeably between Design and Testing status.
– Data Forms can be created using a template in Testing status; however, such data forms must be used for testing purposes only. A template in Testing status can be edited or deleted. A template can be switched interchangeably between Design and Testing status.
Warnings: •Templates in Testing status should be used for testing purposes only. Editing a template in Testing status will delete all associated data forms. Do not use a template in Testing status for field data collection. •While a template's logic is automatically validated when the template's status is changed to "Testing" or "Published", its data mappings are not. Users should consider manually validating the data mappings of their template before publishing. |
|---|
•Published ![]() – A template should be set to Published status when all desired modifications have been made to the template. Once a template is Published, it cannot be deleted or switched to Design or Testing status. It can only be switched to Disabled status.
– A template should be set to Published status when all desired modifications have been made to the template. Once a template is Published, it cannot be deleted or switched to Design or Testing status. It can only be switched to Disabled status.
•Disabled ![]() – Only a Published template can be set to Disabled status, which will stop any additional Data Forms from being created from that template. Setting the status of the template to Disabled cannot be undone.
– Only a Published template can be set to Disabled status, which will stop any additional Data Forms from being created from that template. Setting the status of the template to Disabled cannot be undone.
To change the status of a template or to delete a template, click on the Status icon of the template to open the Status window. Select the desired status option and click the OK button. The status icon changes to the selected option, unless a template is deleted, which removes the template. To prevent the inadvertent publication or deletion of a template, the user will be prompted with a message asking for confirmation of the selected action.
Notes: •Switching a template from Test to Publish status will clear any existing data (EDDs) that may have been uploaded from that template in the Data Forms Page. •When a template is in Testing, data will not be pushed directly to EDP, even if “Automatically push to EDP” is selected for the template. •A template validation check is performed when switching templates from Design to Testing or Published status, or from Testing to Published status. |
|---|
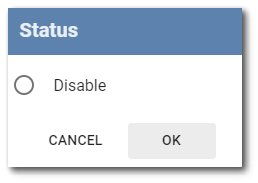
To disable a published template, click on Published ![]() icon to open the Status window. Select Disable and click the OK button. The user will be prompted with a message asking for confirmation of the selected action.
icon to open the Status window. Select Disable and click the OK button. The user will be prompted with a message asking for confirmation of the selected action.
Disabled templates can be displayed by selecting the Show Disabled option on Template Designer page header.
![]()
Edit Existing Template
To modify a template, select the Edit ![]() icon of the template to open the Form Template Layout window. A template can be modified until it is published.
icon of the template to open the Form Template Layout window. A template can be modified until it is published.

Note: If a user changes the facility while editing a facility-specific template and the new facility is not part of the selected facility group, they will be redirected to the template list. |
|---|
Template Preview
To see how the template structure will display on the Collect Mobile app, click the Preview ![]() icon for the template. The Form Templates Preview window opens. Select any of the forms in the Forms Template Preview window to display the fields on the form. Select the Template Designer page from the side menu or hit the back button to return to the Template Designer page.
icon for the template. The Form Templates Preview window opens. Select any of the forms in the Forms Template Preview window to display the fields on the form. Select the Template Designer page from the side menu or hit the back button to return to the Template Designer page.

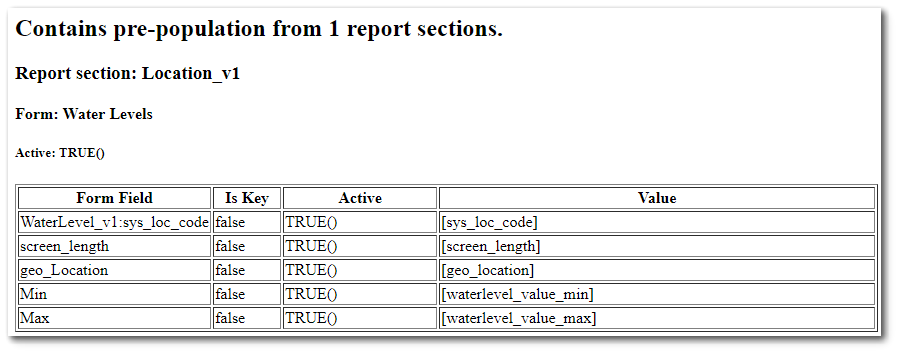
View Template Prepopulation
To view the pre-population data setup for the template, click the View Template Prepopulation button on the frame of the Form Templates Preview window. A new web browser tab will open, showing details about the current template in an XML table structure.
View Template
To view the mapping variable structure as an HTML document, click the View Template button on the frame of the Form Templates Preview window. A new web browser tab will open, showing details about the current template in an XML table structure. These details can include:
•Template version
•EDD format used by the template
•Form fields, their types, and attributes (e.g., Visible, Required, Default)
•Data Mappings
•Data Sets
Note: This functionality may not work if popups are blocked in the web browser. |
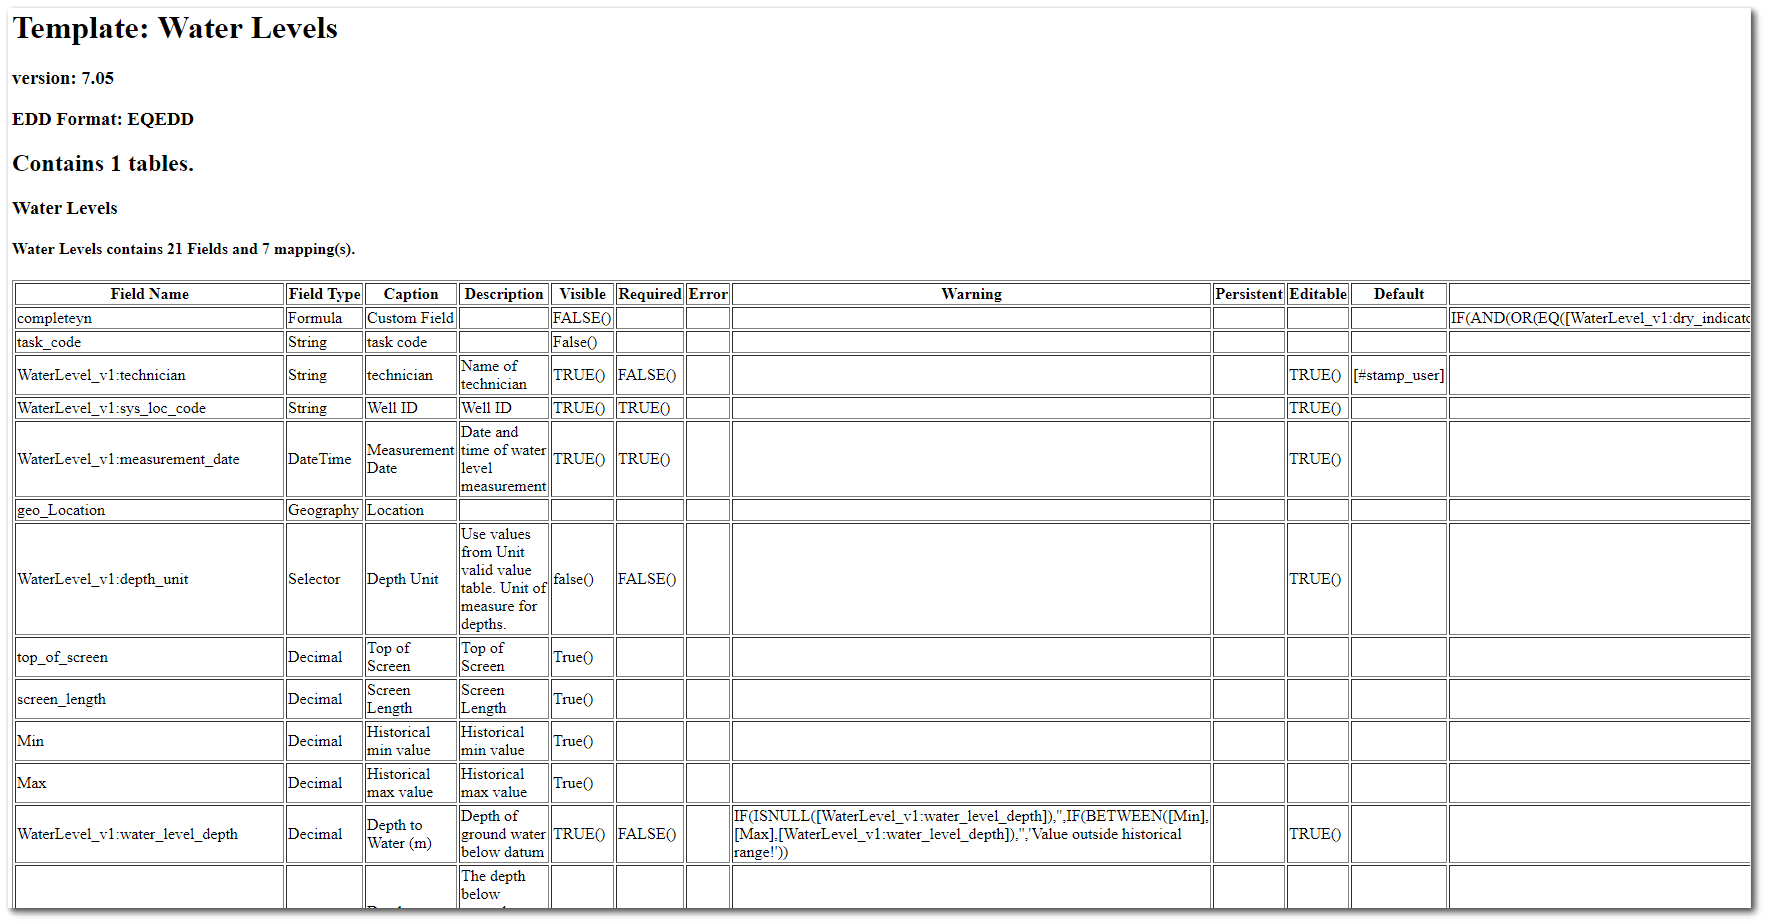
The table shows the form structure and their respective attributes, which are set during the design of the form. Field names are listed on the first column of the table. The field types are displayed in the second column, as well as their attributes in the subsequent columns (“Visible”; “Required”; “Formula”, etc.).
Note: The View Template document is visualized into HTML by a default XSLT file. Users can customize the content or layout of this document by supplying a customized XSLT file to Enterprise. 1.Customize an XSLT file as desired. 2.Upload the customized XSLT file to the Enterprise server via the Docs and Photos form in EQuIS Professional. 3.Locate the uploaded file's FILE_ID value in the DT_FILE table. 4.In the ST_CONFIG table, create a row like the following, where the STRING_VALUE is the FILE_ID from Step 3:
|
View Mappings
Click the View Mappings button to download the mappings report as an .XLSX file. The file will automatically be downloaded to the local Downloads directory.
The following linked example mappings report (example) contains the following five worksheets: Summary, Format, Format + Source, Pre-Population, and Pre-Population + Source.
•The Summary worksheet displays an overview of the template, selected format, and pre-population. The tables included in the Summary worksheet are set to use Microsoft Excel's color themes, which can be adjusted.
•The Format and Pre-Population tables contain information about mappings and target tables.
•The Format + Source and Pre-Population + Source tables contain information about mappings, target tables, and the source fields referenced in the mappings.
Notes: •The mappings report is only available for templates that have mappings configured. •Templates with pre-population configured will include Summary, Format, Format + Source, Pre-Population, and Pre-Population + Source tables in the mappings report, while templates without pre-population configured will only include Summary, Format, and Format + Source tables. •For each of the non-Summary tables, the columns utilize specific colors to represent source, mappings, target, and errors, described below. oThe blue columns represent the source table information. oThe orange columns represent mappings information. oThe green columns represent target table information. oIf present, red columns represent errors. |
Download
Click the Download button to download the template as a zip file. A Save As dialog will open with the name of the template as the file name.
Click OK button to download the file.