The Data Forms page provides a status summary of data forms available from the Collect Mobile app or the Web Forms widget. The Data Forms page can also be used to create new forms directly on the server. Data forms displaying on the Data Forms page are only those associated with the facility selected on the Enterprise dashboard header.
Note: Ensure the correct facility is selected to see all data forms associated with the facility. |
|---|
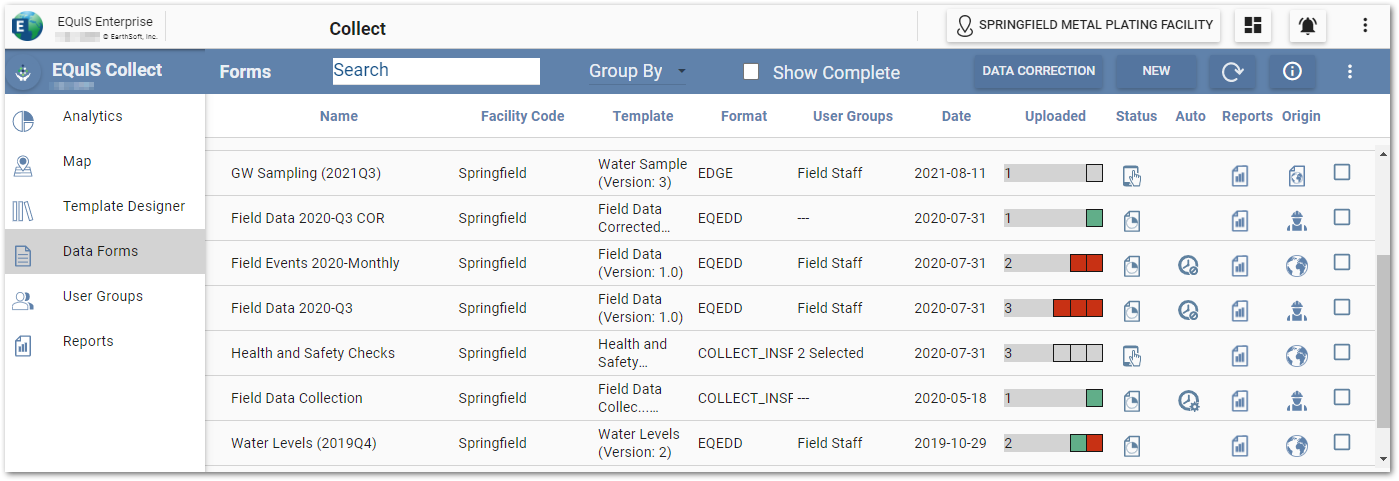
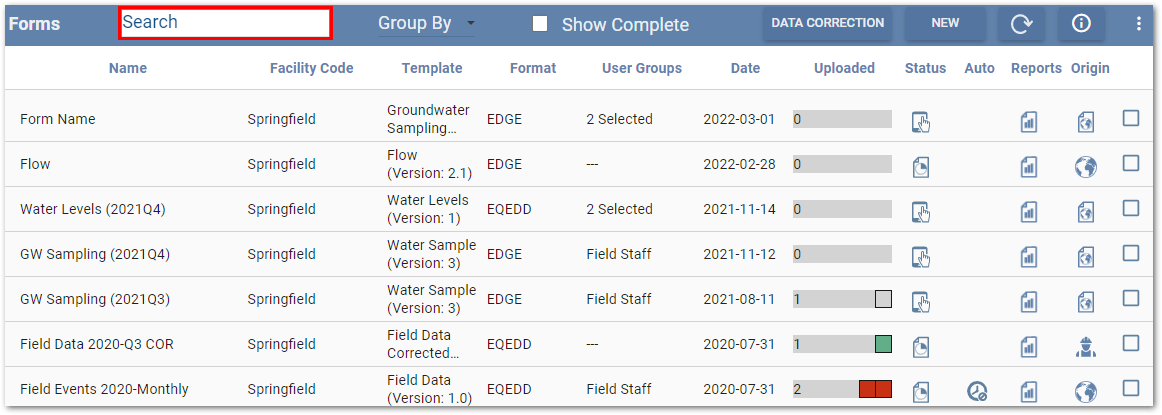
By default, the following information is provided for each data form. The columns displaying on the Data Forms page can be configured in the JSON Editor (see the Dashboard Management article).
•Name – Form name.
•Facility Code – Facility where the form is deployed.
•Template – Template name and version number.
•Format – Template format; frequently a specified EQuIS EDD format.
•User Groups – User groups to which the form has been assigned. Hovering over a record will show which user groups are associated with the data form. Clicking on the record will open a Groups dialog. The Groups dialog allows user groups to be added or removed from the data form and displays the user group code, user group description, and user group facility, if a facility is assigned to a user group. If a session facility or session facility group is configured, only user groups associated with the selected facility or user groups not associated with a facility are displayed.
•Date – Date the form was uploaded.
•Uploaded – Number of times the completed form was uploaded from Collect Mobile; icons shown for success or failure of forms to be processed by the EQuIS Data Processor (EDP).
•Status – Form status (Testing ![]() , In Progress
, In Progress ![]() , or Complete
, or Complete ![]() ).
).
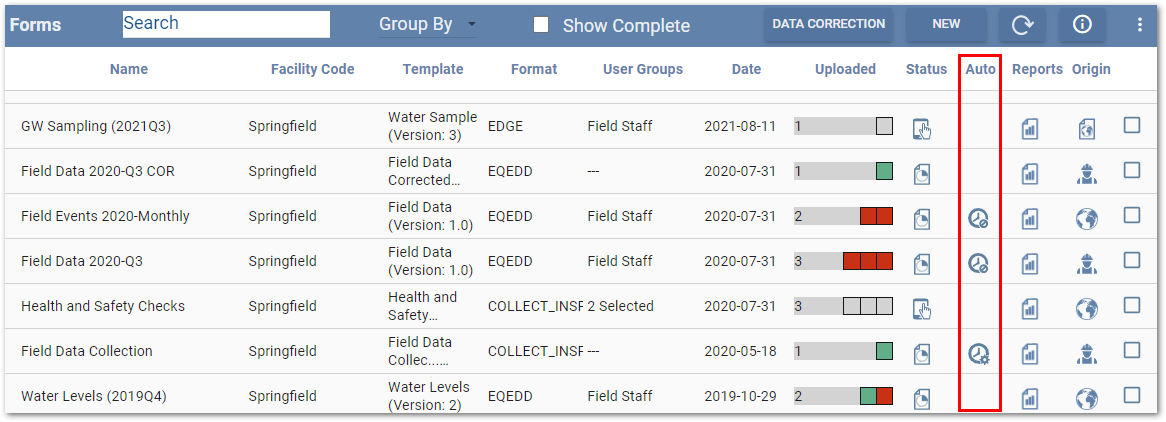
•Auto – Signifying if the data form is configured for Auto Completion or not. Clicking the Auto Complete Disabled ![]() or Auto Complete Enabled
or Auto Complete Enabled ![]() icons allows users to toggle whether the data form will be completed automatically or not. Please see the Auto Completion Settings in Collect Templates article for more information.
icons allows users to toggle whether the data form will be completed automatically or not. Please see the Auto Completion Settings in Collect Templates article for more information.
•Reports – Create PDF report, as either a Form Summary report or Form Table Summary report, of all data collected with the form; compiles data from all users.
Tip: Template reports (e.g., Form Summary and Table Form Summary) can be filtered, and generated, via the REST API by using the GET /api/collect/reports/template/{reportName}/execute endpoint. Users can adjust the report output by using a field name and field value from a Form Summary report as filter parameters. The following example shows a filtered request and includes explanations of the parameters: •Example: /api/collect/reports/template/Form Summary/execute?formId=73662&equisFieldName=sys_loc_code&equisFieldValue=B-30 ▪{reportName} = "Form Summary". If the endpoint is run in a URL field, space characters will be escaped (i.e., %20) automatically (e.g., "Form%20Summary"). ▪formId = 73662 which is the value from ST_COLLECT_FILES.COLLECT_FILE_ID. ▪equisFieldName = "sys_loc_code" and is the name of the field used to filter values. ▪equisFieldValue = "B-30" and is the value being filtered from "sys_loc_code". ▪The generated PDF output includes the Form Summary report data for the B-30 records. |
|---|
•Origin – Indicates whether the data form was created locally on the device (i.e., field ![]() ) or from the server (
) or from the server ( ![]() ) and pushed to the device. The
) and pushed to the device. The ![]() icon indicates if the data form was pre-populated from a report. Hovering over the
icon indicates if the data form was pre-populated from a report. Hovering over the ![]() icon will display the name of the base report used in the pre-population.
icon will display the name of the base report used in the pre-population.
The last untitled column with check boxes is designed to allow users to change the status of multiple data forms at the same time. To change status of multiple data forms, select the check box icon for each desired data form and click the status icon of one that is selected. A message dialog will ask to confirm the status change for all the selected data forms.
The Refresh ![]() button in the right corner of the Data Forms page header allows the user to refresh the page without having to refresh the site or switch between Collect Enterprise pages (e.g., Data Forms to User Groups and back).
button in the right corner of the Data Forms page header allows the user to refresh the page without having to refresh the site or switch between Collect Enterprise pages (e.g., Data Forms to User Groups and back).
The Data Correction feature on the Data Forms page allows administrators to resubmit data using another Collect template.
Filter or Group Data Forms
Each of the columns in the view window can be filtered alphabetically or chronologically. The mouse cursor changes from the default arrow to a pointer when hovering over selectable items on the Data Forms page.
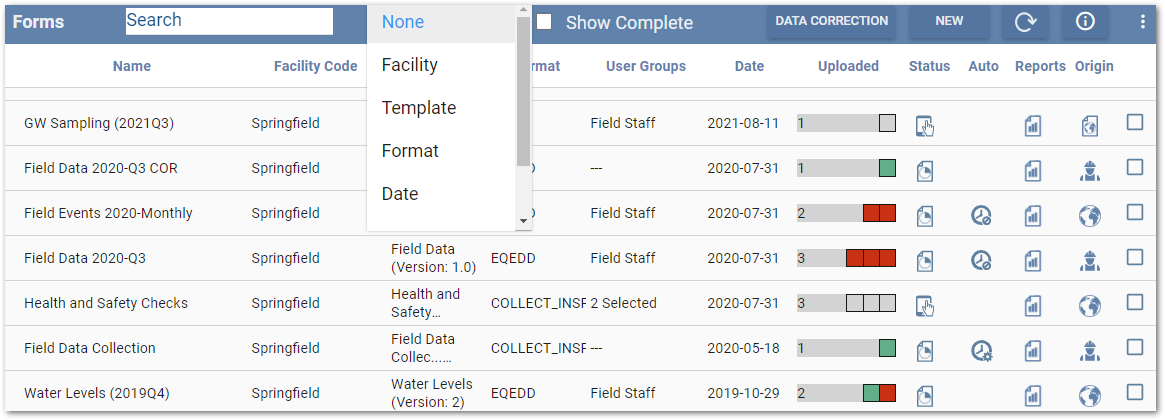
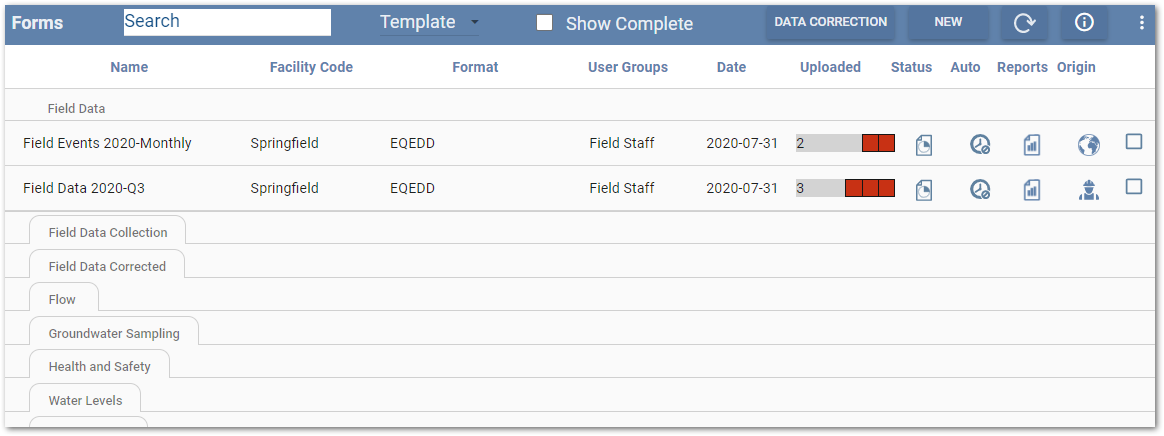
The data forms can also be organized based on the categories in the Facility Code, Template, Format, Date, Created By, or Status columns. To organize the data forms, click the Group By selector button at the top of the page to open a drop-down menu and choose the desired column.
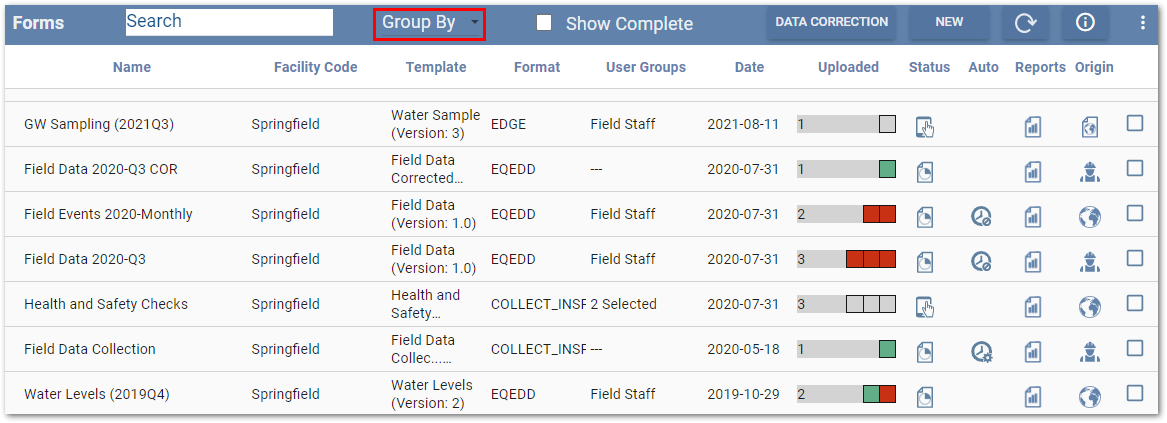
The view will change when organizing the data forms to a file folder like setup.

Each tab of the folders will display the values used from the column. If there is blank/unassigned category in the selected column the folder will display with a blank/empty tab. Clicking on each of the tabs will open that folder view to see the data forms available in that folder.
Note: Once a column is chosen for folder sorting, it is removed from the columns that are viewed in the folders view, as the folder tabs now display the selected column values. |
|---|
Search
The Search box can be used to filter the data forms. Type into the search field. The display of data forms will be limited to the search string.
User Groups
The user groups status shows which groups are currently assigned to the data form. To change or add user groups, click in the User Groups column of the desired data form. The Groups window opens showing all available user groups. Check the boxes for all desired user groups and select the OK button.
Uploaded
The Uploaded status provides the number of times the data form was uploaded from Collect Mobile or the Web Forms widget, and displays the status of the EDD upload to EQuIS through EDP as indicated by color.
Grey – The data form was received but not yet sent to EDP.
Orange – The EDD is still processing in EDP.
Green – The EDD passed EDP checks and was sent to the database.
Red – The EDD did not upload successfully to the database (i.e., it was rejected by EDP). If this happens frequently due to data issues, consider adding other checks to the form template (e.g., using the Error attribute on form fields to ensure users can only enter valid data).

Click the status bar of an individual data form to view details of the uploading process in the Status/Download window.

The upload details are described below.
•Users – User who uploaded the data form.
•Status – Status of EDP submission, which matches the colors displayed on the Data Forms page. The Fail icon is displayed in red, the word Processing is orange, the word Pass is Green, and the word Received is Black.
•DateTime – Date/time stamp of submission.
•Actions – Select the drop-down menu to choose from the following actions:
•Download Data Package – Download the raw data submitted from EQuIS Collect mobile app.
•Download Data Package with Files – Download the raw data submitted from EQuIS Collect mobile app along with any attached files (e.g., photos).
•Download EDD – Download the EDD (*.zip) file. This is generated by processing the submitted Collect form into the EQuIS format defined in the template upon which the data form is based.
•Send to EDP – Shows if the form has been received but not yet pushed to EDP. Click here to submit to EDP.
•Send to Remote EDP – If the form has been setup to send data to a remote EDP, click here to submit to the remove server. See Using Collect with EQuIS 6.x Databases for more information on Remote EDP.
•Publish as New Form – This feature adds the ability to create a new form from the uploaded EDD. Click the icon in this column to open another dialog called Publish EDD. Use this dialog to create another form using the EDD. This new form will have data from the original EDD.
•EDD Generation Log – For every EDD processed, a log is created. If EDP reports errors when processing the EDD, this log is useful to understand why the EDD failed. Select this action to download the EDD log.
Status
Data forms are listed with one of three statuses:
•Testing ![]() – Submitted data forms cannot be pushed to EDP, but may have their raw data or EDD downloaded.
– Submitted data forms cannot be pushed to EDP, but may have their raw data or EDD downloaded.
•In Progress ![]() – Active data form, which may receive future submissions. Submissions can be manually or automatically pushed to EDP.
– Active data form, which may receive future submissions. Submissions can be manually or automatically pushed to EDP.
•Complete ![]() – Data form is archived. This status is set by an Enterprise user by clicking the In Progress status icon and confirming to mark the data form as complete. The data form is not visible on the Data Forms page unless the “Show Complete” check box on the page frame is enabled. The data form will also be removed from the Forms list in Collect Mobile for end users. However, if a user recorded data on this form, and it is pending upload, the data form will remain visible in Collect Mobile until the data is submitted to Enterprise.
– Data form is archived. This status is set by an Enterprise user by clicking the In Progress status icon and confirming to mark the data form as complete. The data form is not visible on the Data Forms page unless the “Show Complete” check box on the page frame is enabled. The data form will also be removed from the Forms list in Collect Mobile for end users. However, if a user recorded data on this form, and it is pending upload, the data form will remain visible in Collect Mobile until the data is submitted to Enterprise.
![]()
Any data form with a "Complete" status can be changed back to an "In Progress" status. To do this, select the Show Complete check box to display all completed data forms. Find the desired data form(s) and click on the Complete status icon. Move the selected data form(s) back into the list by confirming to mark the data form(s) as In Progress. If new data is entered into a form that has already been marked Complete, the form status will automatically be marked as In Progress and will be visible on the Data Forms page.
Note: Marking a data form as "Complete" sets ST_COLLECT_FILES.EDD_STATUS for the data form to TRUE. |
|---|