The Data Correction feature on the Data Forms page allows administrators to resubmit data using another Collect template. Ideally, the feature is designed to correct data mappings for forms that have already been pushed from Collect Mobile and resubmit the data. The Data Correction feature can be applied to adjust data whether it failed or passed the EDP checks. Incorrect data mappings might not produce EDP check errors, but may result in data being loaded to the wrong fields in the database.
Note: Data Correction is available only to administrators. |
|---|

Warning: The Data Correction feature will use the commit type that is defined by the format setup in Enterprise. It will produce a new EDD (i.e., data form) that is processed by Enterprise EDP. It is imperative to know which commit type is being used to assess whether or not a previously submitted data form needs to be rolled back prior to using the Data Correction feature. |
Example Potential Data Correction Scenarios
Example 1
Template A has a data mapping with an invalid formula in the mapping, causing it not to create a parameter record when data is entered in the field.
Data was pushed through Template A all week, and the issue was only discovered at the end of the week. The template was then updated with the fix (Template A, v2) and the field crew continued their work.
Data collected prior to the fix needs to be resubmitted through the new template so it will produce the new parameter record. The Data Correction tool can be used to resubmit the original data via the new template. Note that both the original EDD and the new EDD will be present on the Data Forms page.
Example 2
Template A has a comment field that is mapped to ‘Custom Field 1’ in the DT_LOCATION table. This mapping was incorrectly setup and mapped to ‘remark’ instead.
Data was pushed through Template A all week, and the issue was only discovered at the end of the week. The template was then updated with the fix (Template A, v2) and the field crew continued their work.
Data collected and submitted prior to the fix uploaded data to the wrong field. The wrong data must be removed and the correct data inserted. The next steps depend on the commit type set for the format in Enterprise EDP.
If the commit type is "Insert and Replace", the Data Correction tool can be used to resubmit the original data via the new template without any additional steps.
If the commit type will not replace the wrong data values, then the original EDDs should be rolled back from the database to remove the data from the wrong field prior to using the Data Correction tool to resubmit the EDDs via the new template.
Template Setup
Prior to applying a data correction to a pushed data form, any mapping errors in the form's template need to be corrected. The following steps provide a process overview:
1.On the Template Designer page, copy the original template that contains the data mapping error(s).
2.Give the template copy an updated name and/or version to easily identify the corrected template (e.g., original template version 2.1, corrected version 2.1c).
3.In the template copy, make any necessary changes to correct the data mappings.
4.Once the template is ready, publish the corrected template.
Tip: Manually test the corrected template prior to publishing. 1.Set the status of the corrected template to Test. 2.Create a data form using the corrected template. 3.In Collect Mobile, populate the form with testing records and push the data to Collect Enterprise. 4.Download the EDD. 5.Open the EDD in Professional EDP and evaluate the EDD sections to ensure data were mapped appropriately. |
|---|
Apply Data Correction
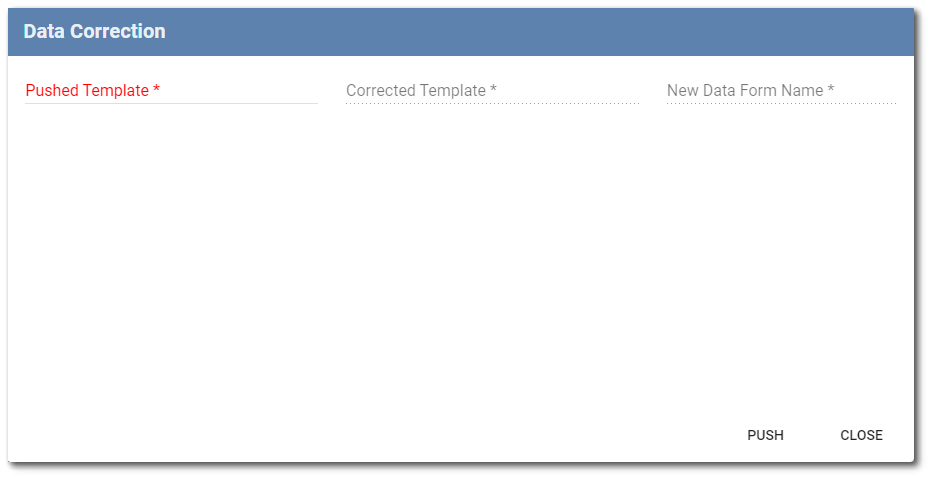
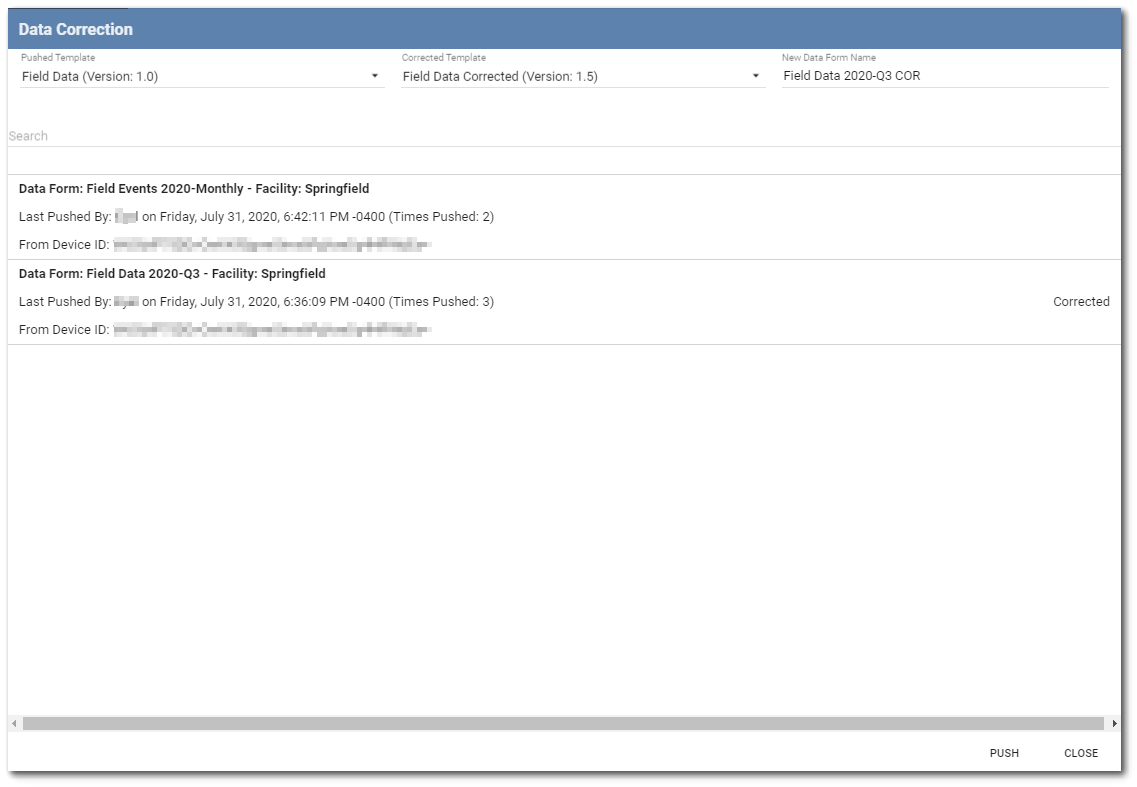
Click the Data Correction button in the right corner of the Data Forms page to open the Data Correction dialog window. The dialog displays three sections: Pushed Template, Corrected Template, and New Data Form Name.
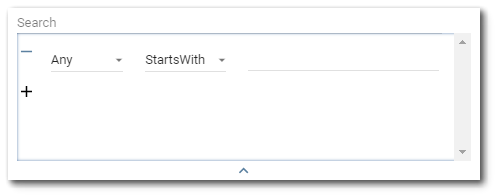
Click on the Pushed Template and Corrected Template fields to open an advanced search dialog window.
Advanced Search – Click the down arrow to expand the advanced search dialog window. Items that can be searched (e.g. Name, Version, Description) will appear in the first drop-down. By default, the first drop-down will be selected as Any. The Any option will search all the items to match the expression with any of the properties. The second drop-down allows the user to select an operator (e.g. Starts With, Ends With, Equals, Contains). By default, the operator is set to StartsWith. The operator defines how the expression is matched to the items being searched. Enter the expression to be searched in the text field. Multiple expressions can be set by clicking the + button below the first expression. Expressions can also be removed/cleared by clicking the – button to the left of each expression. To collapse the advanced search dialog, click the up arrow at the bottom of the advanced search dialog. Note that collapsing the advanced search will not clear search expressions that have been setup.
In the Pushed Template field, select the original template that was used when the data form was pushed from Collect Mobile. This should be the template that had the wrong data mappings. A list of submitted data forms will appear based on the selected template. Select the data forms to be corrected.
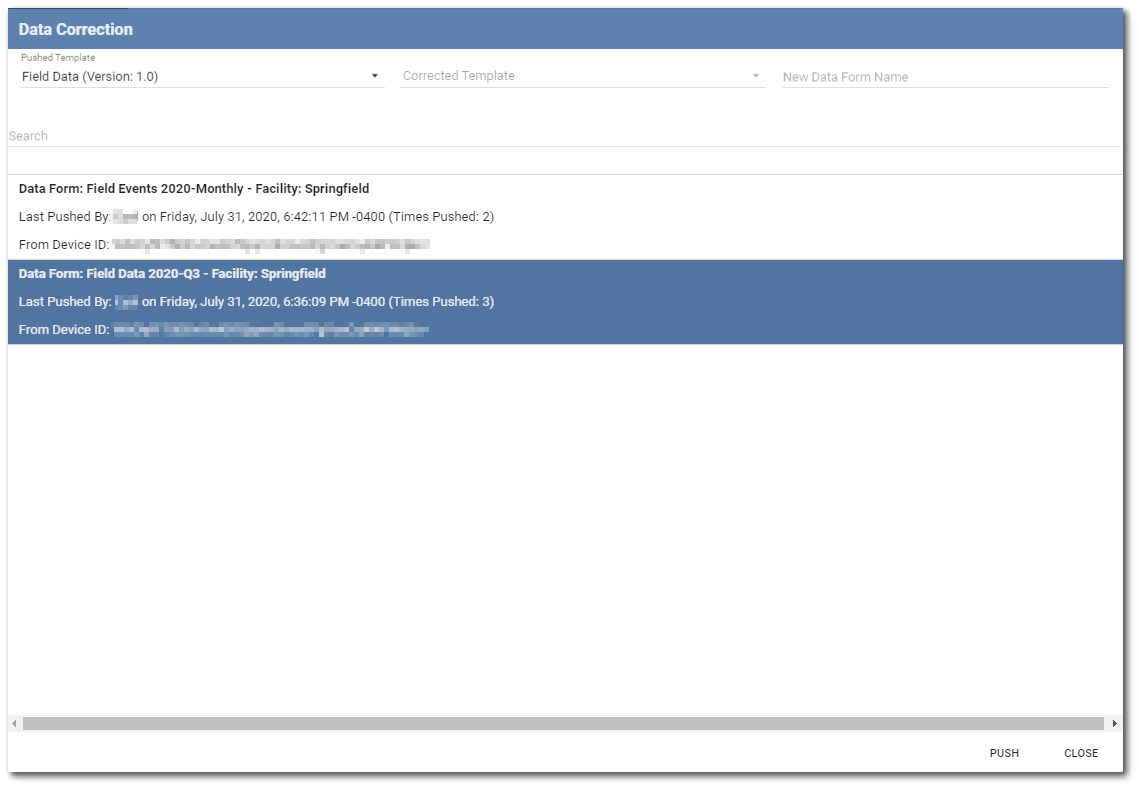
Note: If more than one data form is selected for data correction, all records from the selected data forms will be compiled into a single new data form to be resubmitted. Because the facility is part of each data form, data correction can be applied even if the Collect dashboard is set to a facility group. |
|---|
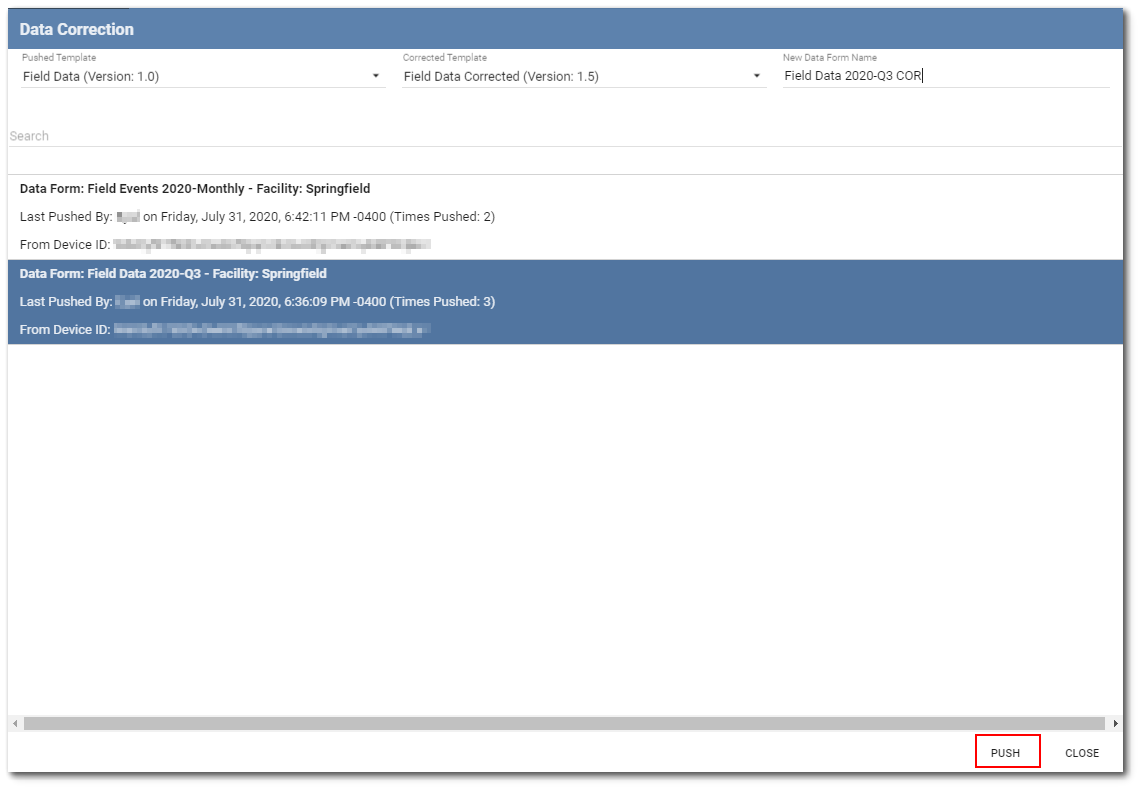
In the Corrected Template field, select the newly corrected and published template. In the New Data Form Name text box, enter a new form name for the resubmitted data form. Once all the information is selected and entered, click the Push button.
Each data form selected will display a status dialog indicating it is being processed and once finished will display “Corrected.” Once all the forms have finished, click Close to exit the dialog.
The resubmitted data form will be available on the Data Forms page.

Tip: Once the new corrected data form is created and processed, users may want to remove the previously pushed data forms from displaying on the Data Forms page. To remove a data form from displaying on the page, click the Status icon for the data form and select Yes to mark the form as complete. The data form is still available, but will not display on the Data Forms page (unless the Show Complete box is checked). |
|---|