The User Groups page lists approved EQuIS Collect users and Enterprise users, and provides the tools to create or manage user groups and to assign individual users to specific groups. Access to templates and forms on the Collect Mobile app are controlled through assignment to user groups.
Notes: •Management of user groups is limited to Enterprise users belonging to the Admin role. •Throughout this article, the terms "facility" or "facilities" are used to describe individual facilities and facility groups, unless otherwise noted. |
The User Group page has several ways to view the user and group information, including Group Mode, User Mode, and by licensed role. By default, Group Mode is displayed where the user groups are listed on the left side, showing the following information about the each user group: code, description, and if assigned, the associated facility name and icon. Selecting a user group will then display tiles of all available users with access to the site on the right side. Any user that is assigned as a part of that user group will feature a blue highlighted user tile.
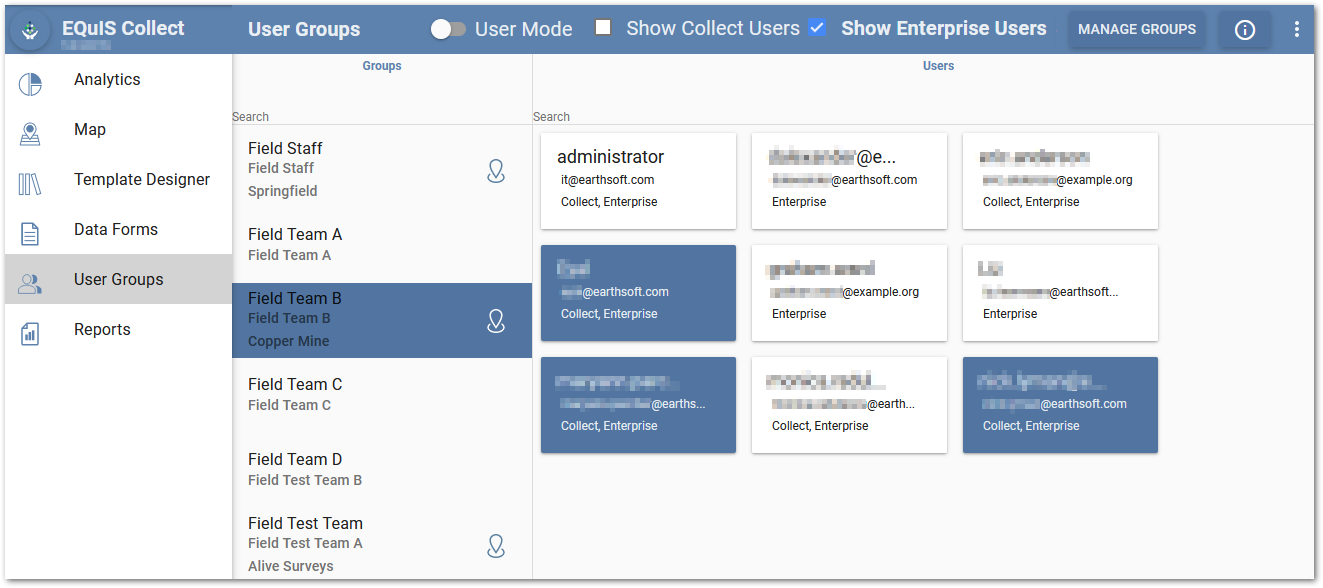
The example above shows the User Groups associated with several facilities, or no facility, because a session facility is not configured for the dashboard.

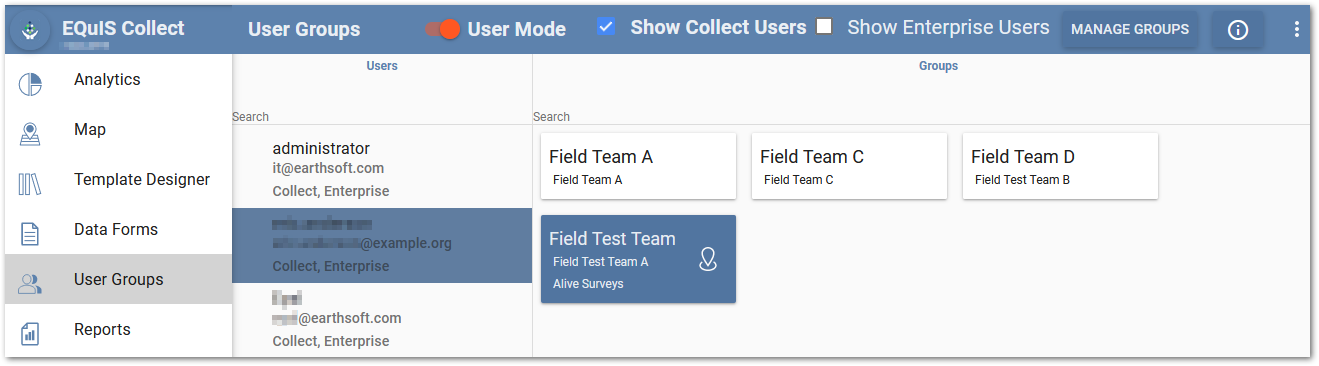
The example above shows the User Groups with a session facility configured for the dashboard, restricting which user groups are visible.
The view can be changed to User Mode by selecting the User Mode toggle/button at the top of the page. In the User Mode view, users are displayed on the left side. Selecting a user from the list will display tiles of all current user groups available on the right side, highlighting any assigned user group blue. Each user group tile shows the code, description, and associated facility name and icon, if assigned.
Note: Visibility of user groups can be affected by the selection of a session facility, or session group facility, for a dashboard. If a session facility is set, user groups associated with the session facility, and user groups not associated with a facility, are visible. User groups associated with facilities other than the session facility are hidden. If a session group facility is set, all individual facilities which are part of the group facility are visible. If no session facility is configured, all user groups are visible. When creating a new user group or editing an existing user group with a session facility configured, only the session facility is available for associating with the user group. When creating a new user group or editing an existing group with a session group facility configured, all individual facilities within the group facility are available for associating with the user group. If no session facility is configured, all facilities are available for associating with the user group. |
Two check boxes, Show Collect Users and Show Enterprise Users, are displayed to the right of the User Mode toggle and enable showing users assigned to a Collect license role, an Enterprise license role, or both. For information about the Collect and Enterprise license roles, please refer to the Collect Permissions and Enterprise Permissions articles. By default, the Show Collect Users check box is selected. Users that are assigned to the Collect and/or Enterprise license role(s) are listed by username and their assigned license role(s) are displayed at the bottom of the user tile. If an email has been entered in the user credentials, the email address will also be displayed in the user tile or list.
Note: The Show Enterprise Users check box, when selected, displays the users with an Enterprise license which grants them the required permissions to view and/or enter data into the Web Forms widget. Each Enterprise user must also be assigned to the user group associated with the data form being accessed. A Collect license is not required to work with the Web Forms widget. |
|---|
A search bar is available for the both the list and tiles in both Group and User Modes. The search bar can be used to filter out users and groups. Type the name (or a portion of the name) for the user or group into the search bar. Searching a username in the groups list will filter the groups to those assigned to that user. Searching for a group name in the user list, in User Mode, will filter all users to those assigned to the group.
Assign Users to User Groups
Depending on the view mode, select either a group or user from the list in the left window. Associated tiles for that selection will display in the right window. Assign any users or groups by clicking on the desired user or group tiles. Selected tiles will be displayed in blue. Since access to templates and forms on the Collect Mobile app is controlled through assignment to user groups, it is critical for users to be assigned to all necessary user groups.
Manage User Groups
To create or manage a user group, select the Manage Groups button on the right side of the User Groups page.

The Manage User Groups page opens.
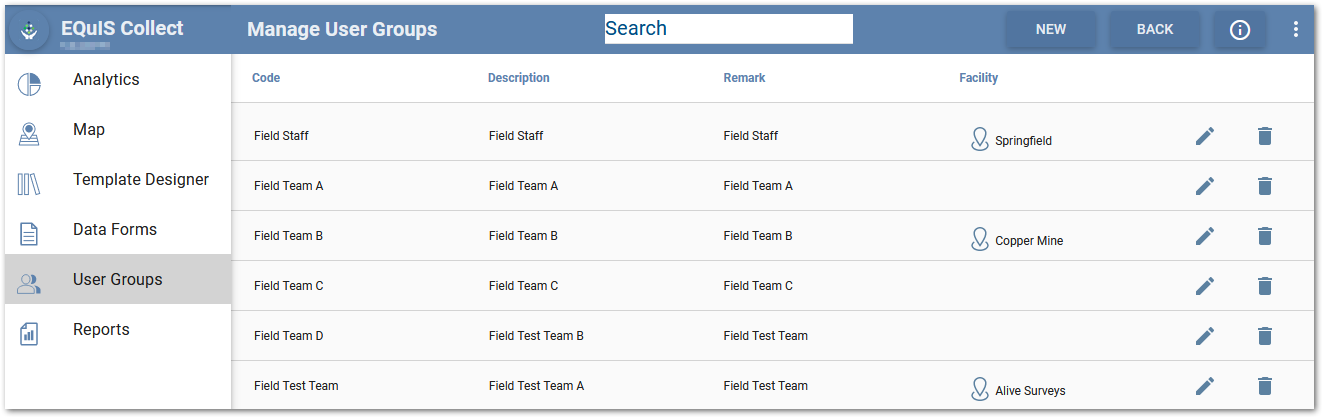
Each column in the Manage User Groups window are sortable by clicking on the column header (click again to reverse the sort). Sorting is alphabetically (A to Z or Z to A).
Note: A facility can be associated with an existing user group. If a session facility is currently set for the dashboard, only user groups assigned to the session facility, or user groups not associated with a facility, will be displayed. If a session group facility is set, all individual facilities that are part of the group facility will be displayed. If no session facility is set, all user groups are displayed. |
The Search box can be used to filter the user groups. Type at least three characters into the search field. Only user groups that contain the search term will be displayed.
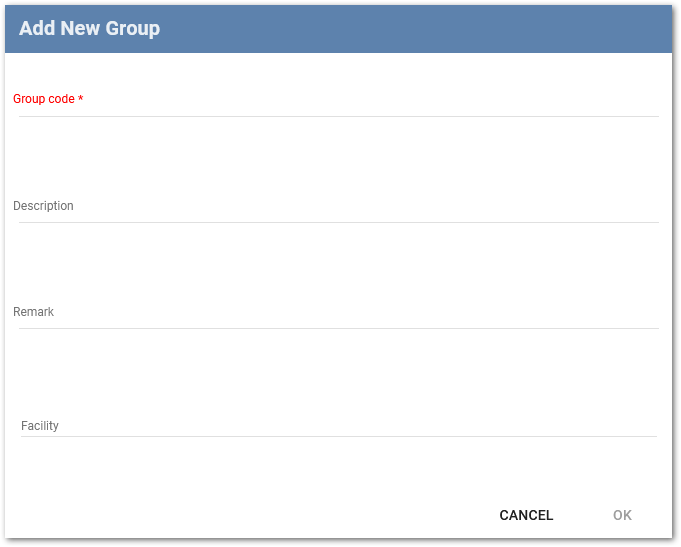
To create a new user group, select the New button and the Add New Group window opens. Enter a new Group Code. This field is required. Supply a Description and Remark if desired. To assign a facility to the user group, select the Facility field to open the facility chooser. Click the Save button to create the new user group.
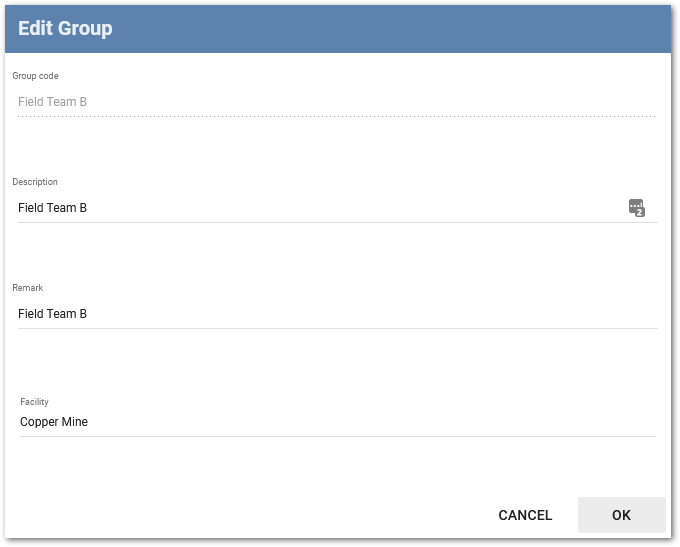
To edit an existing user group, click on the Edit ![]() icon of the desired group code in the Available Groups page. The information for the user group will populate in the Edit Group window. Edit the information as desired and click the Save button to save the changes.
icon of the desired group code in the Available Groups page. The information for the user group will populate in the Edit Group window. Edit the information as desired and click the Save button to save the changes.
Note: When creating a new user group or editing an existing user group, if a session facility is currently configured for the dashboard, the session facility is the only facility that will be available for assigning to the user group. If a session group facility is set, all individual facilities that are part of the group facility will be displayed and available to associate with the user group. If no session facility is currently set, all facilities will be available to choose from. |
To remove a facility from a user group, click on the Manage Groups button. Select the Edit ![]() icon, then select the current facility which opens the facility chooser dialog. Deselect the current facility, and click the Clear button to remove the facility from the user group and close the dialog. The Clear button is only available after deselecting the selected facility.
icon, then select the current facility which opens the facility chooser dialog. Deselect the current facility, and click the Clear button to remove the facility from the user group and close the dialog. The Clear button is only available after deselecting the selected facility.
To delete an existing user group, click on the Delete ![]() icon. A warning message will be displayed to confirm the deletion. Click the Yes button to delete the user group.
icon. A warning message will be displayed to confirm the deletion. Click the Yes button to delete the user group.
Select the Back button to close the Available Groups page and return to the User Groups page.