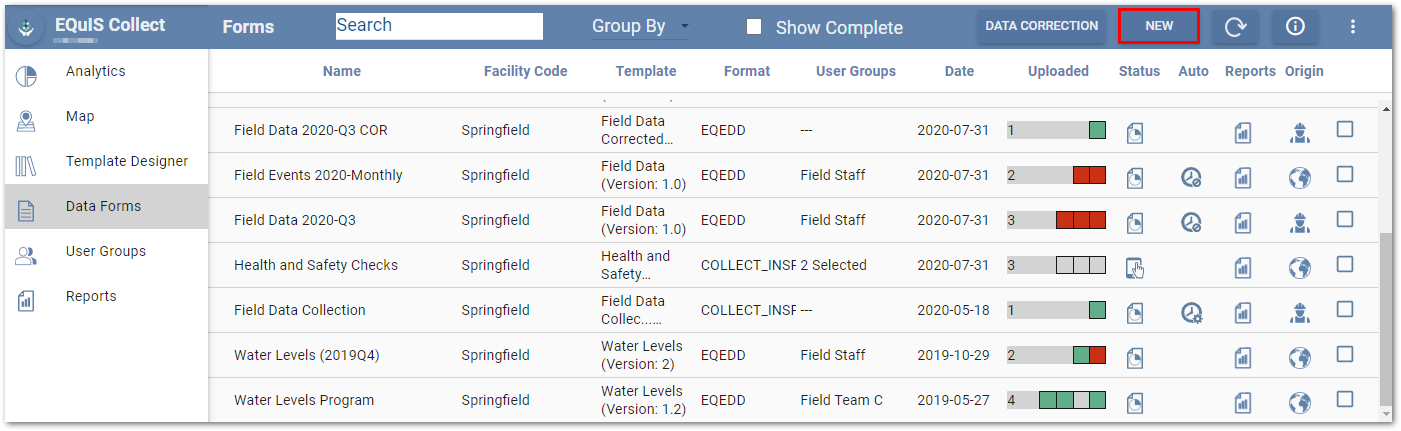
A new data form can be created directly on the server, based on an existing Collect template. To create a new data form, select the New button on the Data Forms page frame.
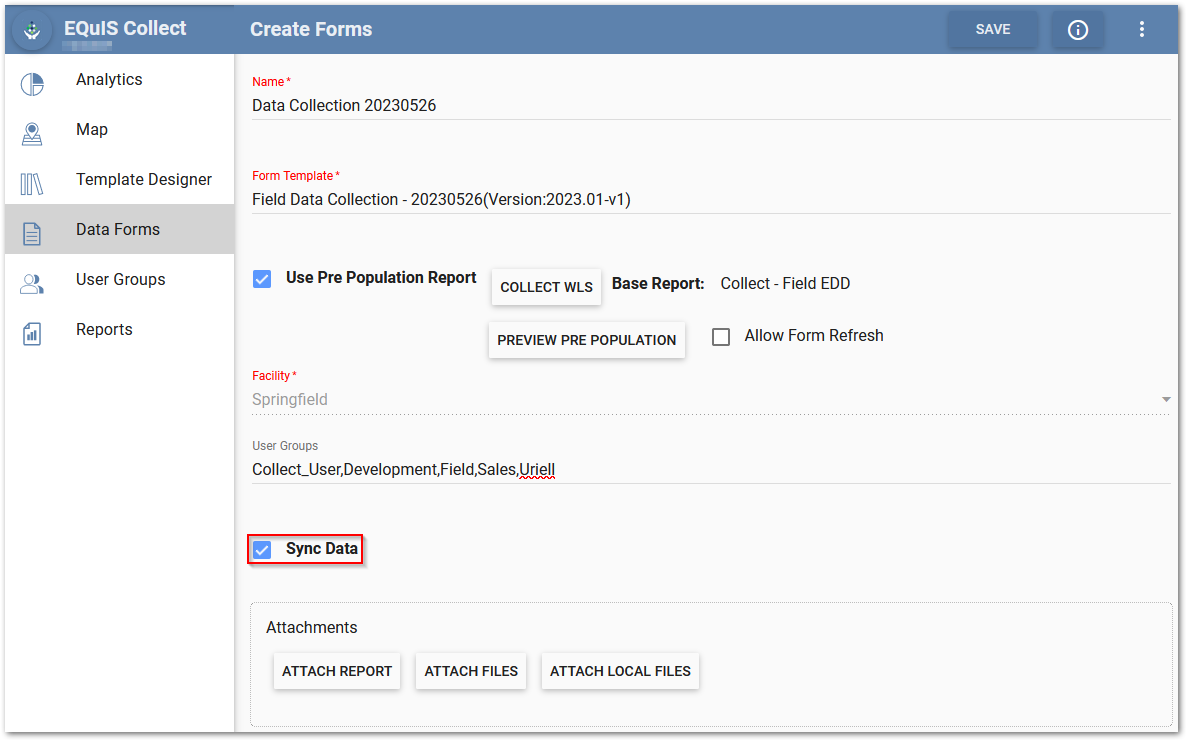
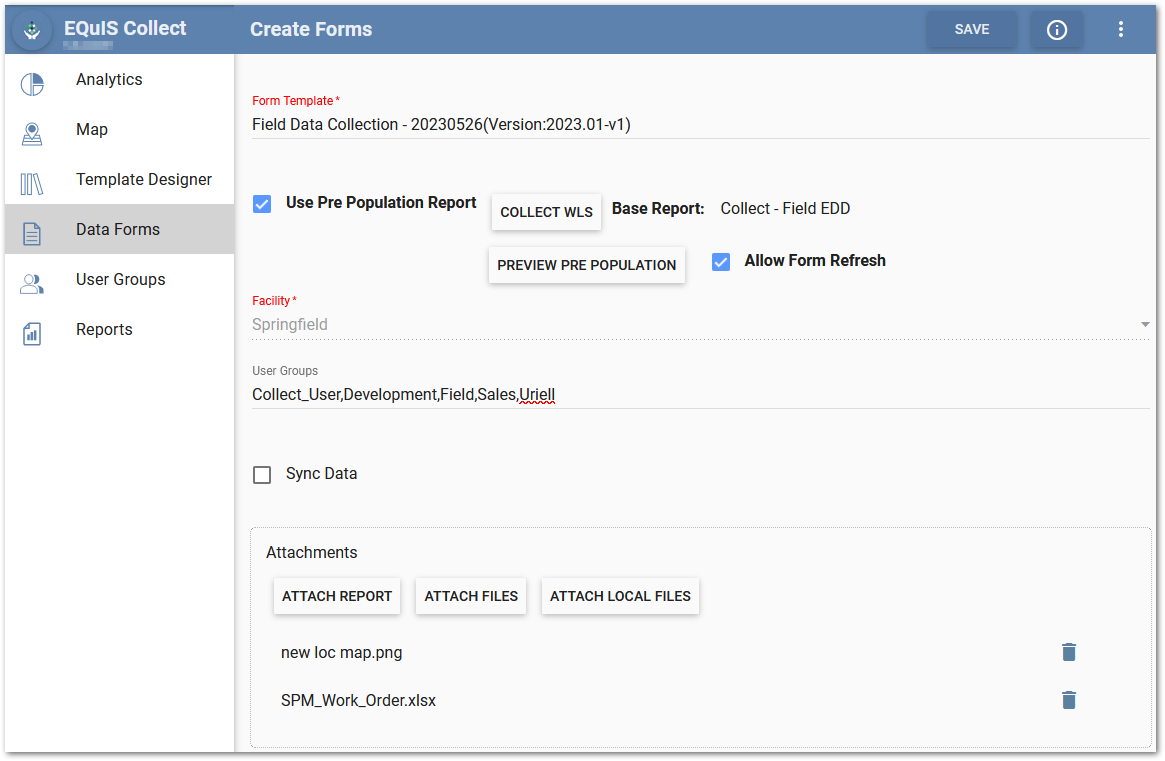
The Create Forms page opens. Enter a Name for the data form and edit the form details in the available fields. Note that field names with red text and followed by an asterisk (e.g., Form Template*) denotes required fields.
Notes: •Collect Data Form names are limited to a maximum of 60 characters. Data form names created on the server must have a unique name within each facility. However, data forms created locally (i.e., Field), in Collect Mobile are able to use the same name as a data form created on the server for the same facility. •The data form name cannot begin with the word "New". •The following characters are not allowed in the data form name: ▪periods (.) ▪forward slashes (/) ▪backward slashes (\) ▪ampersands (&) ▪colons (:) ▪apostrophes (') •If these characters are included in the name, an error message will be displayed and the data form will not be created. •Special characters for languages supported in EQuIS Collect can be used in data forms and form names. |
|---|

Click on Select Form Template to open a searchable dialog window of existing templates listed in alphabetical order.

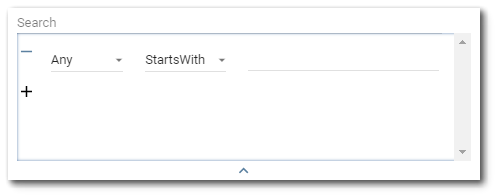
Advanced Search – Click the down arrow to expand the advanced search dialog window. Items that can be searched (e.g., Name, Version, Description) will appear in the first drop-down. By default, the first drop-down will be selected as Any. The Any option will search all the items to match the expression with any of the properties. The second drop-down allows the user to select an operator (e.g., Starts With, Ends With, Equals, Contains). By default, the operator is set to StartsWith. The operator defines how the expression is matched to the items being searched. Enter the expression to be searched in the text field. Multiple expressions can be set by clicking the + button below the first expression. Expressions can also be removed/cleared by clicking the – button to the left of each expression. To collapse the advanced search dialog, click the up arrow at the bottom of the advanced search dialog. Note that collapsing the advanced search will not clear search expressions that have been setup.
Facility – The Facility auto-populates with the active Facility session for the Collect Enterprise dashboard and cannot be changed. If creating the data form while in a Facility Group or a specific facility has not been chosen on the dashboard, a drop-down will appear requiring the user to select a specific facility to assign to the data form.
Note: Only individual facilities are available in the drop-down menu for selection when creating a data form, not facility groups. |
|---|
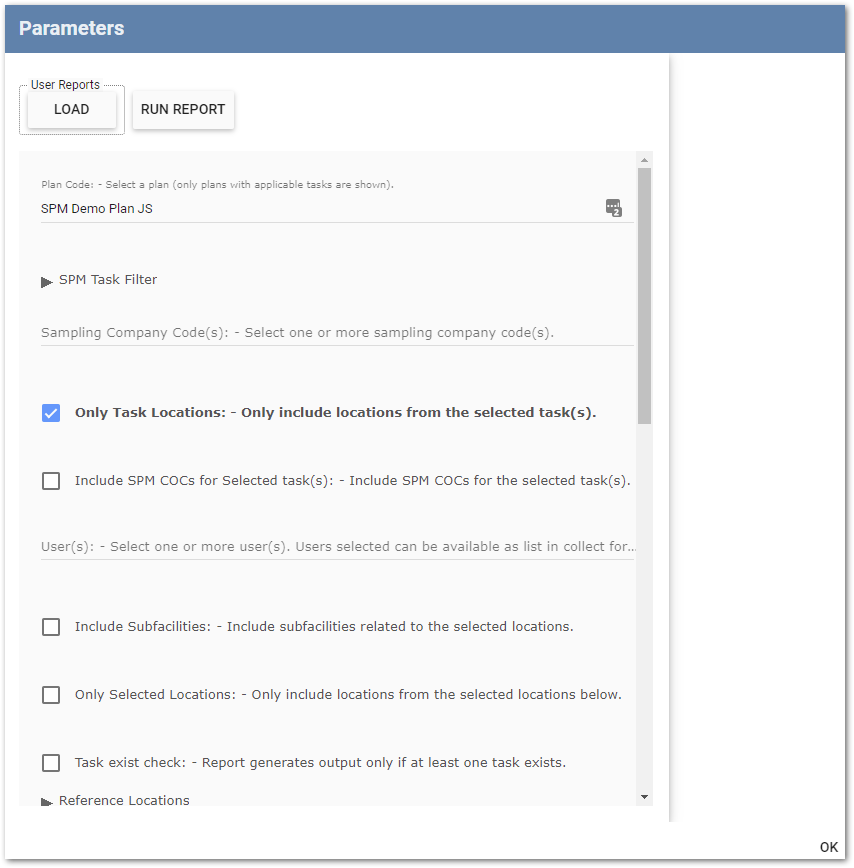
Pre-Population – If the selected template has pre-population defined, a Use Pre Population Report check box appears. Check this box to enable pre-population on this form; this will default to using the same report parameters for this form as were used when originally designing the template’s pre-population logic. If a different set of report parameters is desired, click User Report. On the Parameters screen that opens, users can load a previously saved user report by clicking Load or select the desired parameters in the main portion of the window. Click OK to save the report parameters that will be used to pre-populate this form. The name of the user report selected for pre-population will display to the right of the User Report button. To preview the pre-population output, click Preview Pre Population.
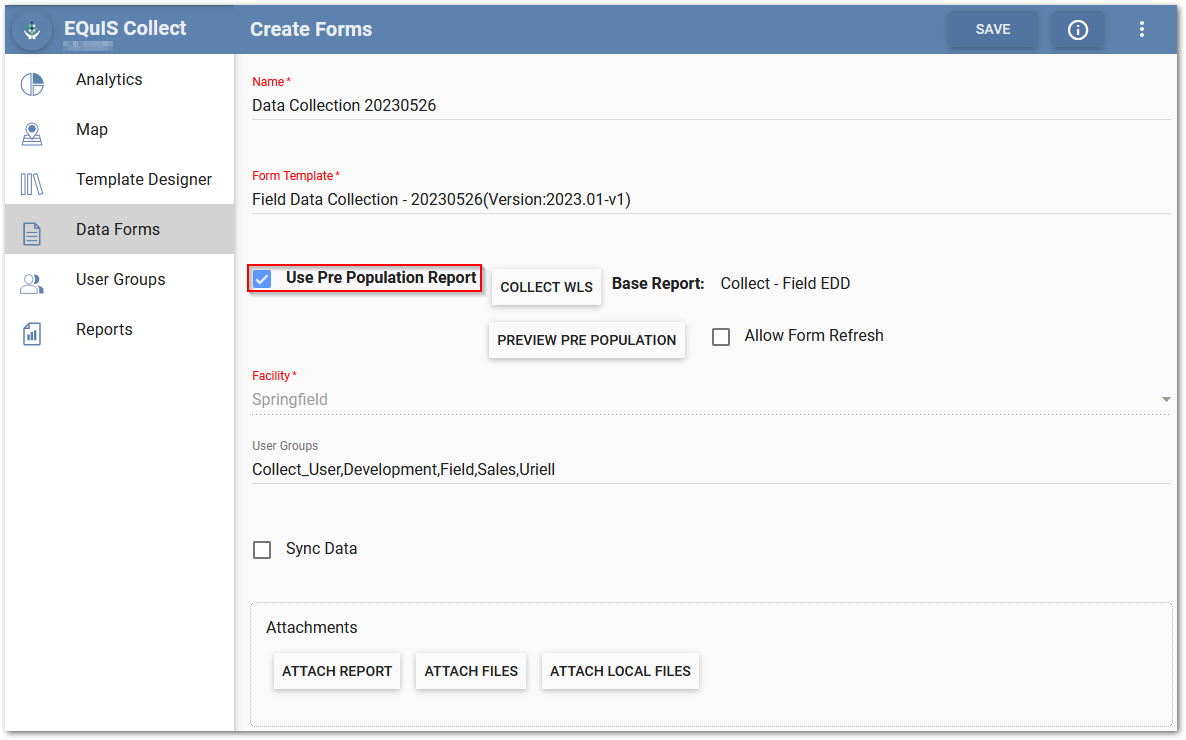
Note: The Use Pre Population Report check box is selected by default if the selected template has pre-population configured. |
|---|
Warning: •If a user creates a data form from a pre-populated template that has a selected user report and proceeds to modify that user report parameters, then the Preview Pre Population results will be inaccurate. •All records in data forms with pre-population enabled must follow the configured data set constraints before being available in Collect Mobile and the Web Forms widget. During pre-population the data set will, in combination with the Key fields in the pre-population mapping, define the record uniqueness. If there are two records with the same Key field values or data set value, only one will appear in the resulting data form during pre-population. |
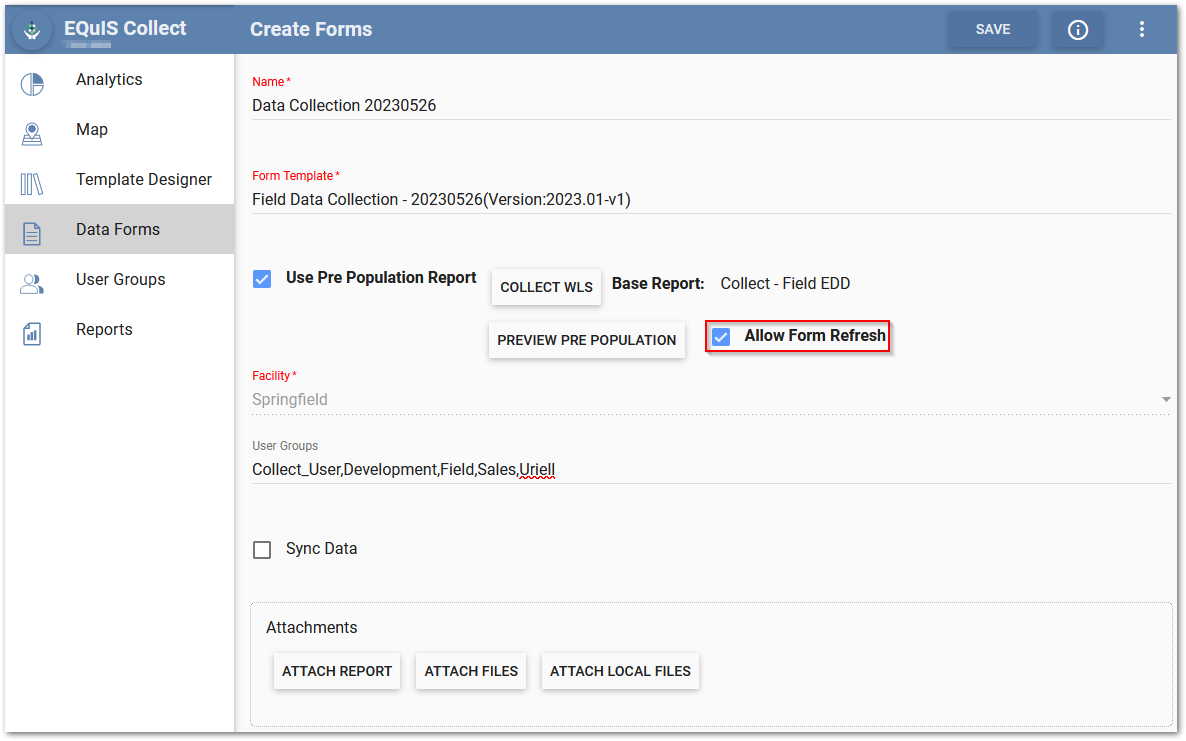
Allow Form Refresh – The Allow Form Refresh check box, when checked, allows users to refresh a pre-populated Collect form with the latest data from the database in Collect Mobile and the Web Forms widget without needing to create a new form. The Allow Form Refresh check box is unchecked by default.
When pre-populating a data form, users must pre-populate using a user report at the data form level in order to use the Allow Form Refresh functionality. Users should not select additional parameters in the pre-population window in conjunction with the user report to pre-populate.
Notes: •If pre-populating without a user report, the Allow Form Refresh check box is unchecked and disabled. •If a user report has been modified, but not saved as a new user report, the User Report button will display "Modified User Report" and the Allow Form Refresh check box will become disabled. •If the Use Pre Population Report option is unchecked, the Allow Form Refresh option is unchecked and disabled, even if it was previously selected. |
|---|
Warning: When using Data Sets in conjunction with pre-population and the Allow Form Refresh functionality, ensure the parameters defined for the Data Set return unique values. If the values defined by the Data Set, in the pre-populated records, are not unique they will be deleted when the data form is refreshed in Collect Mobile or the Web Forms widget. |
User Groups – The User Groups will auto-populate to the User Groups currently assigned to the selected template. To change the User Group settings, select Users Groups to open the Groups window. Check the boxes for all desired user groups and select the OK button.
Note: If a user group has been associated with a facility, the user group will automatically populate when that facility is selected for the data form, if the user group has been assigned to the template. |
|---|

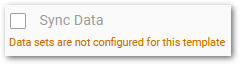
Sync Data – The Sync Data feature allows multiple Collect users to use the same form and see all the data that has been collected from multiple devices. Check the Sync Data box to enable the synchronization option. See the Sync Data Functionality article for additional details and an example of data syncing for multiple mobile devices.
Notes: •Data Sets are required on all form sections, for both parent and child forms, of new and edited templates in order to use the Sync Data functionality. The Sync Data check box will only be enabled for legacy templates that have not been edited or new/edited templates that have data sets configured. •A message stating "Data sets are not configured for this template" will be displayed beneath the disabled Sync Data button if data sets have not been configured for all form sections of a template.
|
|---|
Warning: Backwards compatibility of the Sync Data functionality is allowed in certain scenarios. Templates that were created and published, or put into Test Mode, in previous builds without Data Sets configured can still be used to create data forms on the server with Sync Data enabled. However, if a published template or a template in Test Mode is edited (e.g., changing the template user group, updating the template description, etc.), the template will no longer be backwards compatible and will require Data Sets to be configured for all form sections in order to create data forms on the server with Sync Data enabled. |
|---|
Attachments
Files can be attached to the form to be available on Collect Mobile. Attached files are displayed below the Attachments buttons. To remove any file as an attachment, select the Delete ![]() icon to the right of the file name.
icon to the right of the file name.
Three sources are available to attached files: User reports, files stored in the DT_FILE table, and local files.
Attach Report
Select the Attach Report button to open the Report Selector window. Check the box to the left of the desired report name to select the report and click the OK button.

The Parameters dialog will appear. Select a User Report.
Adjust any parameters and for certain reports it is necessary to select an output type. Click the OK button. After the report is finished running, the report file name appears below the Attachments buttons.
Files Stored in DT_FILE Table
Select the Attach Files button to select files from the DT_FILE table. The search box under the column names can be used to filter the file list and easily find the desired file(s). Check the box to the left of the desired file name to select the file. Click the OK button.
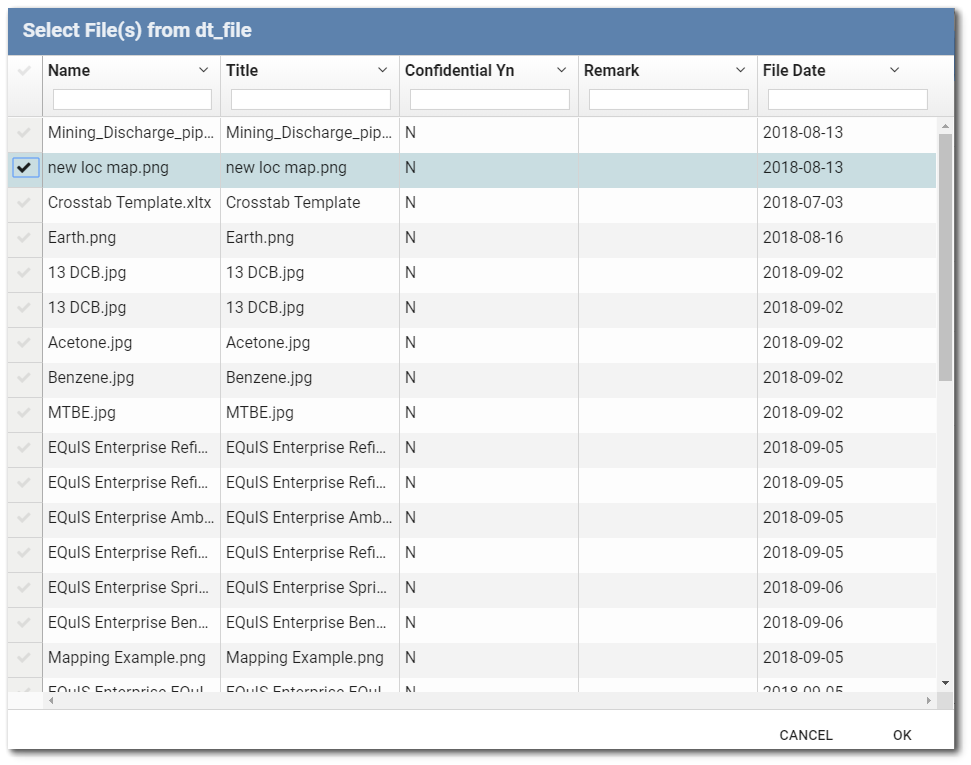
The selected attachments will be displayed below the Attachments buttons.
Local Files
Select the Attach Local Files button to to display an Open File window. Browse to the folder containing the file(s) and select the desired attachments. The attached files will be displayed below the Attachments buttons.