The Collect dashboard can be copied and customized. Numerous Collect dashboards can exist within Enterprise. General Enterprise dashboard functionality is accessible via the dashboard header at the top of the page.
By default, the Collect Enterprise dashboard consists of a dashboard header and a Collect widget with with six menu pages: Analytics, Map, Template Designer, Data Forms, User Groups, and Reports. Administrator users can define which page(s) are displayed, the order of page(s), and which page is the default for each Collect dashboard. Additionally, the columns on the Template Designer and Data Forms pages can be configured.
Edit Settings
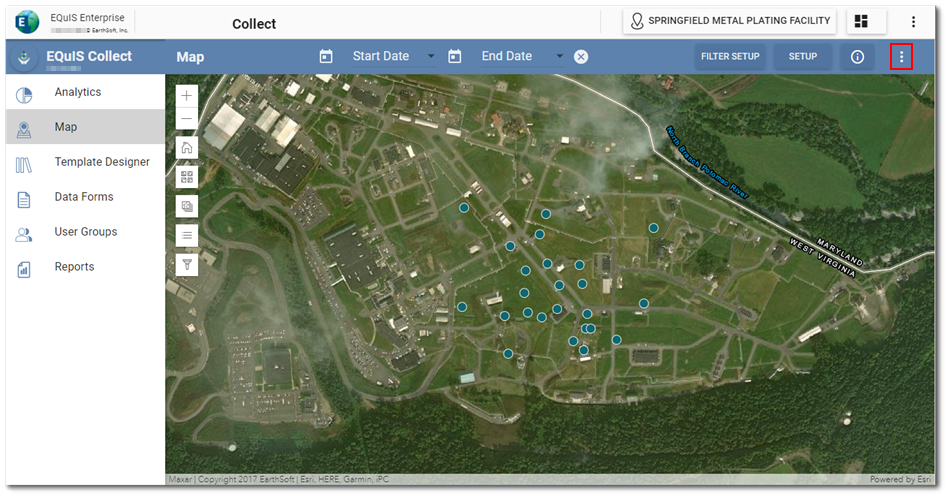
To edit the settings on the Collect dashboard, click the More Options ![]() icon on the right-side of the Collect widget header and then select the Edit Settings option.
icon on the right-side of the Collect widget header and then select the Edit Settings option.
The Collect Widget Editor will open to allow an administrative user to edit the dashboard properties.
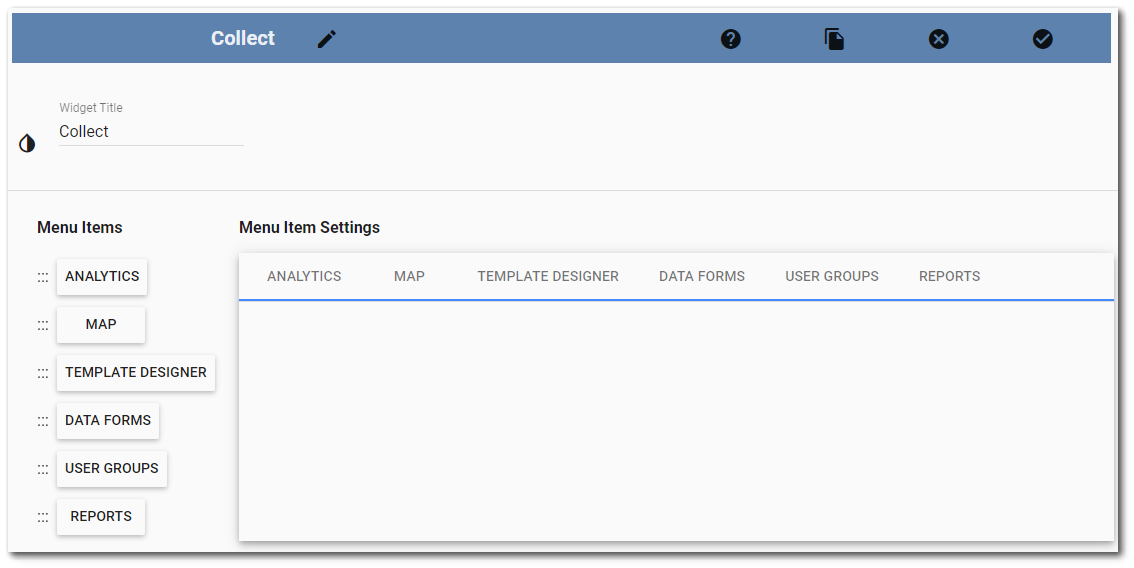
Menu Items
This property can be used to define which pages appear on the Collect dashboard and their display order in the side menu. By default, this property is empty and all six pages are displayed. Users can show/hide a page by clicking on the corresponding menu item in the Menu Items column. The menu item will turn blue when it is selected and will turn white when it is not selected. Menu items can be dragged (up or down) using the handle at the left of the item to change the display order of the pages. Dragging an unselected item into the selected portion of the list will automatically select the item. Dragging a selected item into the unselected portion of the list will automatically unselect the item (item will be white). Only selected menu items will be displayed on the Collect dashboard in the order they are listed. Any menu items not selected will not be displayed (will be hidden).
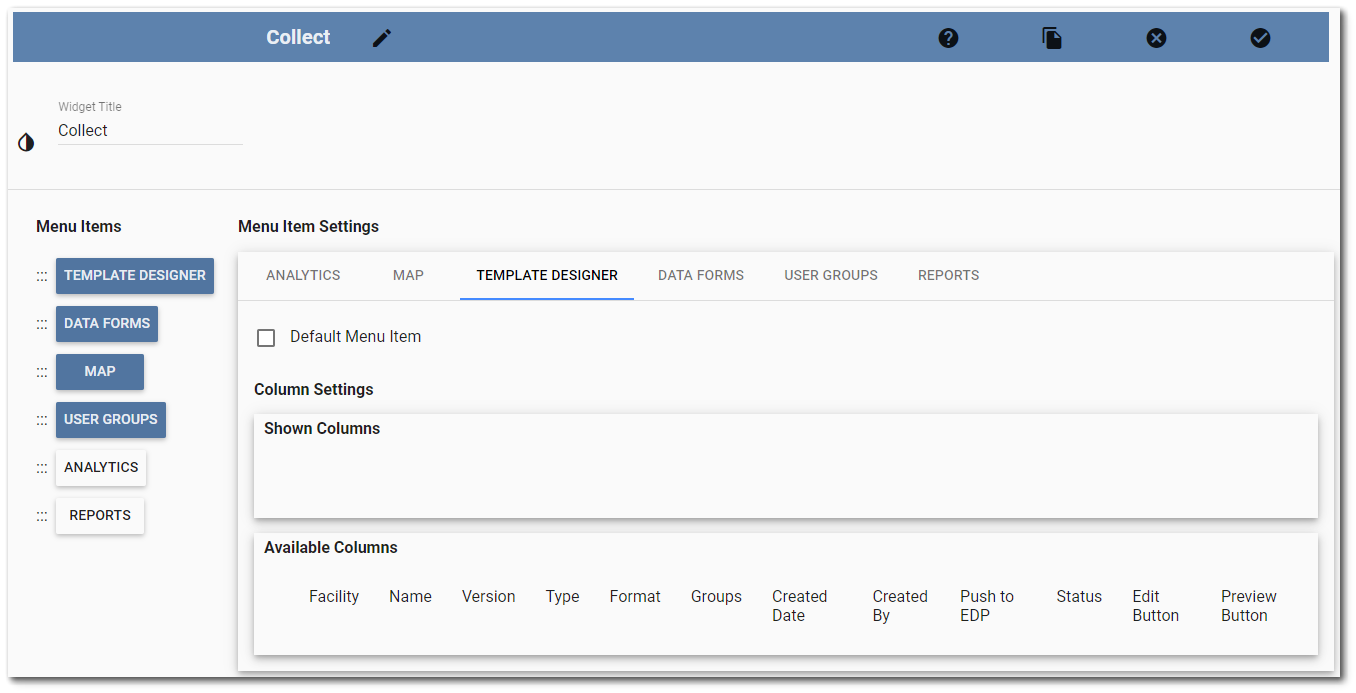
In the image below, the Template Designer, Data Forms, Map and User Groups pages are selected to display in that order. The Analytics and Reports page will not be displayed on the Collect Dashboard.
Menu Item Settings
To change settings of a menu item, select the menu item tab under menu item settings. Available settings for each menu item will be displayed.
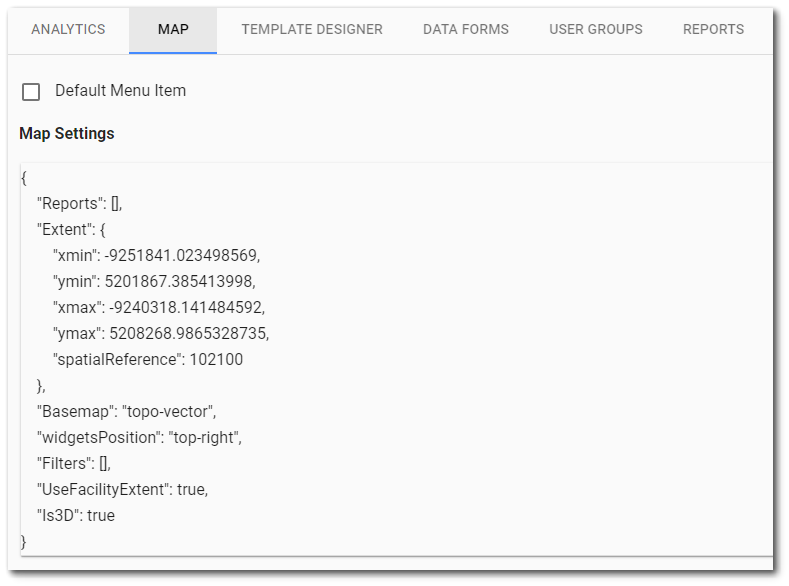
Default Menu Item – This property defines the default landing page that loads when a user chooses the Collect dashboard. The Analytics Page is the default landing page if no other page has been selected. To set a page to be the default, select the desired menu item tab and check the Default Menu Item box.
Column Settings – The Template Designer and Data Forms pages have column settings. Administrator users can define which columns are displayed and in which order.
The "Available Columns" pane lists the available columns for the menu item. By default, the Template Designer page consists of 12 columns in this order: Facility, Name, Version, Type, Format, User Groups, Date, Created By, EDP?, Status, Editing, and Preview. By default, the Data Forms page consists of 11 columns in this order: Name, Facility Code, Template, Format, User Groups, Date, Uploaded, Status, Reports, Origin, and Select check boxes.
The "Shown Columns" pane indicates which of the columns will be displayed and which order. If "Shown Columns" pane is empty, Collect will default to showing all columns in the default order. To add a column to the "Shown Columns" pane, drag the item from the "Available Columns" pane. Change the column order by dragging the columns to the desired positions. To remove a column from the "Shown Columns" pane, drag the item to the "Available Columns" pane.
Map Settings – On the Map tab, the JavaScript Object Notation (JSON) properties are available to edit (if the Map page was selected prior to opening the Widget Editor). However, the map settings are easier to manage by using the Map Page Setup window. Note that this has to be valid JSON or the settings will not update.
Changes will be applied to the Collect widget by clicking on the Save ![]() button. The Widget Editor will close and changes will be reflected on the Collect Dashboard.
button. The Widget Editor will close and changes will be reflected on the Collect Dashboard.
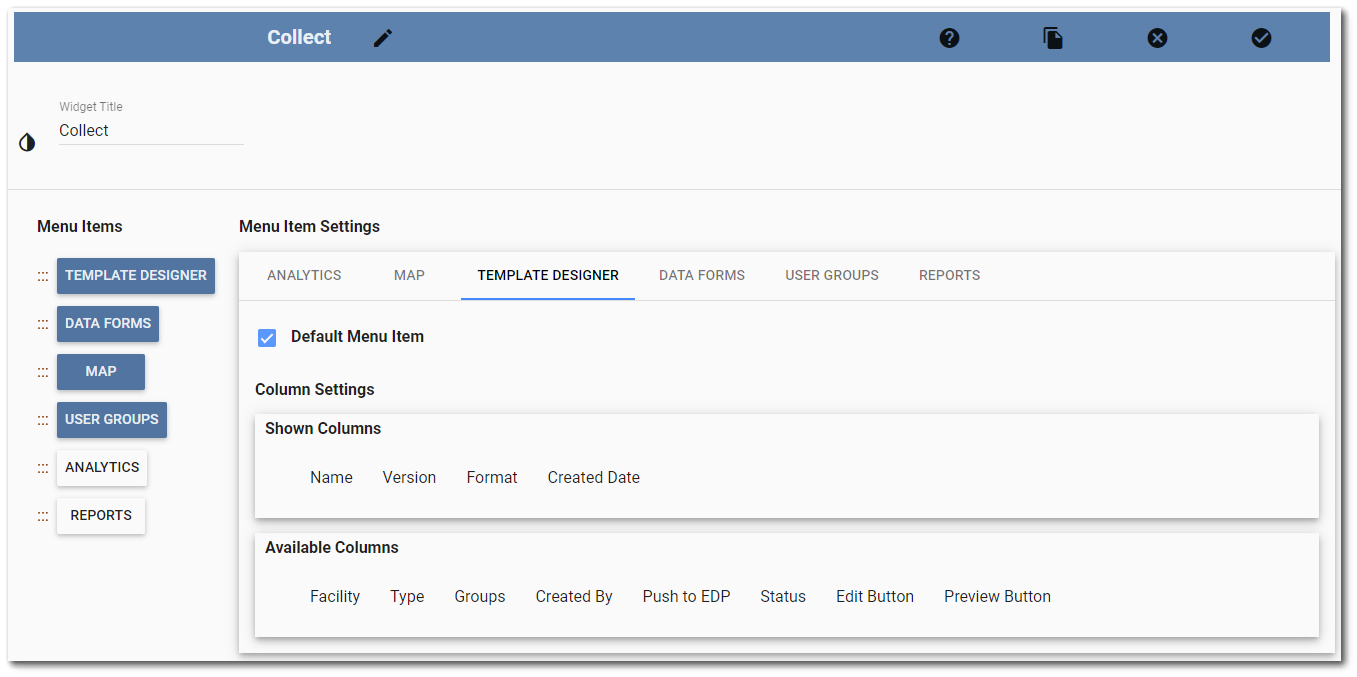
Example
In the image below, the Template Designer, Data Forms, Map and User Groups pages are selected to display in that order. The Template Designer page will be the default page and will display four columns: Name, Version, Format, and Created Date (in that order).