Each form in a Collect template is configured based on the addition of fields. Once a field is added to a form, field properties and attributes can be assigned. The role and nature of the respective field is designed by defining field properties and applying field attributes.
Add Fields
Fields can be added from columns in tables pertinent to the EQuIS format assigned to the template or by adding custom fields that do not reference any format. To add a custom field, click the Add New Field button in the Fields section of the left pane. The Edit Field window will open. A field name will need to be created, but note that using ampersand (&) characters in field names is not recommended. See the Field Types and Attributes article to set other properties and attributes for the custom field.
Note: Once saved, the custom field name cannot be changed because this name is referenced when building formulas. For instance, if aggregate functions are being used in formulas and the name of the field was changed, the references would break causing the form and Collect to be unusable. |
|---|
If an EQuIS format is assigned to the template, clicking in the Table selector will display a list of all sections (tables) in the format. Select the desired section (table). The selection can be expedited by using the Advanced Search box located at the top of the Table dialog.

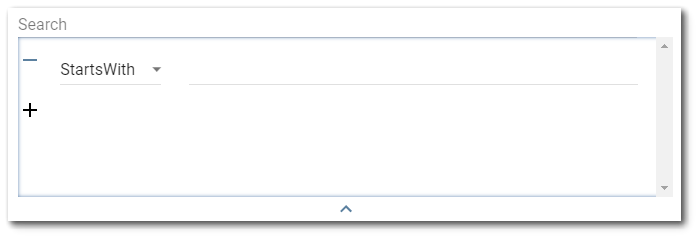
Advanced Search – Click the down arrow to expand the advanced search dialog window. The drop-down allows the user to select an operator (e.g. Starts With, Ends With, Equals, Contains). By default, the operator is set to StartsWith. The operator defines how the expression is matched to the items being searched. Enter the expression to be searched in the text field. Multiple expressions can be set by clicking the + button below the first expression. Expressions can also be removed/cleared by clicking the – button to the left of each expression. To collapse the advanced search dialog, click the up arrow at the bottom of the advanced search dialog. Note that collapsing the advanced search will not clear search expressions that have been setup.

Once an EQuIS format section is selected, the fields belonging to the section become available to add to the form.

Fields can be added to a form in two ways. Clicking on a field will add the specified field to the bottom of the form. Fields can also be selected and dragged to a specified location within the form. Fields can be dragged and placed into the form itself, or into groups and/or combined fields within the form.
Note: To reduce loading time of format fields, any fields in the format that have lookup values do not retain the lookup values. The field will be added to the form as a string. The lookup values can be added by changing the field type to "Selector" and populating the options. |
|---|
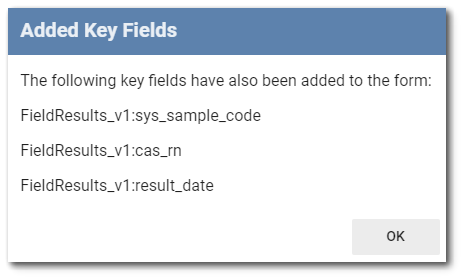
When any field from an EQuIS format section is added to the form, the key/required fields from that section are also automatically added to the form. The key fields will also automatically have one data mapping: Active set to "True" with the value of the field.
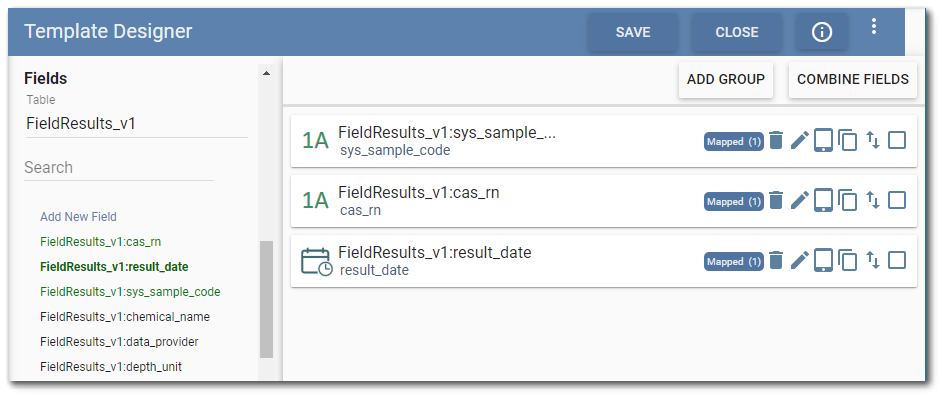
Other field(s) can be incorporated into the form, as desired by the user. Fields added to the form will be displayed green. The field last added to the form will be dark green and bold.
See the Field Types and Attributes article for a detailed discussion of assigning field properties and attributes. To set properties and attributes for each field added to the form, select the field and click the Edit ![]() icon. If the field attribute being changed is also existent in other parts of the templates (mapping, pre-population, select/multiselect, etc.), a warning message will be displayed to advise the user. The warning message does not prevent the change and is intended to inform the user of the possible consequences of performing the change.
icon. If the field attribute being changed is also existent in other parts of the templates (mapping, pre-population, select/multiselect, etc.), a warning message will be displayed to advise the user. The warning message does not prevent the change and is intended to inform the user of the possible consequences of performing the change.

To see how the field will be displayed on the mobile device, select the field and click on the Preview ![]() icon.
icon.

Copy Fields on Form
To copy a single field on the form, select the field and click the Copy ![]() icon. A Copy As dialog will be displayed. By default, the existing field name will be appended with "_Copy". Rename the field as desired and click OK. Edit the field as needed.
icon. A Copy As dialog will be displayed. By default, the existing field name will be appended with "_Copy". Rename the field as desired and click OK. Edit the field as needed.

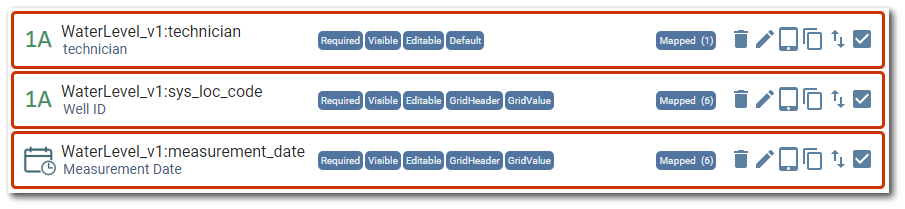
To copy multiple fields on the form at the same time, check the box at the right side of the field for all fields to be copied on the form. Each field will be outlined in red.
Click the Copy ![]() icon for any of the checked fields. A Copy As dialog will be displayed. By default, the existing field name will be appended with "_Copy".
icon for any of the checked fields. A Copy As dialog will be displayed. By default, the existing field name will be appended with "_Copy".
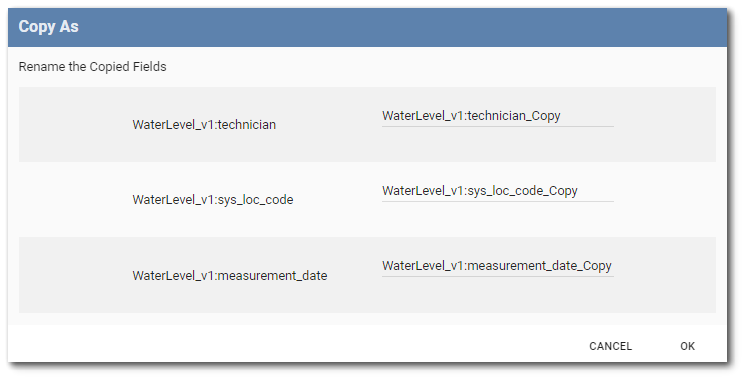
Rename the fields as desired and click OK. Edit the new fields as needed.
Note: When copying multiple fields, the copied fields will be placed beneath their original fields. The original fields will remain selected after the copying process. To clear the selected fields, click the Clear Selected button in the top right. |
|---|
Move Fields on Form
There are two ways to move fields within a form: (1) Drag and drop, and (2) Move arrow icons. The first method is to click and drag the field from the current location to the desired location and then release. This allows fields to be moved easily on the form as well as to and from within grouped and/or combined fields. However, dragging and dropping fields to the desired position can be cumbersome in long forms with many fields.
Tip: If attempting to drag a field to a significantly lower or higher position on the form, click and drag the field and then while holding the click down, hover over the side scroll down or up arrow in the browser window. This will increase the speed and control of the scroll action. |
|---|
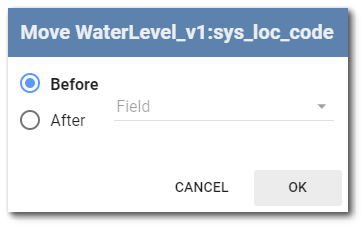
The second method to move fields is the up-down arrow icon on the right side of the field. Clicking on the Move ![]() icon will open a dialog for moving the desired field.
icon will open a dialog for moving the desired field.

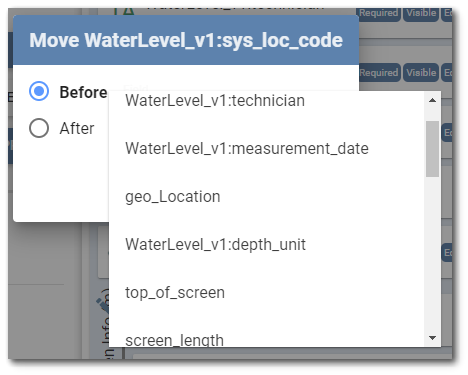
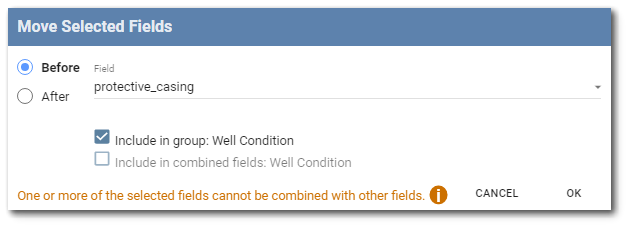
The dialog has a drop-down for choosing another field on the form as a corresponding position and radio buttons for placement "Before" or "After" the selected field. Once a field is selected in the drop-down and Before or After is chosen, clicking OK will move the field to the position specified.
|
|
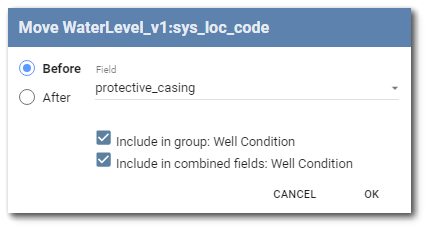
If the field from the drop-down is within a field grouping or combined field group, an option will be provided to include the field being moved to the same grouping relationship as the drop-down field.
To move multiple fields on the form at the same time, check the box at the right side of the field for all fields to be moved on the form. Each field will be outlined in red. Click the Move ![]() icon for any of the checked fields.
icon for any of the checked fields.
When moving multiple fields, they will remain selected after the move process. To clear the selected fields, click the Clear Selected button in the top right.
Note: If moving a single or multiple fields "Before" or "After" a grouped or combined field, but do not choose to add the field(s) selected for moving into the group or combined group of the referenced field, the selected field(s) will be placed after the group or combined group. If the referenced field is the first field in the group or combined group and the action was to move the selected field(s) "Before", they will be placed before the group or combined group. |
|---|
If attempting to move incompatible field(s) into a combined field group, a prompt will appear in the move dialog with an information icon. Hovering over this icon will display the names of the fields that cannot be added to a combined group.
Delete Fields from Form
To remove a single field from the form, select the field and click the Delete ![]() icon. The user will be prompted for confirmation prior to deletion. If the field is being used in formulas, a warning message will be displayed denoting the occurrences of the field in the template.
icon. The user will be prompted for confirmation prior to deletion. If the field is being used in formulas, a warning message will be displayed denoting the occurrences of the field in the template.

To remove multiple fields from the form at the same time, check the box at the right side of the field for all fields to be deleted from the form. Each field will be outlined in red.
Click the Delete ![]() icon for any of the checked fields. The user will be prompted for confirmation prior to deletion. If a field is being used in formulas, a warning message will be displayed denoting the occurrences of the field in the template. When deleting multiple referenced fields, a download button will also be present. The download will generate a text file with the warnings seen in the deletion dialog.
icon for any of the checked fields. The user will be prompted for confirmation prior to deletion. If a field is being used in formulas, a warning message will be displayed denoting the occurrences of the field in the template. When deleting multiple referenced fields, a download button will also be present. The download will generate a text file with the warnings seen in the deletion dialog.