The following Collect template files are provided with EQuIS Geotech:
•Geotechnical Field Data Entry.zip
•Geotechnical Field and Lab Data Entry.zip
•Geotechnical Mobile Data Entry.zip
The Geotechnical Collect templates are included in the EQuIS Geotech download package available in the Products\EQuIS Geotech folder on the Downloads Dashboard on the EarthSoft Community Center (ECC). The template files will be in the EarthSoft Templates\EQuIS Geotech Collect Templates folder after the download file is unzipped.
The Collect templates must be uploaded to the database and properly configured to work correctly with the standard EQuIS Geotech dashboards.
Notes: Before uploading the Collect template files to Collect Enterprise, ensure the following items are addressed: •To use these templates, it is essential that a facility is present in the database that includes data for all the data types entered in the template. Therefore, EarthSoft HIGHLY recommends loading the EQuIS Geotech Demo EDD (EQuISGeotechDemo Project_EDDExample_Geotechnical_v2.xlsx) provided in the EQuIS Geotech download package on the EarthSoft Community Center as a demo/test facility. Uploading this demo facility is included in the EQuIS Geotech Database Configuration steps. •These templates are built on the Geotechnical_v2 format. This format must be properly configured in the database. See the EQuIS Geotech Database Configuration article for installation and configuration instructions. •At least one Collect User Group is present. •These templates use the Geotechnical Collect Report. This report should have a generic User Report associated with it. See the steps in the next section to create a User Report for the Geotechnical Collect Report. |
|---|
Create a User Report for the Geotechnical Collect Report
To facilitate data entry in the Web Forms widgets on the EQuIS Geotech dashboards or collecting data in the field using the Collect Mobile app, the EQuIS Geotech Collect templates are configured to pre-populate data through the Geotechnical Collect Report. Prior to following the steps outlined below, confirm that the Geotechnical Collect Report is present in the database.
Below are instructions on the suggested method to create a generic User Report for the Geotechnical Collect Report using Collect Enterprise.
1.Login to Enterprise.
2.Click the Dashboard Chooser ![]() button and select the Collect dashboard.
button and select the Collect dashboard.
3.Click the Facility Chooser ![]() button and select the EQuIS Geotech Demo facility (i.e., example facility that contains all data types).
button and select the EQuIS Geotech Demo facility (i.e., example facility that contains all data types).
4.Navigate to the Reports page on the Collect dashboard side menu.
5.Select the Geotechnical Collect Report from the Report drop-down list.
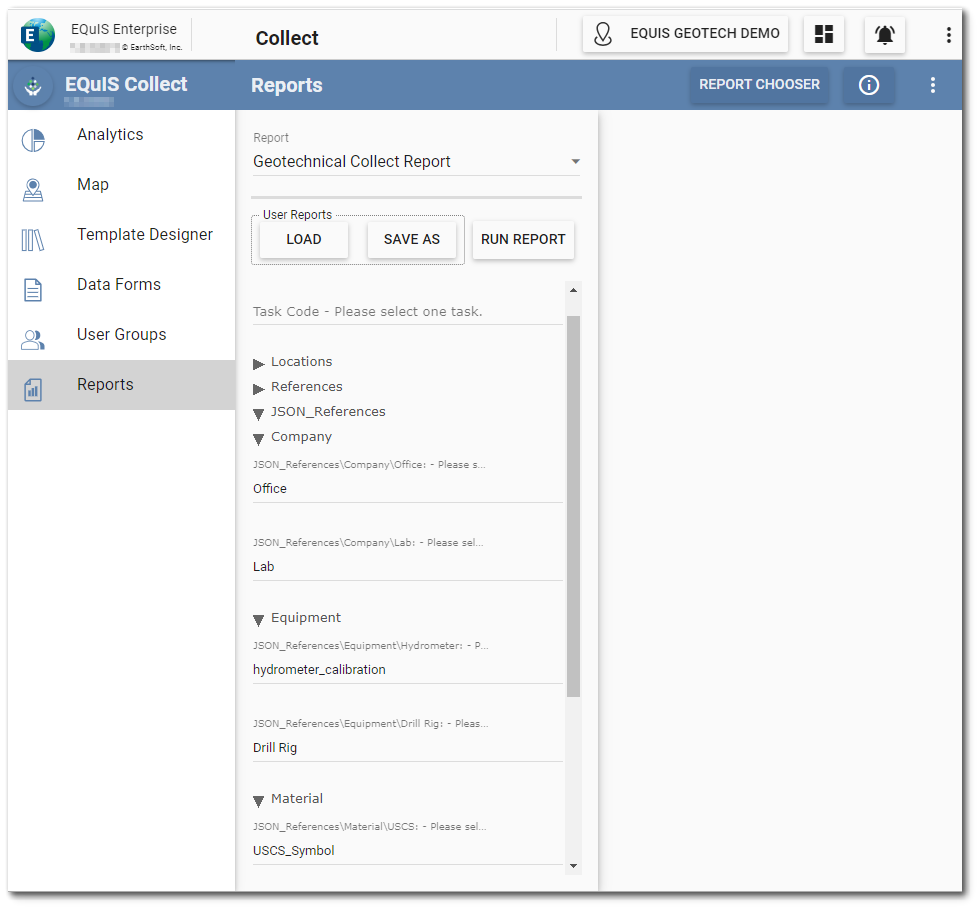
6.The Report parameter options can be selected by clicking the parameter to open the parameter selection dialog window. Set the report parameters as follows for each option. Click the OK button in the parameter selection dialog window after selecting the correct value for each option.
•Task Code – Leave Empty
•Locations – Leave Empty
•References
•Equipment Type – Leave Empty
•Company Type – Leave Empty
•JSON References
•Company
•Office – OFFICE
•Lab – LAB
•Equipment
•Hydrometer – hydrometer_calibration
•Drill Rig – Drill Rig
•Material
•USCS – USCS_Symbol
•Graphic – Material_Name
•Type – Material_Name
7.Click Save As and name the User Report "Geotechnical Collect Prepopulation Report".
8.Click Run Report.
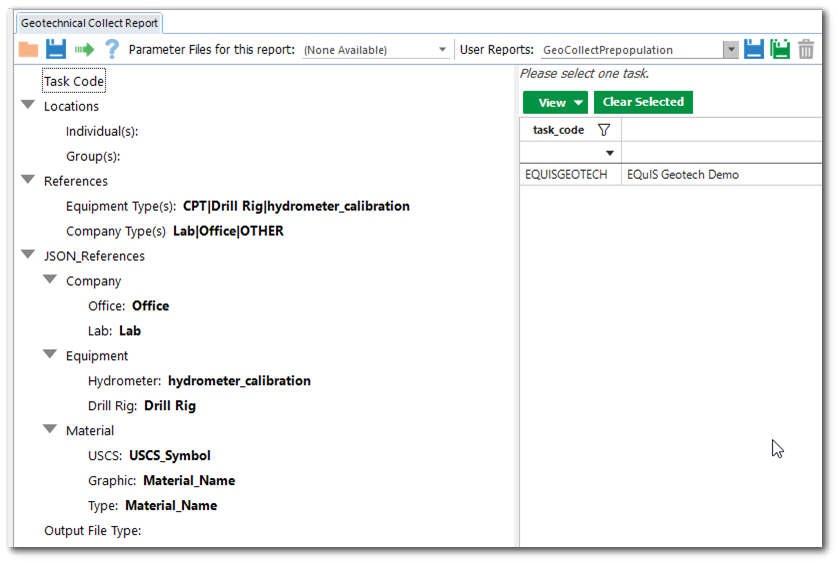
The image below shows an example user report based on the Geotechnical Collect Report open in Professional.

Uploading and Configuring the Templates in the Collect Dashboard
Each of the three EQuIS Geotech Collect templates will need to be uploaded in Collect Enterprise and then configured. See the Collect Enterprise Template Designer Page chapter of the online help for details about configuring Collect templates.
The following steps need to be repeated for each of the Geotechnical Collect Templates.
1.Login to Enterprise.
2.Click the Dashboard Chooser ![]() button and select the Collect dashboard.
button and select the Collect dashboard.
3.Click the Facility Chooser ![]() button and select the EQuIS Geotech Demo facility (i.e., example facility that contains all data types).
button and select the EQuIS Geotech Demo facility (i.e., example facility that contains all data types).
4.Navigate to the Template Designer page on the Collect dashboard side menu.
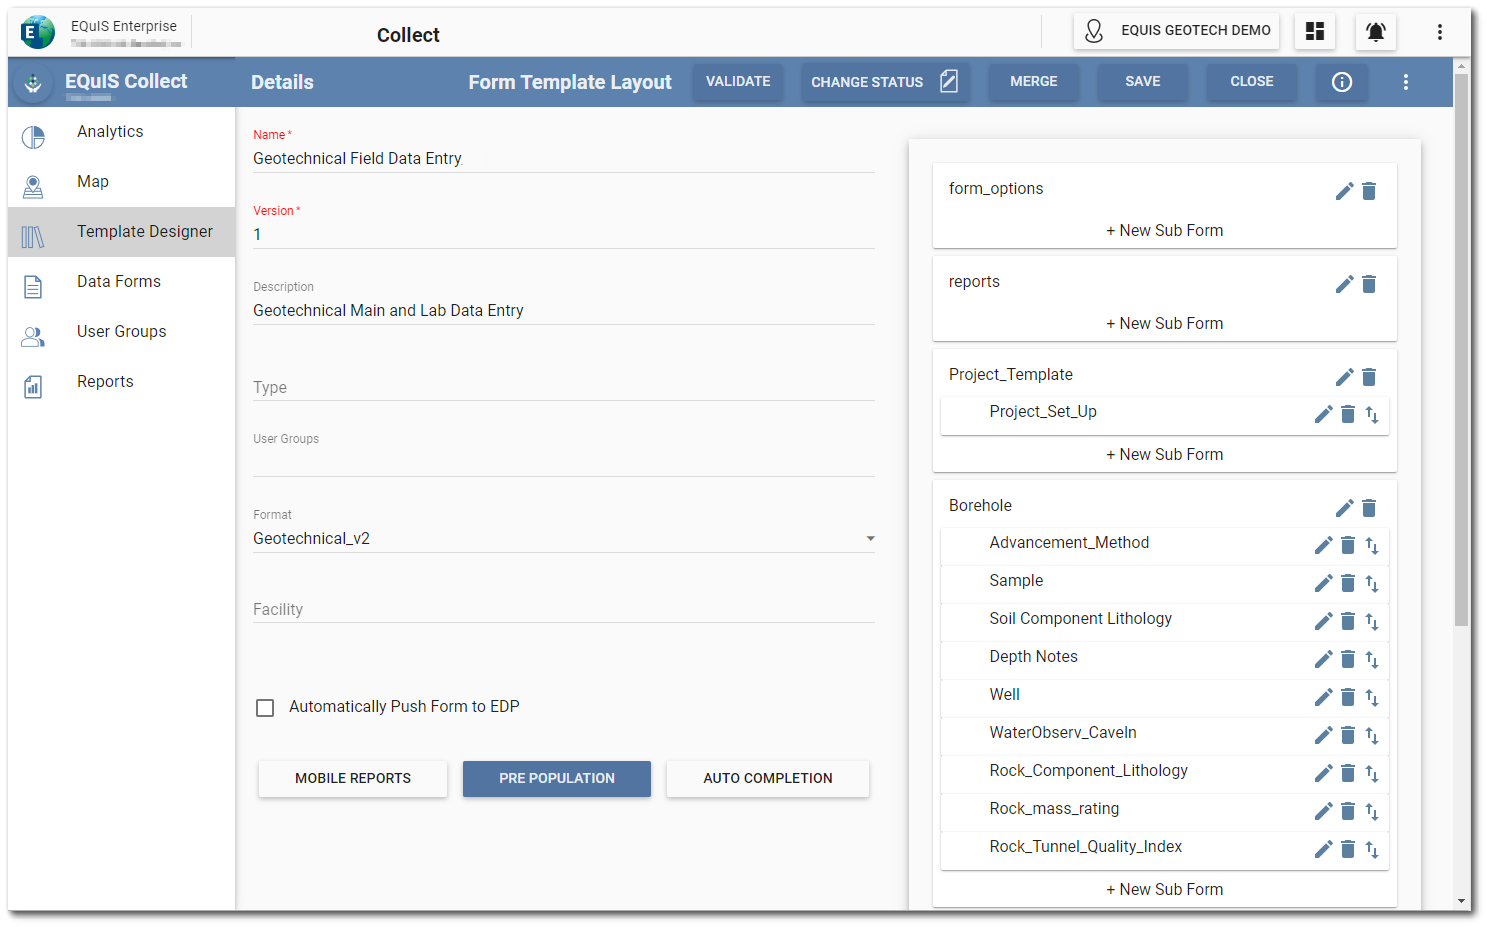
5.Click the New Form Template button on the Template Designer window to open the Form Templates window.
6.Select the Upload Form Template option.
7.Browse to the desired EQuIS Geotech Collect template file (downloaded from the ECC) and click the Upload button. The template will open in the Form Template Layout window.
8.Change the Version in the template to a custom value.
9.(Optional) Set the Type.
10.Assign a User Group to the template.
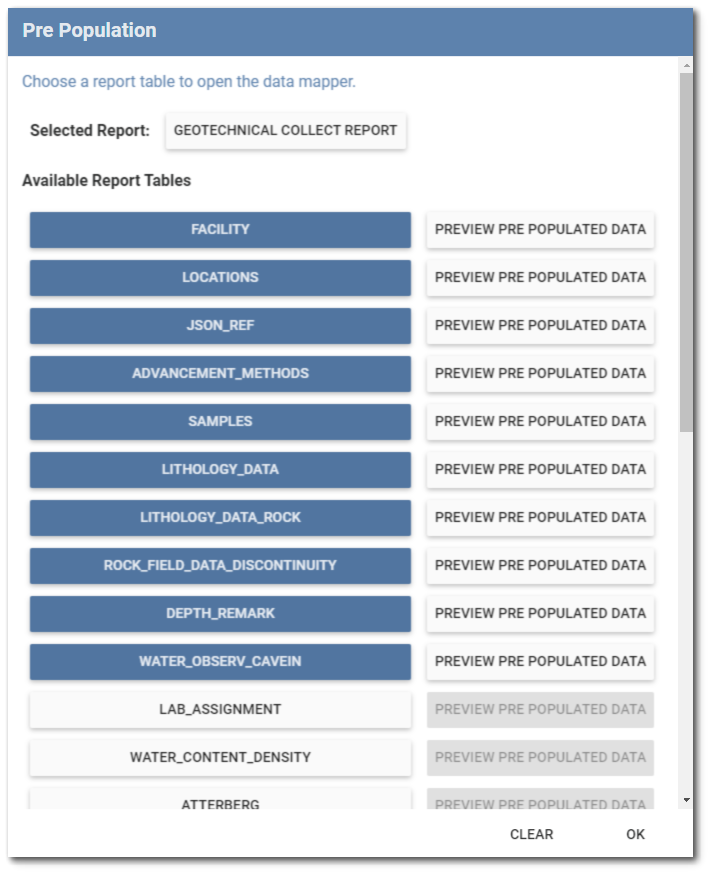
11.Select the Pre Population button and search for the Geotechnical Collect Report. Click OK.
12.On the Report Parameters window, click the Load button in the User Reports section. A new window will open to select an associated User Report. Load the User Report created in the previous section. Click OK to close the new window. Click OK to close the Report Parameters window.
13.The selected User Report will load into the Pre Population window. After the ‘Available Report Tables’ load in the Pre Population window, click any table to open the Data Mapping window for the table. Click Save. Click OK.

14.A message dialog will appear stating: “Do you want to overwrite the saved pre populations?” Click Yes, then click OK. The Pre Population window will close.
15.(Optional) Check the Automatically Push Form to EDP checkbox to have data automatically submit to EDP upon user submittal.
16.Click the Save button on the the Form Template Layout window header.
Applying Web Form Grouping and Filtering
If desired, the EQuIS database can be configured to provide additional options to facilitate data entry using the Web Forms widget. EQuIS system and reference table entries are used to:
•Group forms within a Collect template on the Web Forms Grid Entry screen.
•Filter the content of forms and subforms within a Collect template by a single field (e.g., Location).
Please refer to the documentation articles for information on how to apply Web Forms Grouping and Web Forms Filtering to the EQuIS Geotech Collect templates.

