EQuIS Geotech supports project workflows that use instrumentation data. This article provides an overview for:
Cone Penetration Test / Dilatometer Test Workflow
The EQuIS Geotech Cone Penetrometer Test / Dilatometer Test (CPT/DMT) workflow supports data entry through an instrumentation file. The user submits an instrumentation file for a CPT or DMT test.
To load CPT/DMT data through an instrumentation file, the user must follow the steps outlined below:
1.Open the EQuIS Geotech dashboard in Enterprise.
2.Navigate to the CPT/DMT dashboard and select the Load CPT/DMT Instrument Files tab.
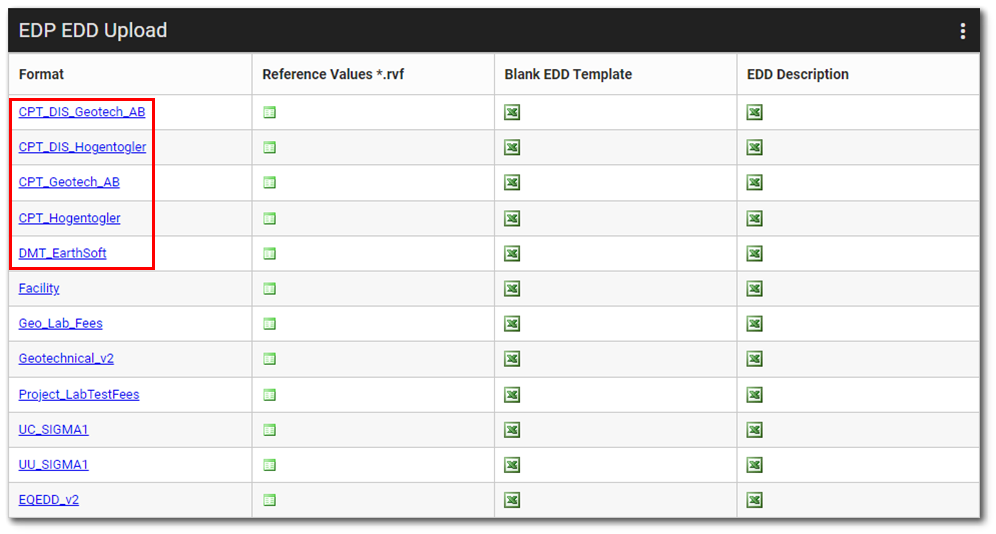
3.Select the proper format in the EDP EDD Upload widget. The CPT method used will determine the format to be selected for CPT data uploads.
4.Make sure a Facility, Location, and Sample already exist in the database and that this information is properly populated in the CPT or DMT instrumentation file.
5.Drag and drop the instrumentation file into the EDP EDD Upload widget. Users may also click the Browse button and select multiple instrumentation files to upload.
6.Verify in the EDP EDD Status widget that the EDD was successfully submitted.
7.Verify that the data have been loaded into the database.
8.Navigate to the Lab Data Entry dashboard and select the Web Forms tab.
9.Create a new data form and add the data that are not coming from the instrumentation file, such as water depth, measurement type for water depth, and adjacent boreholes.

10.Submit the data form to the database.
11.View the CPT and DMT data and calculated results in the Data Grid widgets located in the CPT Data, CPT Dissipation, and DMT Data sections of the CPT/DMT dashboard.
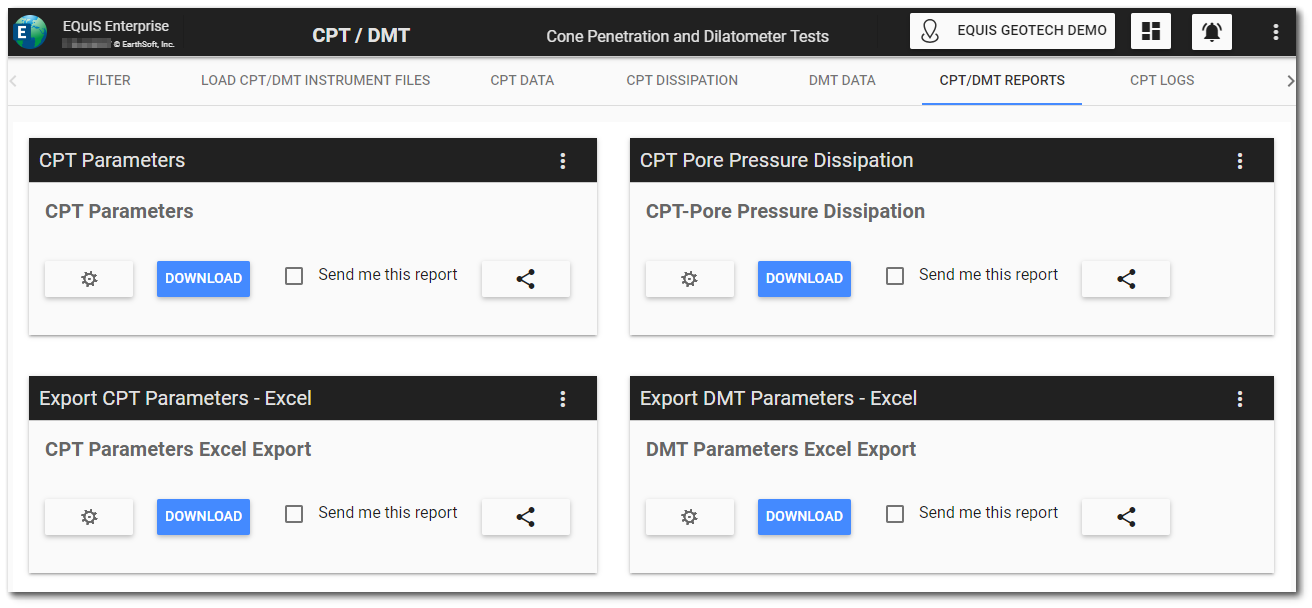
12.Run the associated report(s) on the CPT/DMT Reports tab.
13.Visualize CPT and DMT data by running the CPT and DMT logs on the CPT Logs and DMT Logs tabs, respectively.
Note: The CPT logs are generated using the GeoCPT_EIReport_Template.xml template file with the EnviroInsite Boring Logs II report output. The DMT logs are generated using the GeoDMT_EIReport_Template.xml template file with the EnviroInsite Boring Logs II report output. If geotechnical data management team wants to use a customized CPT or DMT log template, then a customized CPT or DMT log template needs to be created. |
|---|
Unconfined Compression/Unconsolidated Undrained Workflow
The EQuIS Geotech Unconfined Compression/Unconsolidated Undrained (UC/UU) workflow supports both manual entry of the test results and entry through an instrumentation file.
Method 1 – Manual Data Submittal
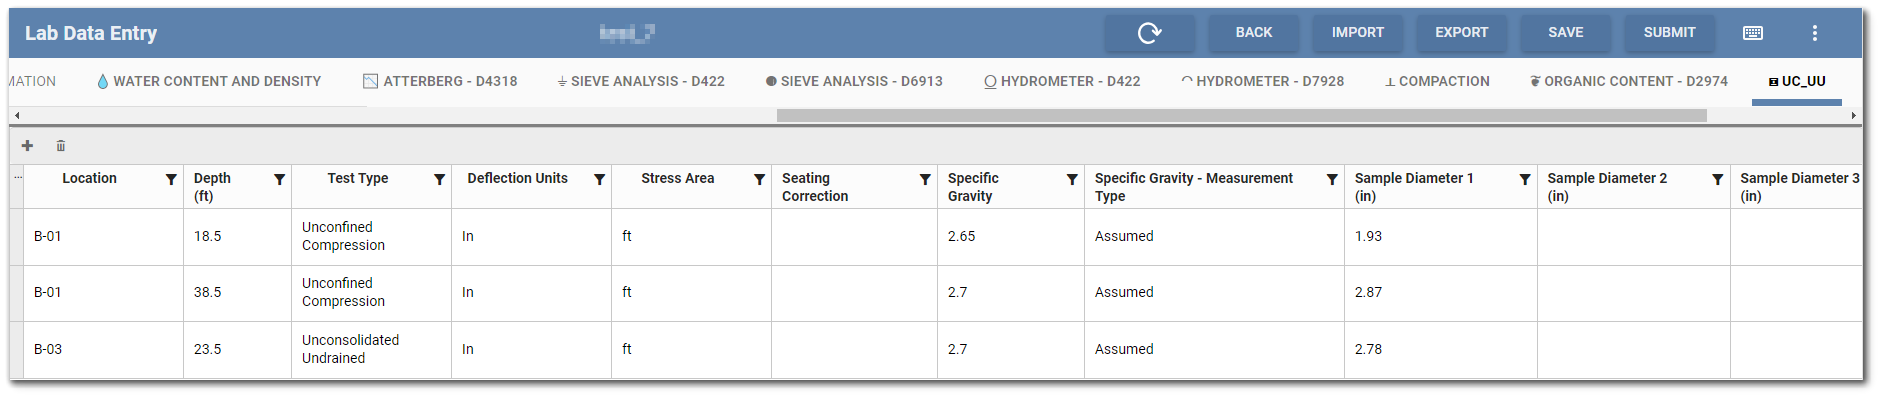
The user will manually enter the results of the Unconfined Compression (UC) or Unconsolidated Undrained (UU) test in the UC_UU section of the Geotechnical Field and Lab Data Entry Web Forms template.
1.Open the EQuIS Geotech dashboard in Enterprise.
2.Navigate to the Lab Data Entry dashboard and select the Web Forms tab.
3.Create a new data form and populate the UC_UU section of the form. The following information must be populated for the database function to properly compute:
•Test Type
•Deflection Units
•Stress Area
•Specific Gravity
•Sample Diameter 1
•Height Diameter 1
•Weight Specimen + Tare
•Wt Tare
•WC Wet weight + Tare
•WC Dry Wright + Tare
•Load
•Deflection Reading
4.Submit the data form to the database. Once the raw data has been submitted to the database, a function will conduct calculations for the Stress and Strain and other test results. These results can be reviewed and assessed in the Geotechnical Unconfined Compression Data function report.
Method 2 – Instrumentation File Submittal
The user submits an instrumentation file for a UC or UU test.
To load UC/UU data through an instrumentation file, the user must follow the steps outlined below:
4.Open the EQuIS Geotech dashboard in Enterprise.
5.Navigate to the Lab Instrument Data dashboard and select the Load UU/CC Instrument Files tab.
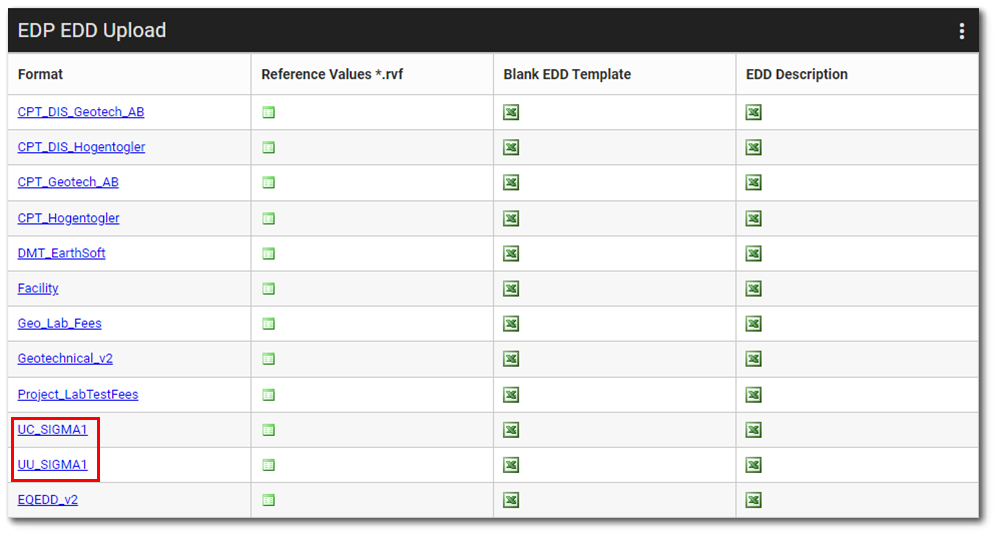
6.Select the proper format in the EDP EDD Upload widget.
7.Make sure a Facility, Location, and Sample already exist in the database and that this information is properly populated in the instrumentation file.
8.Drag and drop the instrumentation file into the EDP EDD Upload widget. Users may also click the Browse button and select multiple instrumentation files to upload.
9.Verify in the EDP EDD Status widget that the EDD was successfully submitted.
10.Verify that the data have been loaded into the database.
11.Navigate to the Lab Data Entry dashboard and select the Web Forms tab.
12.Create a new data form and add the data that are not coming from the instrumentation file, such as water content, dry density, failure mode, failure image(s), etc. .
13.View the calculated Stress and Strain results in the Data Grid widgets on the Unconfined Compression and Unconsolidated Undrained sections of the Lab Instrument Data dashboard.
14.Run the associated report(s).