References:
•EQuIS Format Definition Configuration
EQuIS Link allows users to load source data tables and create data mappings from the source data table to sections and fields in a specified EQuIS Format file. An EQuIS Link Project Template can be configured in EQuIS Enterprise to act as a “virtual” format using the EDP Upload Widget to process data.
Before configuring Link for use in Enterprise, users must first:
1.Create an EQuIS Link Project Template.
2.Map the data from the source file to the desired EQuIS Format.
Note: This functionality requires an active Link license. |
How to configure a Link Project Template for use with a specified format in EQuIS Enterprise:
1.In Professional EDP on the Link tab with a Link Project Template loaded or created, select Edit from the Project ribbon. Then select Save As and save the *.link file somewhere easily accessible.
2.Zip the *.link file. Enterprise will not recognize the ‘.link’ file extension by default, and thus, the file must be zipped to upload it to the database. The easiest method in Windows is to:
a.Right-click the .link file.
b.Hover the cursor over Compress to.
c.Select ZIP File.
d.Click Save.
3.Upload the zipped *.link file to the database using the Explorer Widget in Enterprise, or the Docs & Photos form in EQuIS Professional.
4. (If desired) Repeat Steps 2 and 3 to upload a reference file (as a .zip file) to EQuIS. See Steps 8 and 9 for additional setup instructions for the reference file.
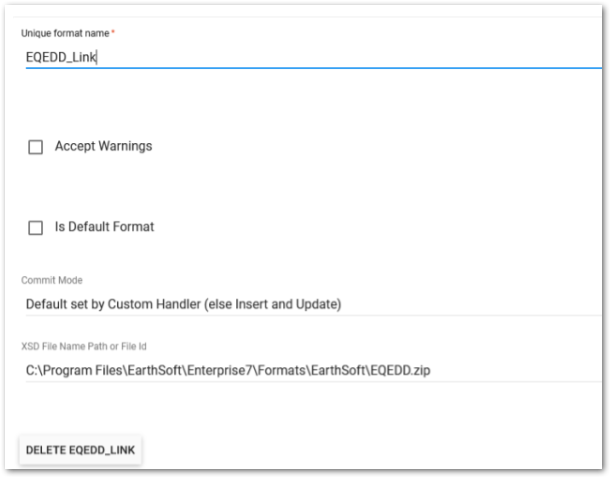
5.From the Administration Dashboard in Enterprise, open the Workflow Widget and create new format definition. In the new format definition, use the EQuIS format to which the *.link project file would map the EDD. When configured, select Save and Close.

6.In EQuIS Professional, open the tables DT_FILE and ST_CONFIG.
7.In the DT_FILE table, find the record for the saved *.link project file and copy the DT_FILE.FILE_ID.
8.In the ST_CONFIG table, find the records corresponding to the Unique Format Name created in Step 5 by filtering OBJECT_TYPE = [Unique Format Name]. Create a record where:
a.CONFIG_SECTION = efdManagementConfiguration
b.CONFIG_KEY = efd
c.OBJECT_TYPE = [Unique Format Name]
d.OBJECT_VALUE = LinkProjectFileID
e.STRING_VALUE = [DT_FILE.FILE_ID] from Step 7.
9.Create a second record in the ST_CONFIG table, using the same CONFIG_SECTION, CONFIG_KEY, and OBJECT_TYPE values from Step 8 adding:
a.OBJECT_VALUE = LinkSourceFileType
b.STRING_VALUE = [file type of the Link source file from the list of valid values below] (this will be the expected file type for EDDs being submitted)
Valid values for the LinkSourceFileType:
EXCEL – Microsoft Excel file
CSV – Set of comma-delimited text files
TXT – Set of text files
EQUOTE – XML eQuote file
eCOC – XML eCOC file
XML – Generic XML file
AGS – Set of AGS files
AB_CPT – Geotech (*.cpt, *.dpt) file
HT_CPT – Hogentogler sounding (*.cpt) and dissipation (*.dis) files
10.(Optional - If using a Link reference data file) Create a third and fourth record in ST_CONFIG, using the same CONFIG_SECTION, CONFIG_KEY, and OBJECT_TYPE values from Step 8, adding:
a.OBJECT_VALUE = LinkReferenceFileID;
STRING_VALUE = [DT_FILE.FILE_ID] for the Link reference file
b.OBJECT_VALUE = LinkReferenceFileType;
STRING_VALUE = [file type of the Link reference file from the same list of valid values as seen in LinkSourceFileType above]

11.Restart the EQuIS Workflow.
Incorrect configurations may result in the following errors in the Enterprise EDP Status widget:
Error 1:
EDD File xxxxxx.zip Rejected - No Data Found
Your EDD file 'xxxxx.zip' has been rejected because no valid data were found. Please make the necessary corrections before resubmitting the EDD.
CAUSE: An extra space ' ' at the end of the OBJECT_VALUE record.
Error 2:
Error starting Agent [FileProcess]: Exception has been thrown by the target of an invocation.
System.Reflection.TargetInvocationException: Exception has been thrown by the target of an invocation. ---> System.Configuration.ConfigurationErrorsException: File management configuration not found, Can't connect to database. System.IO.InvalidDataException: End of Central Directory record could not be found.
CAUSE: A .link Link project file loaded in DT_FILE and registered in ST_CONFIG.
Error 3:
Error Process Agent alert – Configuration Error
Error occurred while loading data: [Source File] System.Exception: Invalid Link Virtual Format setting for: [Unique Format Name from step 5 of configuring the ‘virtual’ format], error: dt_dfle.content issue LinkReferenceFileID att EarthSoft.Collect.Link.Helpers.LinkHelper.UseLinkInEntEdp(String formatName, Boolean linkSettingsValid, String linkSettingsError, String linkProjectFileName, DataSourceType linkDataSourceType, String linkReferenceFileName, DataSourceType linkReferenceFileType) at EarthSoft.Workflow.Clients.Default.DefaultFileProcess.PerformAction(ReservedTaskInfo taskInfo, TaskReservationMonitor taskReservationMonitor)“
Cause: A reference file was loaded in DT_FILE unzipped and registered in ST_CONFIG in step 9 of configuring the ‘virtual’ format.
