Form Name: Docs & Photos
File Name: N/A
Software: EQuIS Professional
Source: EQuIS Professional install
Description: The Docs & Photos Form can upload files to DT_FILE, or download existing files stored in the database. These files may include images (which can be associated with a location or location types for visualization), or spreadsheets or templates for use in report output. File type associations are stored in RT_FILE_TYPE.
Installation Instructions: The Docs & Photos Form is included with the EQuIS Professional installer. No additional steps are necessary.
Overview: Open the Docs & Photos Form, Upload a File, Download a File, View and Edit Properties of Uploaded Files, Troubleshooting
Open the Docs & Photos Form
1.In EQuIS Professional, click on Forms in the Home tab of the ribbon.
2.Select Docs & Photos, then Open.
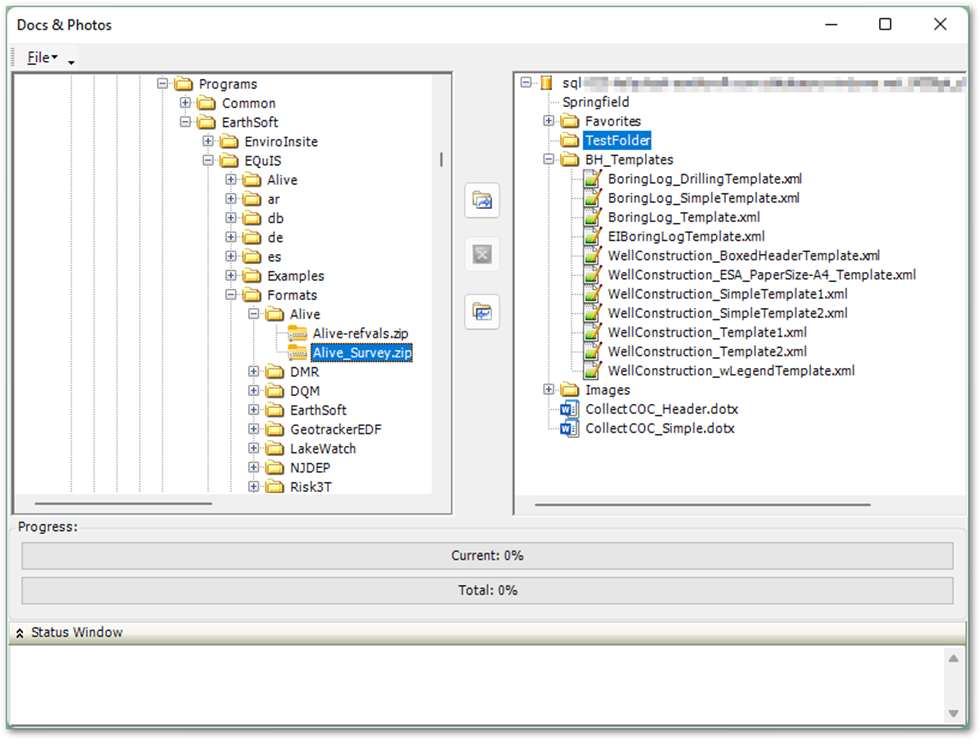
The Docs & Photos Form consists of the following areas:
1.File menu with the “Replace Existing” option
2.Left pane with the system’s folder structure
3.Middle pane with Upload (from system), Delete, and Download (from database) buttons
4.Right pane with the database's folder structure
5.Progress bar showing the upload status for the current file, plus total progress for all files
6.Status Window to show messages
Upload a File
1.In the left pane of the Docs & Photos Form, navigate to where the file(s) or folder(s) are located on the system.
2.Select the file(s) or folder(s) to upload.
Note: Avoid uploading files with special characters in the filenames; rename or create a copy to upload, if needed. |
3.If desired, pick a target folder in the database in the right pane for the file(s) or folder(s). Otherwise, the target will default to being in the root folder (equivalent to All Items in the Explorer widget) with the current FACILITY_ID set for the file. To add the file to All Items without a FACILITY_ID, select the top row, with the server name, as the target.
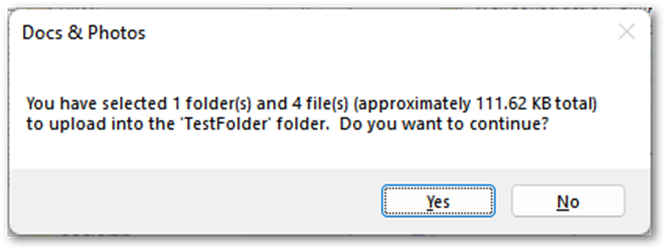
4.Click on the Upload button to transfer the files to the database.
5.Select Yes for the dialog that appears regarding the file(s) and folder(s) to upload. This will create a new record in DT_FILE associated with the file that was uploaded.
Download a File
1.In the right pane of the Docs & Photos Form, navigate to where the file(s) or folder(s) are located in the database.
2.Select the file(s) or folder(s) to download.
3.In the left pane, pick a target folder in the system for the file(s) or folder(s).
4.Click on the Download button to add the files to the chosen folder. The Status window will provide an update like the following:
File '[filepath]' download in 0.1 seconds.
View and Edit Properties of Uploaded Files
Modify properties of uploaded files in the DT_FILE table.
Troubleshooting
Issue: Receiving the following message when opening the Docs & Photos Form.
The multi-part identifier"g.facility_id" could not be bound. No column name was specified for column 1 of 'fac'. |
The message above appears for non-administrative users when opening the form. Click OK to clear the message and continue using the form.
Issue: Receiving the following message attempting to expand a folder for the system.
Access to the path '[filepath]' is denied. |
Access to the filepath may require one of the following approaches:
•Run EQuIS Professional as an administrator.
•Use a file path with sufficient Read access on the computer or network.