The Report Parameter Editor modifies selected parameter for a specified report, appearing in widgets that use data reports. On the Widget Editor screen, click the Edit ![]() icon to open the Report Parameter Editor for the selected report.
icon to open the Report Parameter Editor for the selected report.

Note: Use of the Report Parameter Editor is limited on dashboards containing the Workflow widget; for best performance, limit the Workflow widget to dashboards without reporting capabilities. |
Depending on the user's permissions for the selected report, the Report Parameter Editor allows the following actions:
•Download – To export the report output, click on the Download button to open a drop-down menu with download options. These options will download a report based on the selected parameters and specified file type. To prevent empty report output, download links only appear after selecting a facility if the report has a Facility parameter. Download links do not require the report to be saved.
The following file types are available for download:
•.txt – Tab-separated text file containing the tabular data.
•.csv – Comma-separated, double-quote delimited text file containing the tabular data.
•.xlsx – Microsoft Excel workbook containing the tabular data.
•.kmz – Google Earth kmz file containing Placemarks for each location and a balloon pop-up with the tabular data for that location.
•.shp – A .zip file containing the Esri Shapefile (locations as features) and other related files (*.dbf, *.prj, etc).
•.pdf – A Portable Document Format (PDF) file displaying the tabular data.
•View – The view button will run the report and display the output for grid reports.
Upon clicking this button for a non-grid report, the following message appears: "This report contained no data with the selected parameters".
Note: Reports with apostrophes/special characters in the columns will not load in the View screen for the Report Parameter Editor. |
•Save – A user with Edit permission for the opened report will see the Save button, and clicking on it will overwrite the current report with changes to the report name or any of the report parameters.
•Save As – A user with Create report permission will see the Save As button. The Save As option will create a new user report of the same type as the original report using the selected parameter values. Change the name of the existing report and select the Save As button. If the new user report name is not unique, edit the report name before saving the report. Selecting the Save As button opens the Explorer Widget tree, allowing the user to select which folder to save the report. The user needs Owner permission on a target folder to save there. With no folder select, the user report saves to the root folder.
•Send Me This Report – The report will be run with the selected parameters, but without being saved as a user report, and the report output will be delivered to the current user.
With both Edit and Create report permissions, the "Save" and "Save As" buttons will display. With at least View permission for the report, a user can run or download the report output. A user without any permissions cannot see anything about the report.
Note: Clicking either Download or View causes the report to execute immediately. When Enterprise is hosted as an Azure Web App, the execution is limited to 240 seconds. Thus, large reports that take longer than 240 seconds to run will time out. The 240 second limit on web requests is designed by Microsoft as a reasonable limitation on web requests to prevent DDoS attacks and to ensure that a site does not consume all available resources. This is not an EQuIS limitation.
Best practices for EQuIS Enterprise in Azure Web Apps include: 1.Limit the parameters of a report such that it runs under 240 seconds. 2.Run these types of reports as EQuIS Information Agents (EIAs). EIAs run outside of the Azure Web App and are not subject to the execution limitation. 3.Run the reports in EQuIS Professional. 4.Enable workflow agent WebJobAsync to allow the report execution to run as a background process.
Enterprise sites running in Windows IIS server environments are NOT affected by this Azure web request timeout, and the execution time out can be set by editing the web.config file entry "system.web/httpRuntime". |
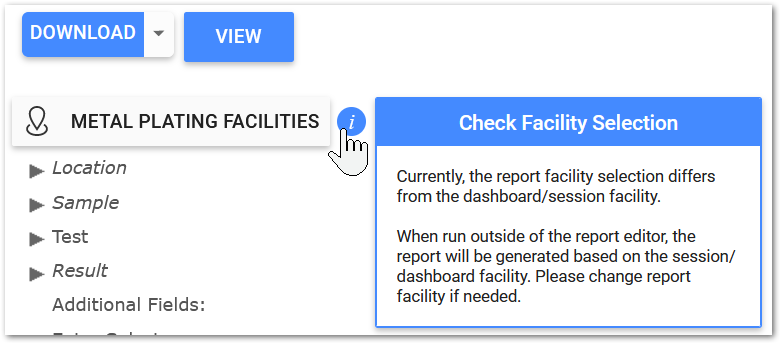
Facility Indicator
If the Facility ID of the report input differs from that of the dashboard, an information icon will appear near the Facility Chooser button. Hovering over the information icon will display a message with additional information:
Report Parameters
Click on a report parameter to set it and change the output that will generate for the report. Report parameter properties are described below.
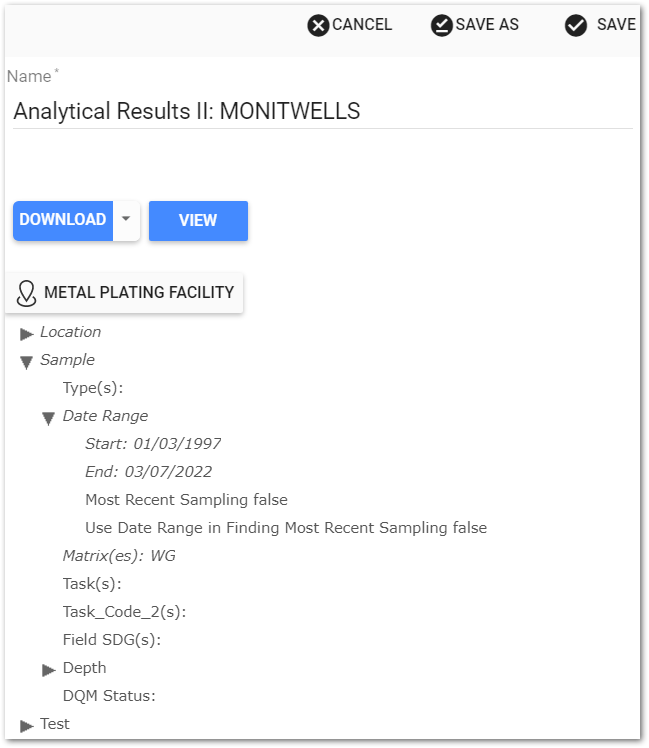
Grouping – Report parameters are grouped in a tree structure. To show all parameters within a group, expand the node by clicking on the name of the group. The image below provides a partial view of the Report Parameter Editor for an Analytical Results II report and selection of the Sample group.
Facility – Many reports include facility as an input parameter. Use the Facility Chooser button above the other report parameters (labelled with "Choose Facility" or the current report facility) to select a facility.
Remark – Hover over a parameter to display a remark tooltip, if one is available. Parameters with set values have names displayed in italics. The parameter values are listed next to the parameter name. If no value is shown, then no value has been set.
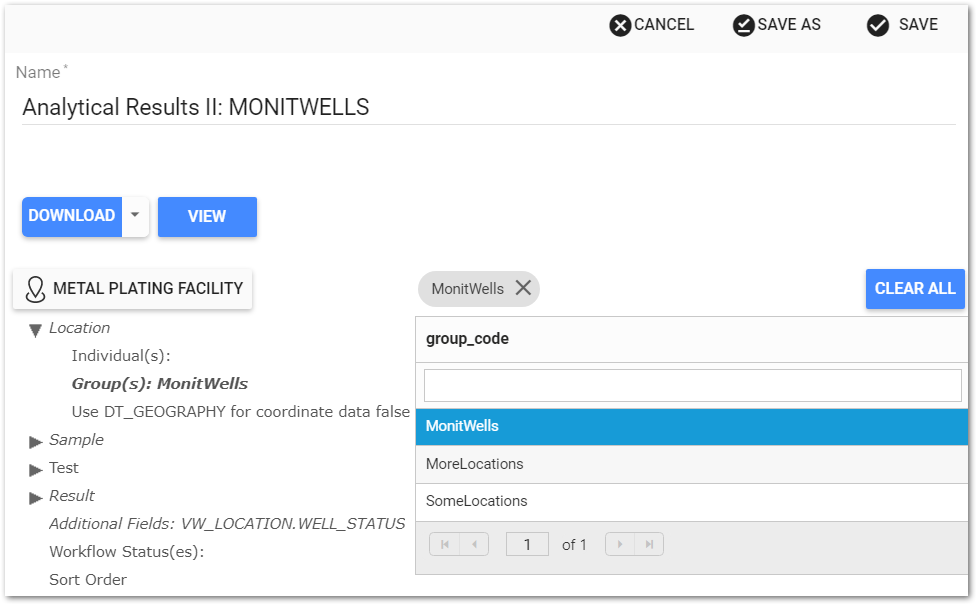
Values – To edit a parameter value, click on the parameter to show a pane with available values or options, such as a calendar tool. Select desired value(s). Selected values will be highlighted and appear at the top of the frame. Remove individual selected values by clicking the X next to the value. Click the Clear All button to remove all values.
Notes: •The Report Parameter Editor will list parameter selections alphabetically unless the report is explicitly changed. To have selected rows be sorted non-alphabetically, set ST_REPORT_PARAMETER.DISPLAY_TYPE = 'MultiSelectNonAlpha' as explained in Customize Report Parameters. This display type option is the default setting for the ARII-ALEII Crosstab Report, which allows the report parameter selections for the Crosstab Column Headers, Row Headers and Tabbed Data to stay in the order that they were selected. •Some report parameter values may be macro values. These values will have a message indicating that they are based on other data, and may change at any time. For these values, the actual value that is saved is a query. Usually, they are the default value for the type of report. Changing this value to any other value and changing back to the initial display value, will not restore the query as the saved value. The parameter will still indicate that it is a changed value. •The Report Parameter Chooser will show the customized display order for input parameters of a published report - see how to customize report parameter display order. |
Report Parameter Types
There are six different types of parameter values.
•Text – When editing this type of parameter, a text box is displayed with the current parameter value, if set. Changing the text in the text box updates the parameter value.
•List – When a list parameter is being edited, a list of possible values from which to choose will be displayed. The current value(s) will be highlighted in gray in the list and accompanied by a check box to the left of the value. Clicking on the check box in the list will select the value. The value can be cleared by unchecking the check box next to the value name in the drop-down list. Selected values will be displayed in the text box for the parameter.
oSingle-Select – This type of list parameter only allows a single value to be selected at a time. Clicking on a new value in the list will replace the current value.
oMulti-Select – This type of list parameter allows the selection of multiple values. The values are displayed in the text box as a pipe ("|") delimited list. Clicking on a value in the list that is not currently selected will add that value to the selection. Clicking on a selected (highlighted) value will de-select it.
•Yes/No – This type of parameter can only have a Yes or No value. To change the value, click on the drop-down and click on the check box next to either the Yes or No values.
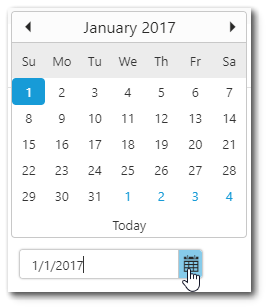
•Date – The default date value may be: (1) a static date that never changes, (2) a macro value based on other data and can change at any time, or (3) a relative dynamic date, such as "Today" or "First day of the Year", which will evaluate to the current representation of this relative date and may be a different date than the last time the report was run. If the value is other than a static date, a message will be displayed next to the value, indicating it is one of these types of values. When editing a date parameter, a text box and a calendar tool are displayed.
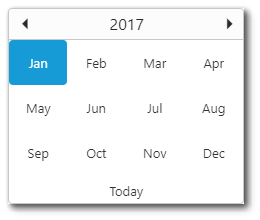
To select a static date, use the calendar tool or manually enter the date into the text box. Please note that the date format is specific and is based on the current culture as set in the browser. Changing the value in the text box will also update the calendar tool. The calendar shows the selected date highlighted with a solid rectangle. To select a different month or year, either use the scroll arrows until the desired month/year is displayed or click on the name of the month at the top of the control. This changes the calendar tool from the month view to the year view. Click the header again to display the decade view. Select the desired month/year combo to return to the month view to pick a specific date.
Month View
|
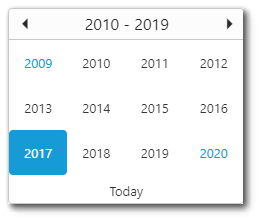
Year View
|
Decade View
|
|---|
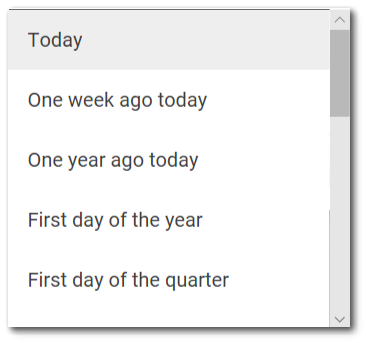
To set a relative dynamic date, select the Select dynamic date drop-down menu. Scroll through the relative date options and select the desired option. The calendar tool will automatically update to reflect the selected relative dynamic date.
Sort Order
For grid reports, users can add sort columns and define the sort order for each sort column to sort the output of a grid report. The "Sort Order" parameter appears at the bottom of the report parameter tree. This parameter only appears in EQuIS Enterprise.
Clicking the Sort Order parameter displays the "Add" button and any existing sorting. Click the Add button to show drop-down menus for selecting the report column to be sorted and for selecting the sort order (ascending/descending).
|
|
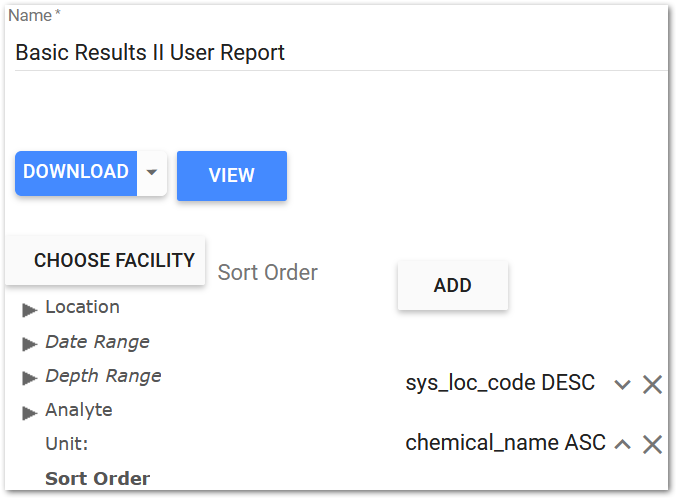
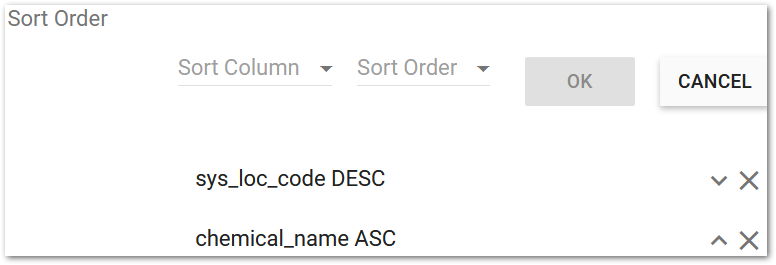
After selecting the desired sort column, click the OK button. Sort columns are displayed with the column name and sort order ("ASC" for ascending and "DESC" for descending). Multiple sort columns can be added. Sort columns are displayed and saved in the same order that the user adds them. Use the "X" next to a sorted column to remove it.
Reorder sort columns with the up and down arrows to the right of the sort column name. The above below shows SYS_LOC_CODE with a descending sort order, followed by CHEMICAL_NAME with an ascending sort order.
Save the report with the sort order selections. The SortOrder saves to ST_USER_REPORT.USER_REPORT_INFO and will display upon reopening the report in the Report Parameter Editor.