The Depth Form in EDGE provides a user-configured custom form for depth related data e.g. downhole data and other geotechnical information. The Depth form is used to populate a variety of sections in the EDGE EDD, dependent upon the configuration of the form. There is only one Depth Form available.
The Depth Form may be made visible using the “Show/Hide Tabs” item on the EDGE Menu as explained in Form Logos.
Setting up the Depth Form
1.Configure the Depth Form caption as explained in Configuration Plugin Tool (optional).
2.The Depth Form may be customized with a logo. For further information refer to Form Logos.
Add Data Sections
A Data Section permits display of data that may be used as header information for the form.
1.In the Depth Form tab, click the Data Sections drop-down.
2.Click the name of an existing Data Section, or click New Section to add a new section.

3.A "Data Section" window will appear. All Data Sections available from the "Setup" menu may be edited as explained in Setup of Data Sections.
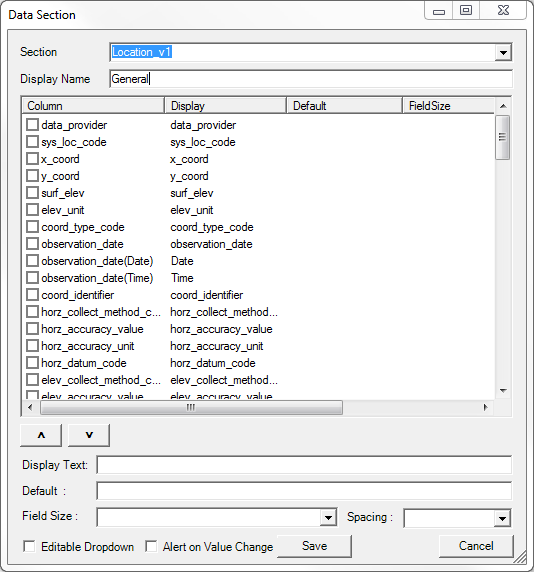
4.When selections are complete, click Save.
5.A Data Section is added to the form.

The section may be edited by returning to Data Sections and selecting the appropriate section.
Add Depth Settings
Depth Settings add vertical columns to the form, which may contain depth related data.
1.Add Depth Settings to the Depth Form by clicking the Depth Settings drop-down, then clicking New Depth Column.

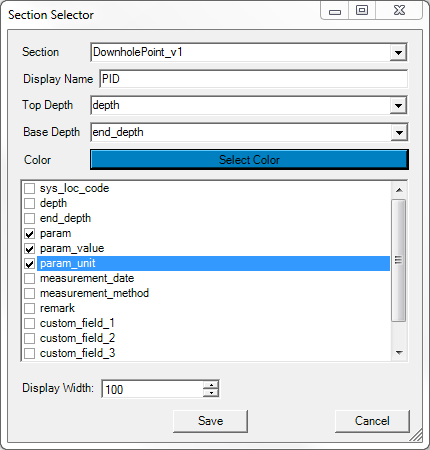
2.A Station Selector dialogue will open to allow configuration of the information that will appear in the column:
3.Section - select which section of the EDGE format will be used for this column, e.g., DownholePoint_v1. This dialogue is active on initial setup, but grayed-out if the section is edited.
4.Display Name - a user friendly name for the column
5.Top Depth & Base Depth - specify the top & base depths of the interval
6.Color - select the fill color for the box
7.Check Box - toggle to make a field visible/invisible as a label in the depth section
8.Display Width - control for the width of the column
9.Select Save or Cancel to exit the dialogue.
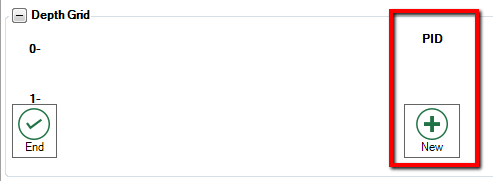
10.A new column is added to the Depth Grid section.
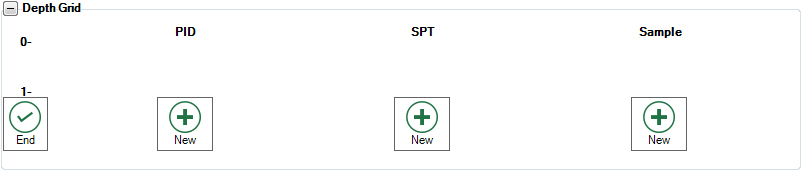
11.Additional depth columns can be added in the same way, including FieldSample information.
12.Signature Panes may be added to the FieldSampleForm and to the Depth Form as described in Signature Panel.
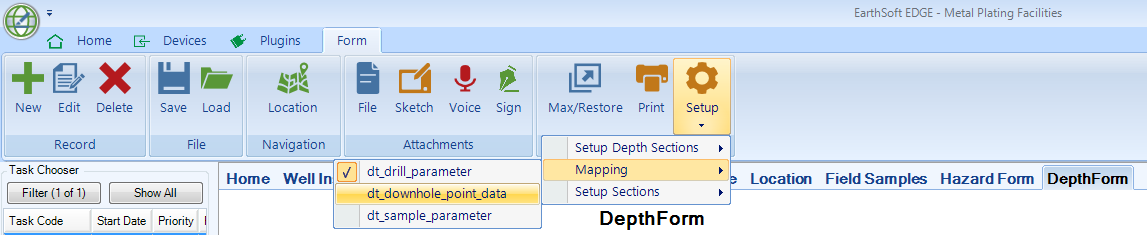
Set Data Mapping
Mapping is an important option that needs to be set in order to determine to which tables the data will be mapped in EQuIS. The data can be mapped to one of three tables in EQuIS:
•DT_DRILL_PARAMETER (DEFAULT). Please click on Drill Parameters Values in EDGE for details on how to set up and remap drilling parameter values in EDGE.
•DT_SAMPLE_PARAMETER
•DT_DOWNHOLE_POINT_DATA
To set the mapping, click Mapping in the form's toolbar and select the desired table from the list:
Using the Depth Form
Once setup is complete, the Depth Form is ready for use as follows:
1.Select the desired Task in the Task Chooser.
2.Select the desired Location in the Location Chooser.
3.Click New to create a new instance of the Depth Form for the selected Location.
4.Any data that already exist in the EDD will be pre-populated in the form.
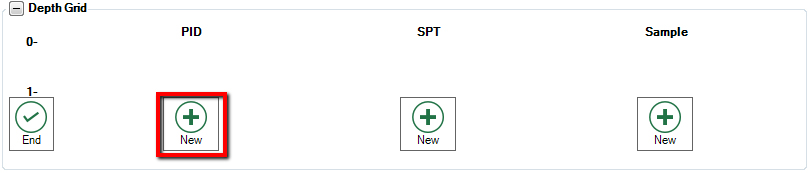
5.To add depth related information, click New in one Depth Setting column.
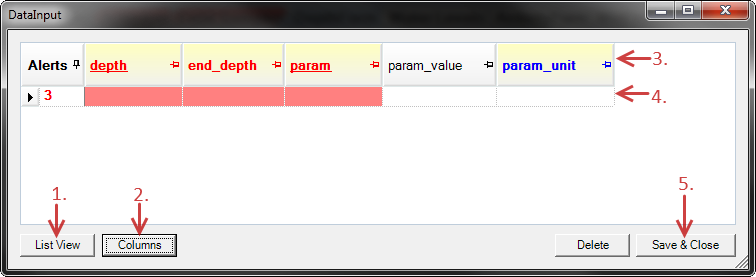
6. A Data Input dialogue will open. The exact layout of the dialogue will depend upon the format section being used for this
column. However, the following will always apply:
•Each dialogue will contain the option to display the information as a List View.
•Each dialogue will contain the Columns icon, which allows you to select which columns to display. For further information click on Column Chooser.
•Any column may be Pinned to fix the column order. After the columns have been configured for the first time, the configuration will be retained for future use.
•Data may be entered in the row.
7.Click Save to save the data in the form.
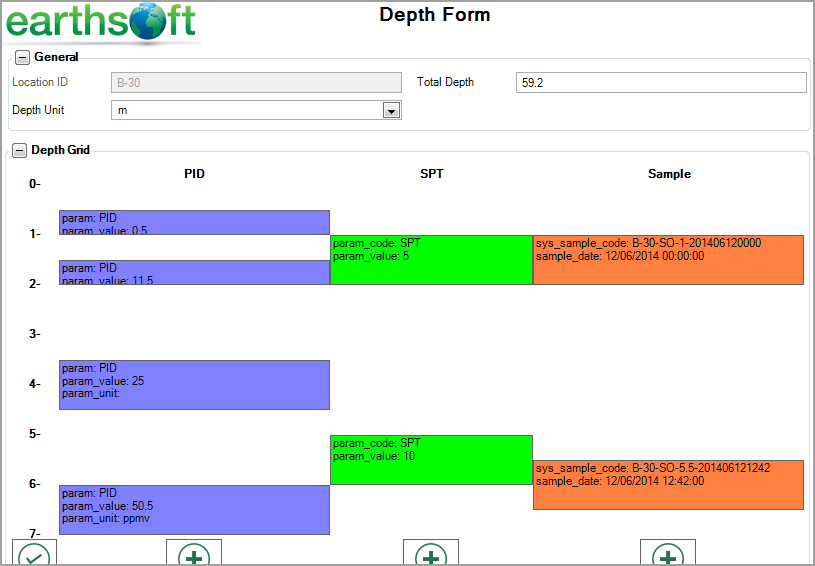
A colored bar will display the relevant data added to the Depth Form.
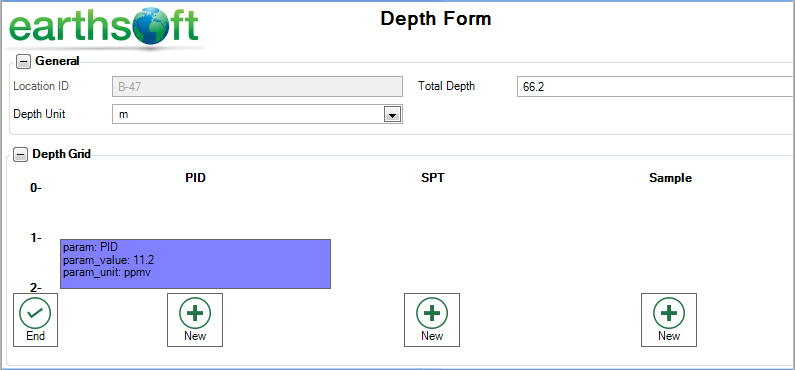
Additional data rows may be added to each of the columns to complete the record for each location.
Once the data is complete for each location, click End ![]() and then click Save to save the EDD.
and then click Save to save the EDD.
Note: In the Depth Form, only one measurement of drill activity is supported for each location. To have more than one drill activity, use the Drill Activity tab. |