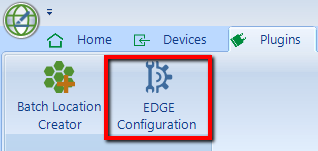
The configuration tool allows the user to edit the standard configuration of EDGE, including Captions, EDP Export, Enumeration Values, Format Sections, and Tabs. To access the EDGE configuration tool, navigate to the Plugins ribbon and click on the EDGE Configuration button.
Tip: If the configuration tool button is missing from the Plugins ribbon, check the \EDGE\Plugins\Tools folder for the required EDGE Configuration.dll file. If this file is missing, please contact EarthSoft Support. |
Captions
Three virtual fields appear throughout EDGE: ALERTS, LOCATION_NAME, and TIME. These fields are referred to as "virtual" as they appear in the EDGE user interface for ease of reference for the user. However, they are not present in the EDGE format, and the captions cannot be edited within the Format Section of the Configuration tool.
Edit the Captions in Virtual Fields
1.Select Captions.
2.Add the required caption to the Custom column for each field.
3.Save and close.

4.Check the caption edits by navigating to a place in EDGE that features the field, such as the Field Samples tab, which shows the Alerts field.

EDP Export
If a location record in LOCATION_V1 has EDGE_UPDATE_YN set to "N", that location record will remain in the EDD, but a database record will not be created for it in the DT_LOCATION table during the Create step in EDP. When location data are created or edited from within EDGE (e.g., in the Location tab), EDGE automatically sets LOCATION_V1.EDGE_UPDATE_YN to "Y" for the new or edited locations.
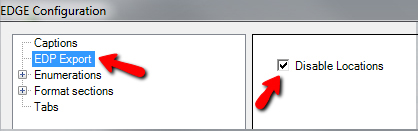
If Disable Locations is enabled in EDGE Configuration > EDP Export, all LOCATION_V1.EDGE_UPDATE_YN values will be set to "N" after completing the EDP Export process in EDGE. Therefore, no location data in the EDD will be uploaded to EQuIS when this feature is enabled.
Enumerations
These are values that are stored within the [Format]-enum.xml file, allowing the user to set any field as a drop-down from the enumeration.
Manage Enumerations
To create a new enumeration list, click the New button. The user will be prompted to name the list as well as define the maximum value length (number of characters) for the members of this list.
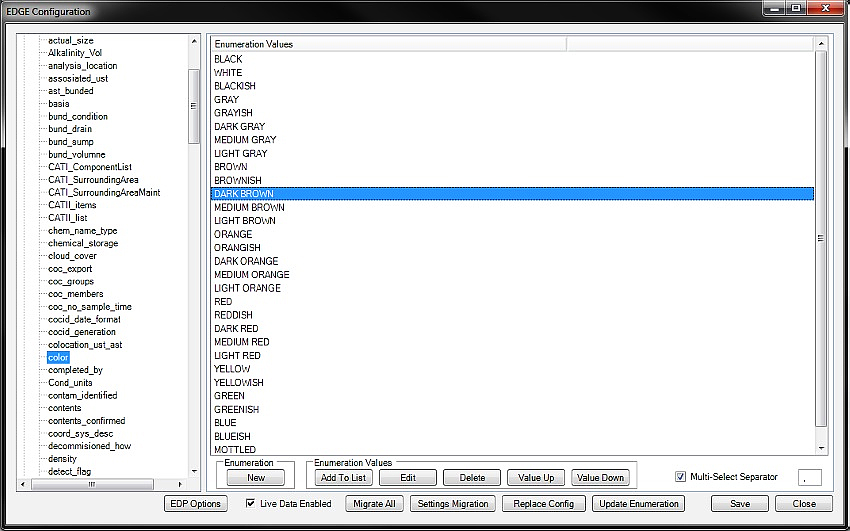
To manage an existing enumeration list, complete the steps below:
1.Select the enumeration to be edited within the left window, under the enumeration node.
2.The enumeration values are displayed in the right window.
3.To add a new value, click the Add to List button and enter text.
Note: Use of commas (,) and blank space can cause drop-downs referring to enumerations to fail in EDGE. |
4.To edit a value, select the required enumeration from the list and click the Edit button. The Edit Form will be displayed, allowing the user to edit the text.
5.To delete a value, select the enumeration and click the Delete button. A warning message will be displayed. Click OK to continue with the deletion.
6.To edit the display order of the enumerations, select a value from the list and use the Value Up and Value Down buttons.
Values listed in a drop-down that references an enumeration will display in the same order that is set in the Configuration Plugin Tool. This allows the user to place more commonly-used values at or near the top of the list, for ease of access in EDGE.
7.To add multi-select support to the enumeration, meaning that more than one value can be selected within EDGE, check the separator check box and type in a separator that will be used within the display string when more than one value is selected. For example, to enable the selection of multiple color values and have each choice separated by a comma (,), select the color enumeration, check Multi-Select Separator and enter a comma in the box.
Note: Instead of supplying drop-down lists on EDGE fields, some enumerations will change functions of EDGE depending on which value is listed first. Examples of these kinds of enumerations are those related to the Sample ID Builder. |
Dynamic Enumerations
Enumerations have the option of dynamically updating themselves from Lookup or other tables. This feature is called "Dynamic Enumeration" and allows the user to access tables and setup specific enumerations without the need to configure enumerations by manually introducing data, as described in the paragraph above. An example of how to setup a dynamic enumeration is described as follows.
Setup a dynamic enumeration in Section FieldSample_v1, sampler column, defined as Field Lead Name.

The same enumeration is assigned in Configurations.

The user selects to lookup in the DT_PERSON table, filtering the PERSON_NAME based on COMPANY_CODE (Build Select Filter in the figure below). The contents of the dt table are available through the reference value file.

The relationship between the dt table and the rvf file is as follows: person selection uses the DT_PERSON table, showing the PERSON_NAME, based on a lookup for COMPANY_CODE. The result of setting up this dynamic enumeration is exemplified below, where the multiple check enumeration shows all PERSON_NAMES from the DT_PERSON table, filtered by the COMPANY_CODE field.

Transfer Enumerations to a New Version
After installing a new EDGE version, the user may wish to transfer particular settings from an existing install (older version). This is done using the Migrate All, Replace Config and Update Enumeration in the Configuration Plugin Tool.
Migrate All will migrate the EDGE settings file as well as the current format's enumeration and configuration files. This process is explained in detail in Migrate Settings, Enum and Config.
The settings, enumeration or configuration files can be individually migrated using the other buttons. Each one will prompt the user to navigate to the new file to migrate in. The settings file saves changes to Application Options and visible tabs. The Configuration file stores changes to the data tabs that are made in the Format Sections area of the Configuration Tool. The enumeration file saves enumeration lists as explained above.
Note: When using these functions within the EDGE Configuration Tool, the target file will be overwritten. Please rename/backup the target file if you may wish to restore it. |
Format Sections
The Format Section shows all sections that are available within the format. This allows the user to change the following attributes on data fields as they appear in EDGE:
•Caption
•Default value
•Lookup and lookup options
•Required fields
•File attachment option
Note: Only Format Sections assigned to group "field" in the format .xse/.xsd files are accessible in the configuration plugin. |
Select the Format Section to edit within the left window under the Format Section node. There are two tabs: one for editing the columns within the Format Section, and the other for editing the file attachment properties. Any default format settings are highlighted in blue text, and any that have been over-ridden are in red text.
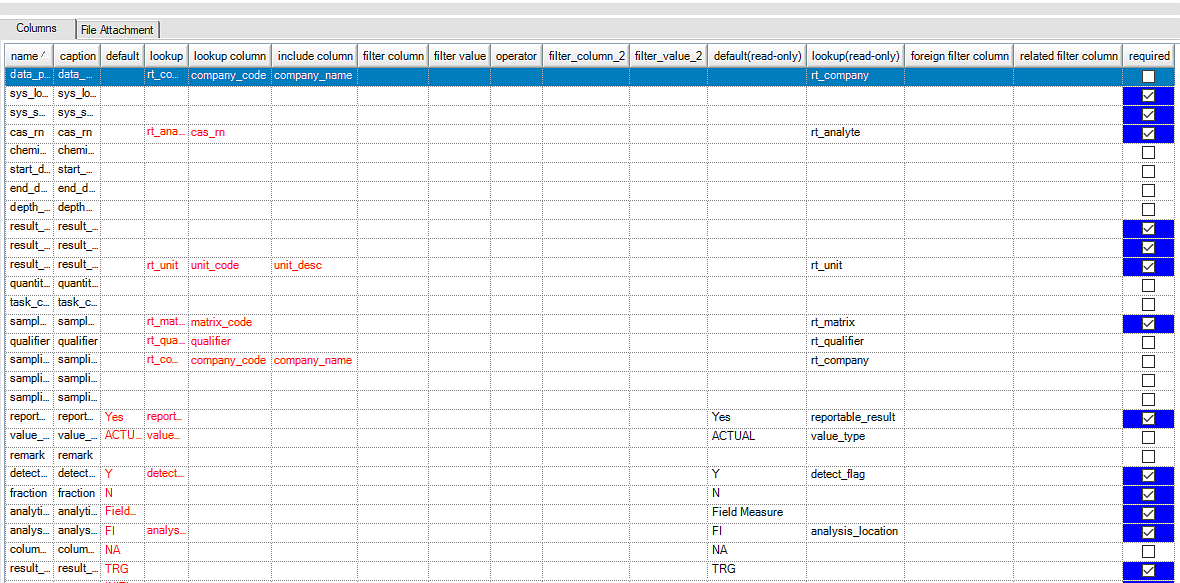
Columns Tab
Caption – The caption column allows the user to set a caption for the selected column name. This caption will be displayed when the column is shown.
Default Value – This sets the default value to insert within the column when a new record is created.
Lookup – This allows the user to set a column to look-up the reference values or enumeration lists, and gives the ability to filter the chosen lookups.
1.Choose the reference table, enumeration list or other data sections/fields in EDGE from the lookup column drop-down. If the desired lookup is not available in the drop-down, go to Create a Reference Value File.
2.Select which column within the lookup destination to display by selecting a value from the lookup column drop-down.
3.To include an extra column within the drop-down, select an additional field from the drop-down under include column.
Note: To display more than one additional column, the user can add columns directly in the EDGE_Config.xml file. Add additional fields, separated by commas, in the <includecolumn> property like shown below:
<Equipment_Parameter_v1> <name>cost_unit</name> <lookup>rt_unit</lookup> <lookupcolumn>unit_code</lookupcolumn> <includecolumn>unit_desc, unit_type</includecolumn> |
4.There are a number of ways to filter the lookup lists that are displayed:
a.Select the data field on which to filter in the filter column drop-down.
b.Type a string into filter value. It will filter out all records where the filter column value does not match the filter value string.
c.If desired, set additional filter values using the second set of filter columns. Set the operator based on the desired result:
i)Set operator to OR to filter a list on one parameter, but with two values (e.g., show sample_type_codes where sample_type_class = "FQ" OR "LQ")
ii)Set operator to AND to do a multi-parameter filter (e.g., show sample_type_codes where sample_type_class = "FQ" AND system_or_user = "U")
d.The foreign filter and related filter columns allow you use another data field in EDGE to dynamically filter the lookup list on the target field. When set up, the user would enter a value in one field and based on the entry there, another field's drop-down list would be filtered.
i)For example, assume that the user will enter or select an RT_LOOKUP.REMARK value in FieldSample_v1.custom_field_1 that should then decide what RT_LOOKUP.LOOKUP_CODE options are available in drop-down on custom_field_2. For the custom_field_2 row, enter:
•lookup=rt_lookup
•lookup column=lookup_code
•foreign filter column=custom_field_1
•related filter column=remark (meaning rt_lookup.remark)
•If no value is entered in custom_field_1, all RT_LOOKUP.LOOKUP_CODEs that do not have REMARK populated will be available for selection.
Required – The user can make EDGE hold additional fields as required within the opened format by checking the Required check box for the column. Fields that have Required checked with blue highlighting in the cell are defined as required in the format and may not be unset as required.
Transfer Configuration to a New Version
1.Click on Replace Config.
2.Select which configuration file to use to replace the current configuration file.
This will transfer the configured settings (e.g., custom field captions and default values) to the new version.
Note: When using Replace Config within the EDGE Configuration Tool, the target file (EDGE_Config.xml, for the standard EDGE format) will be overwritten. Please rename/backup the target file if you will need to restore it. |
File Attachment Tab
To enable a format table to support file attachments within EDGE:
1.Select the Enabled check box.
2.Set values for the "Place type," "Place code," and "Place sub-code" that will be entered within the DT_FILE record when a file is attached.
3.Filter value enables you to set a filter for the file browse dialog.
a.File filtering is optional. If not defined, EDGE will use the default filter: jpeg, jpg, raw, all files. For each filtering option, the filter string contains a description of the filter, followed by the vertical bar (|) and the filter pattern. The strings for different filtering options are separated by the vertical bar.
Example: Text files (*.txt)|*.txt|All files (*.*)|*.*
b.Monitor Picture Folder – When files are added to the picture folder any tabs that have this setting enabled will display the new files within the directory. When the picture cell in the row is clicked, a form will display showing all the newly added files.

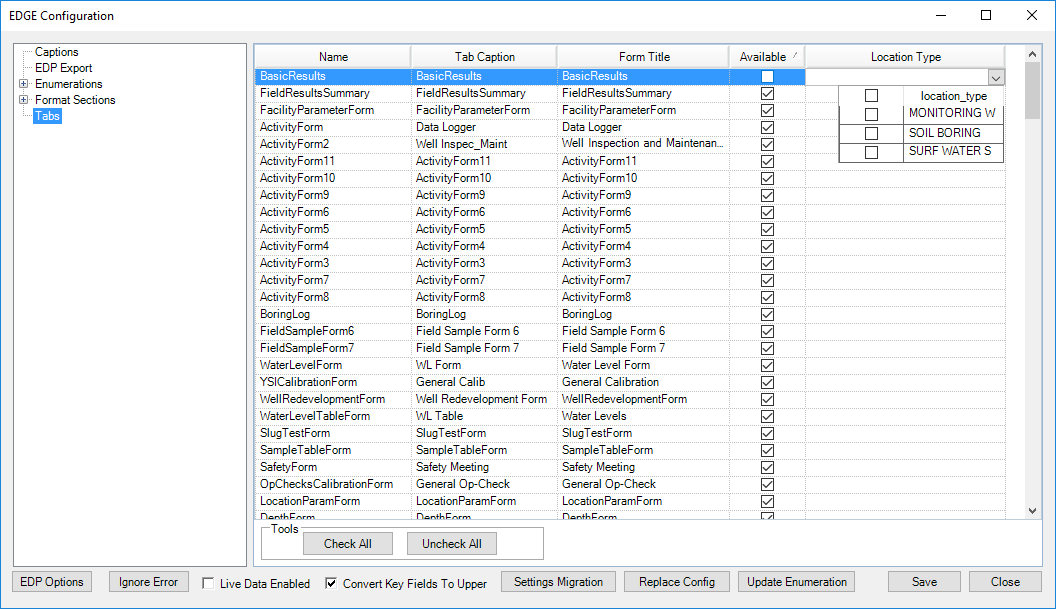
Tabs
This section allows the user to edit the display name of tabs and titles of forms, and also to choose whether or not they appear in the EDGE Data Tab Chooser.
1.Select the Tabs node.
2.To edit the display name of the tab, edit the value in the text box of the Tab Caption column.
3.To edit the title that appears in the header of a form, edit the value in the Form Title column.
4.The Available check box may be used to make the tab visible or not visible in the Data Tab Chooser. Note: Making a tab unavailable also means that EDGE will not load the tab/form in the background on start up. You can improve performance and start up time in EDGE by reducing the number of available tabs. Check or un-check all tabs using the tools located at the bottom of the form. This is useful for when setting up your first configuration.
5.The Location Type field helps define what the form is used for. Once set for a form, creating a new form record will produce a warning if the location currently selected in the Location Chooser does not have the same Location Type. A location's Location Type can be checked or modified in the Location tab's LOC_TYPE column.
EDP Options – To manage appearance settings for EDGE and the version of EDP integrated into EDGE, See the article EDP Settings for more details.
Ignore Error – This dialogue allows users to decide if certain types of data errors should not produce error alerts in the Location Chooser or form tabs. See Ignore Error for more details.
Live Data Enabled – Enables or disables the use of EQuIS Live tables, as explained in more detail in Turn On/Off Live Sections in Format.
Convert Key Fields To Upper – This option, enabled by default, will capitalize the primary key fields to uppercase. Disabling this option is not recommended for users who submit data to Oracle database because those databases are case sensitive. EDGE will give this same warning when the user un-checks this option.