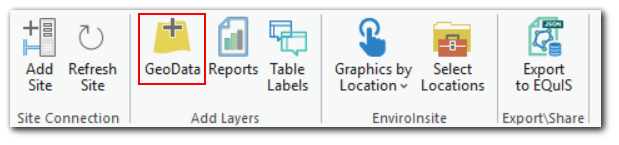
The Add EQuIS Data form, accessed via the Add EQuIS Geospatial Data button, enables plotting locational and facility data from EQuIS on ArcGIS Pro maps.
Data Requirements
ArcEQuIS requires that facilities are properly configured for locational data, particularly DT_FACILITY.COORD_TYPE_CODE and DT_FACILITY.IDENTIFIER. See also GIS.DefaultSpatialReference and VW_LOCATION Toolbar GUI.
Point Layers – Point coordinates pull from DT_GEOGRAPHY when populated, else from DT_COORDINATE.
Polygon Layers – Polygon coordinates pull from DT_GEOGRAPHY only. To create EQuIS polygons from ArcGIS Pro, see Add Features to Layer. To migrate polygon data from other data sources please contact EarthSoft Support.
Add Facilities and Locations
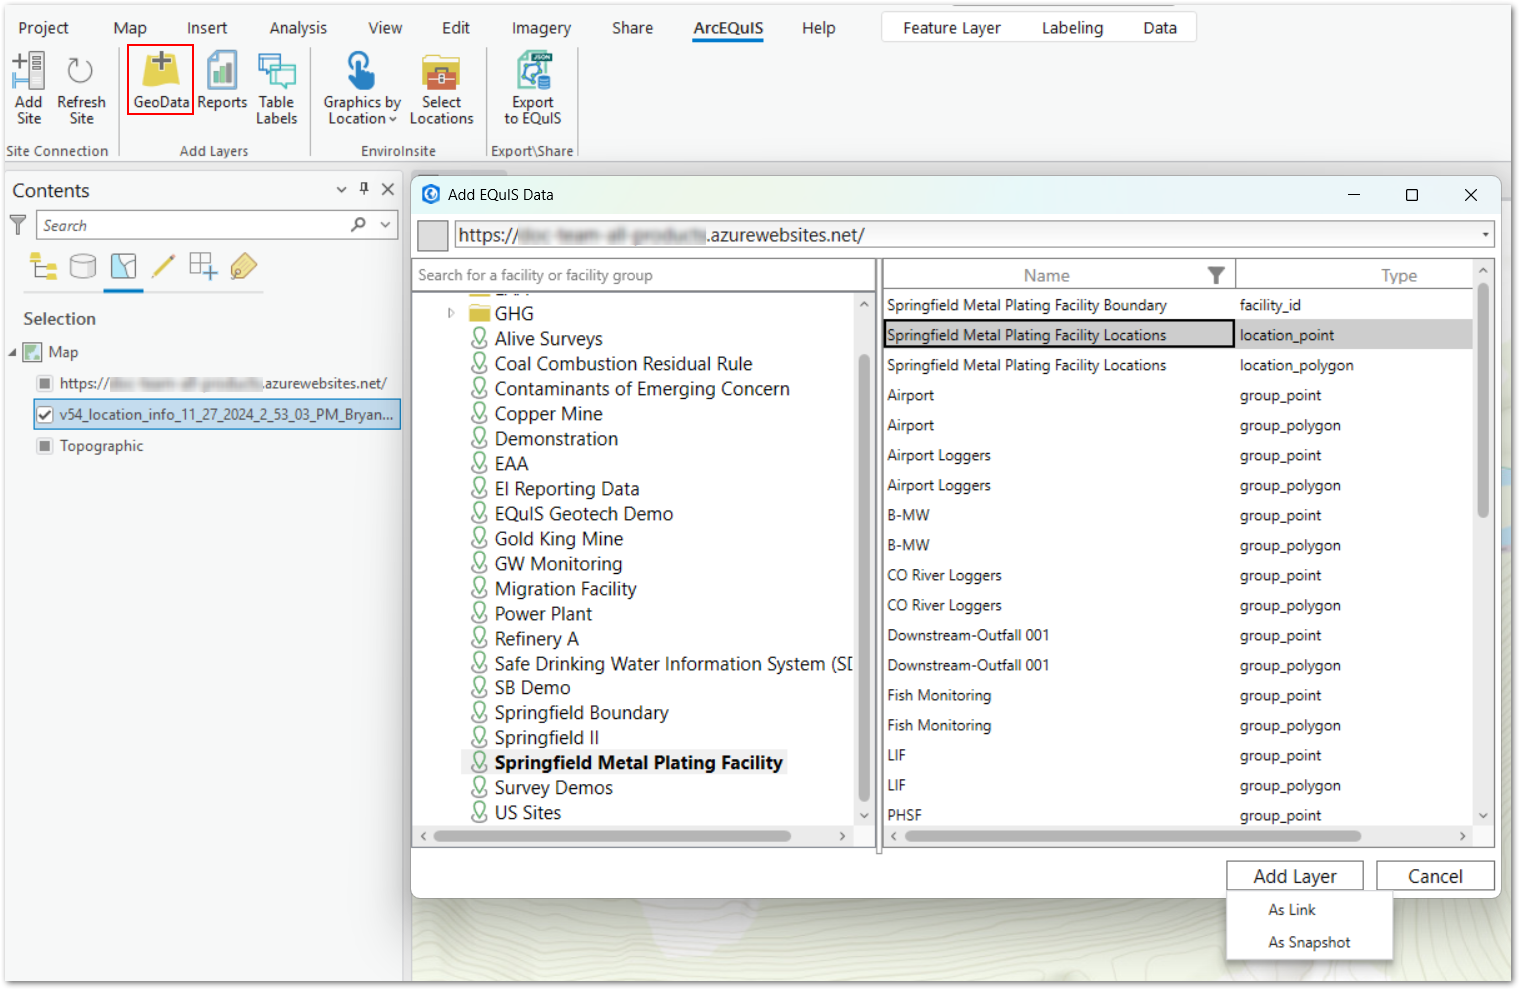
1.Click the Add EQuIS Geospatial Data button on the ArcEQuIS ribbon to open the Add EQuIS Geospatial Data window.
Note: The Add EQuIS Geospatial Data button will be disabled until a site has been added using the Add Site button. |
|---|
If a site connection is not already present, the Add EQuIS Enterprise Site window will also open for the required data entry (see How to Connect).
If a site is present, verify that the site URL in the Site Chooser is correct.
2.The Add EQuIS Data window displays all facilities to which a user has access in the left pane. Facilities can be searched using Facility Name, Facility Code, or Facility ID. If not previously selected, select a Facility or Facility Group to display the available data layers on the right pane:
•Facility Boundaries (polygon) – Polygon boundaries for a single facility from the DT_GEOGRAPHY table (if applicable) or a DT_FACILITY table bounding box
•All Facility Locations (point)
•All Facility Locations (polygon)
•Location Groups. All location groups associated with the chosen facility are shown (RT_GROUP.FACILITY_ID). Layer names pull from RT_GROUP.GROUP_DESC when populated, else from RT_GROUP.GROUP_CODE.
Note: The My EQuIS Facilities polygon is defined by coordinates from the DT_GEOGRAPHY table, if populated. If facility boundaries are not populated in the DT_GEOGRAPHY table, EQuIS auto-generates a bounding polygon based on facility extents as defined in the DT_FACILITY table by the XMIN, XMAX, YMIN, and YMAX fields. If neither table is populated with the required data, the My EQuIS Facilities layer will not plot. |
|---|
3.Select one or more of the layers and click Add Layer. Choose to add the layer As Link or As Snapshot.