Point and polygon features may be created in ArcGIS Pro. To save features to the EQuIS database, they must be added to link layers (i.e., active database connection layers rather than snapshot layers). Added points will create a record in the DT_COORDINATE and DT_LOCATION tables, and added polygons will create a record in the DT_GEOGRAPHY table (and the DT_FACILITY table if creating a facility in the "My EQuIS Facilities" layer).
Note: Features cannot be added or modified in a facility’s boundary layer. To create a new facility or facility boundary, use the “My EQuIS Facilities” layer. If facility boundaries are not populated in the DT_GEOGRAPHY table, the Facility Boundary layers display a rectangle based on the facility extent as defined in the DT_FACILITY table by the XMIN, XMAX, YMIN, and YMAX fields. |
|---|
Add Features to a Layer
1.Click the Add EQuIS Geospatial Data button to add a layer to the map from the ArcEQuIS Add EQuIS Geospatial Data window.
a.Data must be added As a Link.
b.User must have Editor permissions, through Enterprise, to edit the layer.
c.Only location layers and the “My EQuIS Facilities” layer can be modified. Facility Boundary layers cannot be modified.
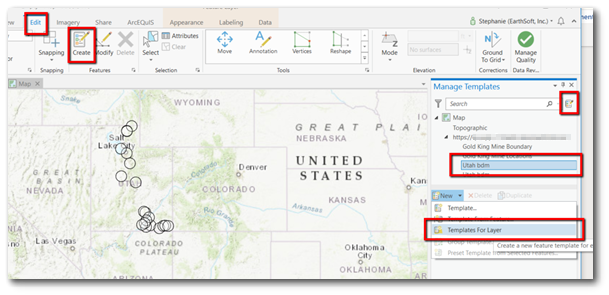
2.In the ArcGIS Ribbon open the Edit tab.
3.Select Create.
4.In the “Create Features” Window that opens, click the Manage Templates button on the right side of the search bar to create a new template. This is required for adding a new feature.
5.In the “Manage Templates” window, top pane, select the Layer where the features will be added.
6.In the lower pane, select New > Templates For Layer.
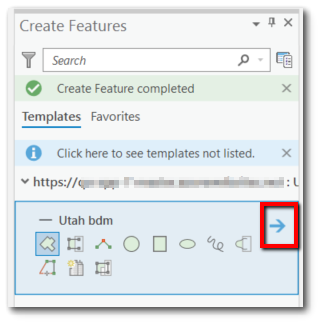
7.Go back in the “Create Features” Window (click the button to the right side of the search bar).
8.Select the target link layer.
9.Do not draw the feature yet! Metadata must be entered before drawing the feature or you will receive an error after it is drawn on the map.
10.Click the arrow on the right of the Templates pane “Open the Active template pane”.
11.Enter the Metadata for the added feature.
12.For location and facility features, the code field (populated with either a new SYS_LOC_CODE or FACILITY_CODE, respectively) is required. If the code is not unique, you will receive an error when adding the feature to the database.
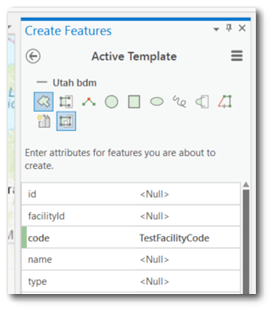
13.For new facility features, coordinateType (COORD_TYPE_CODE) and identifier are also required to enable plotting and adding new locations.
14.Select the tool to use to draw the feature on the layer. (The Polygon Tool is the recommended default). On the map, draw the point/polygon to add to the layer. Double-click to complete drawing.
15.A message will display indicating the feature is being added to the layer.
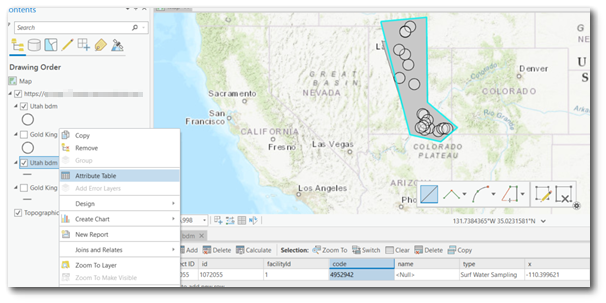
16.Verify the feature was added to the layer by viewing the layer’s “Attribute Table” or the respective table in EQuIS Professional (e.g., DT_GEOGRAPHY, DT_COORDINATE, DT_LOCATION, DT_FACILITY).
17.To stop editing, choose the Select tool.