The EQuIS Geotech - Lithology Editor (BETA) widget allows users to view, edit, add, or delete geotechnical records from the DT_LITHOLOGY and DT_LITHOLOGY_COMPONENT tables. EQuIS Geotech Schema and licensing are required to use this widget.
Note: The widget is available in the Widget Chooser but can only be added to a dashboard by users assigned to the Admin role. Users without appropriate permissions will not be able to use the widget to modify data. |
|---|
Users must enter a comment that saves to the DT_NOTE.NOTE_TEXT field to serve as a record of the changes made to the database via the widget.
Note: A NOTE_TYPE = “Geo_Lithology_Revision” record is needed in the RT_NOTE_TYPE reference table for the widget to be able to save changes to the database and generate the comment record. |
|---|
These changes can be examined with the Geotechnical Widget Data Revisions report.
This article contains the following:
Widget Interface
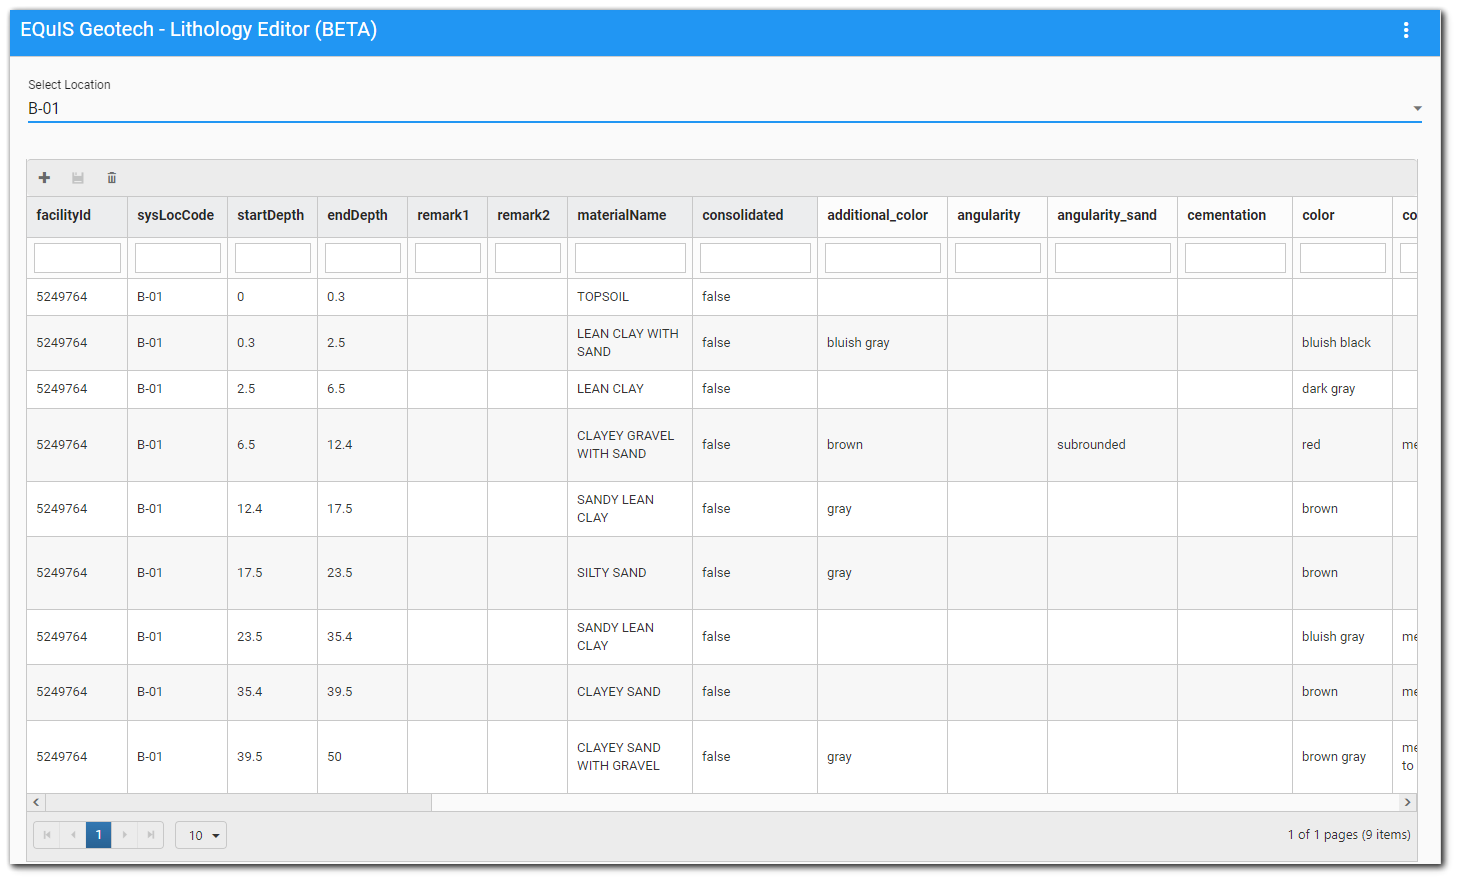
Users can view or modify records for one location at a time by selecting the desired location from the Select Location drop-down menu. Locations listed in the drop-down are based on the selected facility of the dashboard. If a facility is not selected, the Select Location drop-down is disabled and a message is displayed on the widget.
The widget has a grid that displays the lithology and lithology component data for the selected location. The data are retrieved from the DT_LITHOLOGY and DT_LITHOLOGY_COMPONENT tables, where DT_LITHOLOGY_COMPONENT.COMPONENT_TYPE = 'Geotechnical'. The column headers displayed in the grid can be configured in the Widget Editor (see Widget Properties section below).
The following actions can be performed within the grid by the user:
•Add new lithology records.
•Delete existing lithology records.
•Update existing lithology records.
•Save changes to the database.
Grid Functionality
Filtering – Beneath each column header is a filter box that filters on that column only. Enter a search term (one or more characters) in the appropriate search box beneath the column header. Only records that contain the search term will be displayed. Filtering is cumulative if multiple columns are filtered.
The grid has a paging control for displaying a limited number of items at a time (10 by default).
Update Existing Records
All lithology records displayed in the widget grid are editable, except for the FACILITY_ID and SYS_LOC_CODE (i.e., selected location). Click into the desired grid cell and make the desired edit. After any existing data are modified, the Update ![]() icon on the grid frame is enabled. Once all edits are completed, click Update to save changes to the database.
icon on the grid frame is enabled. Once all edits are completed, click Update to save changes to the database.
Note: Records edited in the widget grid will NOT be updated in the database until the user selects the Update |
|---|
Add New Records
Click the Add ![]() icon in the upper left corner of the grid frame to add a new row to the bottom of the grid. This action also enables the Update
icon in the upper left corner of the grid frame to add a new row to the bottom of the grid. This action also enables the Update ![]() icon on the grid frame. The FACILITY_ID and SYS_LOC_CODE (i.e., selected location) will automatically populate and cannot be changed. Enter desired lithology information. A Start Depth and End Depth will be required. Click Update to save changes to the database.
icon on the grid frame. The FACILITY_ID and SYS_LOC_CODE (i.e., selected location) will automatically populate and cannot be changed. Enter desired lithology information. A Start Depth and End Depth will be required. Click Update to save changes to the database.
Note: Records added to the widget grid will NOT be added to the database until the user selects the Update |
|---|
Delete Existing Records
Select the desired record (i.e., row) in the grid. It will be highlighted. Click the Delete ![]() icon on the grid frame to delete the selected record from the grid. This action enables the Update
icon on the grid frame to delete the selected record from the grid. This action enables the Update ![]() icon on the grid frame. Click Update to save changes to the database.
icon on the grid frame. Click Update to save changes to the database.
Note: Records removed from the widget grid with the Delete icon will NOT be removed from the database until the user selects the Update (i.e., Save) icon and adds a required note. |
|---|
Saving to Database
Upon clicking the Update ![]() icon on the grid frame, a dialog box appears for the user to provide a comment relating to the change(s). Clicking Cancel clears any message entered and closes the dialog box. In this scenario, any modifications are still persistent in the grid, but no changes have been made to the database. Clicking OK updates the database.
icon on the grid frame, a dialog box appears for the user to provide a comment relating to the change(s). Clicking Cancel clears any message entered and closes the dialog box. In this scenario, any modifications are still persistent in the grid, but no changes have been made to the database. Clicking OK updates the database.
Tip: Develop best practice(s) for note content such that the note clearly indicates what actions were taken. While revisions to multiple records (i.e., rows) are possible within the widget, saving revisions for each record changed may be advantageous. |
|---|
The comment provided by a user is added to the DT_NOTE table as a note for the selected facility with the following properties:
•NOTE_TYPE = 'Geo_Lithology_Revision'
•NOTE_TEXT = The user's comment
•NOTE_TITLE = ‘Update Lithology’
•DB_RECORD_ID = Session FACILITY_ID
•CONTACT_1 = USER_NAME
•CREATED_DATE = Date and time the note was added to the database via the widget
Data Validation
Prior to saving the note and updating the database with changes made in the widget grid, the changes are validated to ensure the following:
•Start depth is not empty or non-numeric
•End depth is not empty or non-numeric
•Start depth does not overlap with any other lithology records for the location
To set which columns display in the widget, open the Widget Editor by selecting the More Options ![]() icon in the upper right corner of the widget and then select the Edit menu option.
icon in the upper right corner of the widget and then select the Edit menu option.
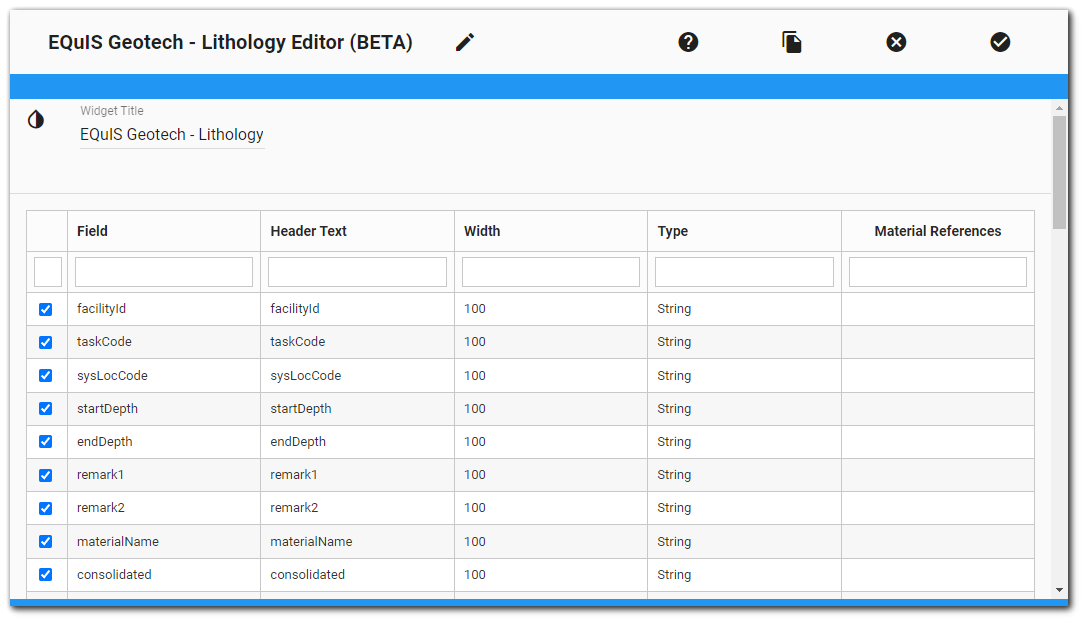
The Widget Editor contains a grid displaying a combined list of lithology and lithology component fields.
The lithology fields are 'facilityId', 'sysLocCode', 'startDepth', 'endDepth', 'remark1', 'remark2', 'materialName', and 'consolidated'. These fields appear on the Widget Interface grid in this order with grey column headers.
The list of lithology components are all the COMPONENT_CODEs from the RT_LITHOLOGY_COMPONENT table where RT_LITHOLOGY_COMPONENT.COMPONENET_TYPE is ‘Geotechnical’. The lithology components are displayed in alphabetical order and appear on the Widget Interface grid with white column headers.
The Widget Editor allows the user to customize the grid. Users can change the following:
•Select Fields – Check the fields to display in the widget grid. Only checked fields are displayed in the grid. All fields are checked by default.
•Field – The lithology and lithology component fields as described above.
•Header Text – The column header text defaults to the field value but can be edited.
•Width – Set grid column width (defaults to 100).
•Type – Three grid column type options are available: String, Numeric, and Boolean. The type defaults to String but can be modified. If Boolean is chosen, a checkbox will show on the widget grid that will map to 'Y' or 'N' in the database.
•Material References – Used to define the MATERIAL_TYPE_CODE reference to a field. The field is a drop-down and will be populated with the MATERIAL_TYPE_CODEs from the RT_MATERIAL_TYPE table. Based on the selected MATERIAL_TYPE_CODE, value will be filtered in the field in the widget.
•Column Order – Change the order columns appear in the grid by dragging and dropping their order.
Widget Title – By default, the widget title is EQuIS Geotech - Lithology Editor (BETA). The title can be modified.
Widget Theme![]() (next to the Widget Title) – Change the widget color.
(next to the Widget Title) – Change the widget color.
Object Editor ![]() – Set various appearance properties of the widget via the Widget Object Editor.
– Set various appearance properties of the widget via the Widget Object Editor.
Help ![]() – Launch online documentation for the widget.
– Launch online documentation for the widget.
Copy Settings ![]() – Copy widget settings from another widget of the same type.
– Copy widget settings from another widget of the same type.
Close without Saving ![]() – Exit the Widget Editor without saving changes.
– Exit the Widget Editor without saving changes.
Save ![]() – Apply Changes and close the Widget Editor.
– Apply Changes and close the Widget Editor.
Known Issues
•When adding the widget, users must open the widget settings and click SAVE to display all component codes.
•Changes are not saved when navigating between different locations in the widget.
•An "Are you sure" message should display when deleting a record from a widget.
•Material Name and Material Type need to both be populated.
•"Up" arrow does not work for field types set to Numeric.
•Records are not ordered naturally by depth.
•Unable to highlight whole value in a field.
•Non-editable fields (such as FACILITY_ID and SYS_LOC_CODE) should display with grey background.
•No method to indicate ROCK lithology records.
•Case sensitive based on RT_LITHOLOGY_COMPONENT.COMPONENT_TYPE when loading RT_LITHOLOGY_COMPONENT.COMPONENT_CODEs.
•Records added for every COMPONENT_CODE, regardless if data exist in the column.
•If a field is set to Type = NUMERIC, a user is unable to input a decimal numeric value. All decimal values will be converted to integers upon clicking into the cell.