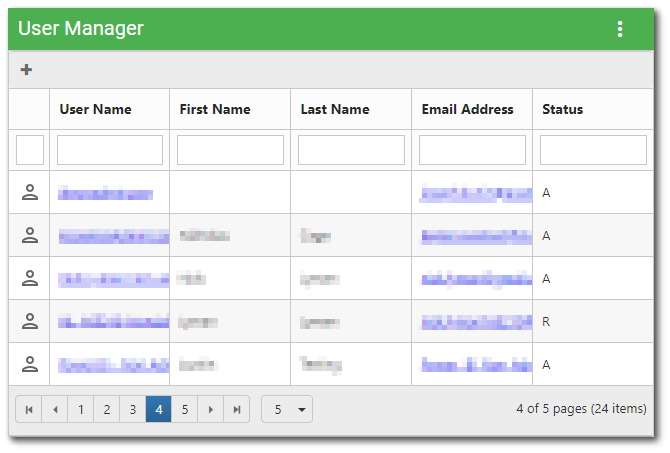
The User Manager widget is located on the Administration dashboard. Administrators may use the User Manager widget to view, modify, or create users. Non-administrators with permission to use this widget will not see any user information. Clicking a user in this widget launches the User Profile Editor for that user.
Note: EarthSoft strongly recommends that the User Manager widget not be added to any other dashboard apart from the Administration dashboard as it may cause permission issues. |
|---|

The User Manager widget displays a grid that lists users in the system (aka the ST_USER table) and contains attributes of the user. The widget has the following six columns:
User Icon ![]() – The icon used to indicate a user. This column is for display purposes only and may not be changed. The same icon is used regardless of status.
– The icon used to indicate a user. This column is for display purposes only and may not be changed. The same icon is used regardless of status.
User Name – The name of the user. This value must be unique (within the ST_USER table) and is immutable (may not be changed). Click the user name to open the User Profile Editor window for that user.
Note: Whenever a user is assigned to the Admin role, double asterisks (**) will appear after the username in the User Name Column. Do not add double asterisks when creating a username. |
|---|
First Name – The user's first name. This value is optional.
Last Name – The user's last name. This value is optional.
Email Address – The email address of the user. The email address must be unique (within the ST_USER table). The Email Address field uses a "mailto:" link that, if clicked, can start an email to the user in a mail provider.
Status – This indicates the Status of the user, corresponding to STATUS_FLAGs in the ST_USER system table.
•A – Active user assigned to at least one role-based license. User can log in and use the application (based on applicable permissions).
•B – Pending review. Users that have registered and are pending approval and activation.
•R – Inactive users and not part of any licensed role. These users may not log in and cannot use the application.
•C – A user with that was created when an email address that did not belong to any existing users is entered in the Recipients list for EQuIS Information Agents (EIAs). This user type cannot log into the EQuIS database but can receive EIA emails and will appear in the User Manager.
•D – This status indicates that an account is disabled. To preserve a history of activity (e.g., to know who submitted a particular EDD), Enterprise users are disabled instead of deleted. Disabling an account prevents login either to the EQuIS Enterprise web application or the EQuIS Professional Server Type: "EQuIS Enterprise Login". Disabled accounts are also prevented from submitting EDDs to the EQuIS Enterprise EDP Workflow Service and do not appear in the User Manager.
Note: Only use the 'Disable function in the User Profile Editor for a user if you plan on not re-activating them. If you plan on reactivating a user, EarthSoft strongly recommends to remove the user from a license role and NOT disable them. |
|---|
The grid columns of the User Manager widget can be sorted or filtered based on these properties.
Sorting – To sort, click the column header (click again to reverse the sort). Sorting does not change the current page, and the first or last values of the sorted column may not be displayed, unless on the first or last page of the list.
Filtering – To filter the users, enter a search term (one or more characters) in the appropriate search box beneath the column header. Only users that contain the search term will be displayed.
The bottom of the grid contains paging controls for displaying a limited number of users at a time, as described below.
Arrows – Use the left/right arrows to navigate through pages.
Go to Page List – Select a specific page to navigate directly to that page.
Rows per Page – Change the number of users to be displayed per page by using the drop-down menu.
Count of Pages and Total Items – This control indicates the total number of users available in the grid, how many pages to display the users, and which page is currently selected.
The paging controls are specific to the current search. For example, if there are 100 users, but only 15 users match the current search term, then the paging controls will apply only to the 15 matching users.
Create a User
The grid header contains the following items:
New User – Click the New User ![]() button to create a new user. The button opens the User Profile Editor window to enter attributes of the user.
button to create a new user. The button opens the User Profile Editor window to enter attributes of the user.
Widget Properties
The User Manager widget has no specific properties. To change the title or color of this widget, open the Widget Editor by selecting More Options ![]() > Edit in the Widget Header.
> Edit in the Widget Header.
For information on these general options, see the Widget Editor article:
•Widget Title •Widget Theme •Object Editor |
•Help •Copy Settings •Close without Saving |
•Save |