After the appropriate data mapping template has been created, the source data needs to be loaded to the EDD format sections and fields. The following steps detail how to create an EDD using EQuIS Link and then commit it to the database:
•Load format
•Open mapping project template
•Select source data
•Load source data (multiple files can be loaded)
•Review mapped data in EDP and resolve errors (if any)
•Commit EDD to EQuIS database
1.Open EQuIS Professional and select EDP ![]() from the Import group of the Home ribbon. Professional EDP opens in a separate window.
from the Import group of the Home ribbon. Professional EDP opens in a separate window.
2.Load the desired format file (e.g., Geotechnical.zip) to use as the target sections and fields in the EDD. Load a format file by selecting the Format button ![]() located in the Open group of the Home ribbon.
located in the Open group of the Home ribbon.
3.Load the desired mapping project template. Select the Link ribbon and click the Open button in the Project Group. In the Open File window, browse to the folder containing the desired mapping project template file. Select and Open the file to load the data mappings.
4.Select the source data. Click the Load button in the Data Group to display an Open File window.

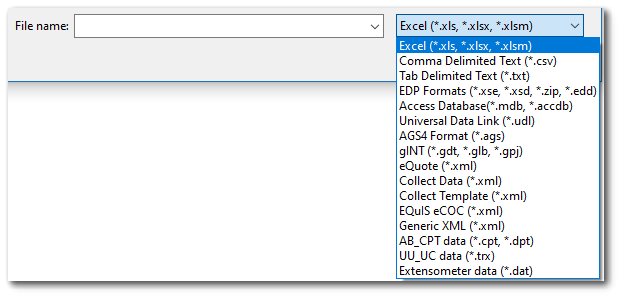
5.Browse to the folder containing the source data. Use the file type drop-down to filter data files by file type. Select and Open the desired source data file.
6.Data in the source file will be mapped to the format using the mapping project template. The Mapper Status dialog box details information on what EDD sections were successfully mapped, which sections were ignored, and if any errors were encountered. Table names are listed on the left side of the Mapper Status dialog box. Table names, for tables that did not encounter errors during the mapping process, are shown in Green text while table names for tables that did encounter errors are shown in Red text. Selecting a table opens the Mapper Messages dialog box and displays information about the mapping process. When viewing a table that has a mapping error(s), the error is shown in red text. To save the Mapper Messages for a specific table, click the Save Selected button, which results in a text file titled error_log_[table_name].txt. To only save the Mapper Messages for tables that contain errors, click the Save Errors button, which results in a text file titled errors_only_log.txt. To save the Mapper Messages for all tables, click the Save All button, which results in a text file titled error_log.txt. Click the Done button to close the Mapper Status dialog box.

Note: The Save Errors button will be disabled if no errors are present in the mappings. |
|---|
7.Data will have loaded into one or more sections of the format, depending on which sections were mapped from the source data file. Populated section names will be Red or Green, depending on if they contain errors or are error-free, respectively. Empty sections of the format will remain black. Data will be displayed in the fields and any detected errors will be shaded.
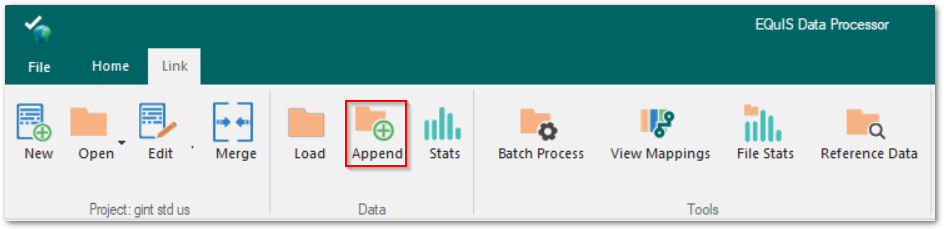
8.(Optional) – If the source data is contained in more than one file, click the Append button in the Data Group to display an Open File window. Repeat Steps 4 and 5. The additional data will be loaded and appended to the existing data. Repeat this step as needed. To load numerous source data files, see to the Batch Processing article.
9.Resolve data errors (if any).
10.Commit the EDD to the database.