Step 1 – Connect to Target Database
Step 2 – Open EQuIS Migration Tool
Introduction
The EQuIS Migration Tool (EMT) components consist of the following files:
•EarthSoft.EQuIS.Migrate.dll – Logic for the migration process
•EarthSoft.EQuIS.Migrate.dll.config – A configuration file for the above related to third-party references (similar to the application configuration files in the EQuIS installation folder)
•EarthSoft.Forms.Library.Migrate.dll – The EMT form
•Translation files for the EMT form
To setup the EMT, unblock and load the form DLL files (EarthSoft.Forms.Library.Migrate.dll and translation files from the EMT form package) into the EQuIS Professional installation directory containing the EarthSoft.EQuIS.Migrate.* files. The EMT form is available through the Forms dialog.
Administrators can migrate an EQuIS facility via the EQuIS Migration Tool using the following steps.
Note: EQuIS Migration Status messages are translated into supported languages. |
Step 1 – Connect to Target Database
Launch EQuIS Professional and connect to the database and facility to which data will be migrated (the target facility).
Step 2 – Open EQuIS Migration Tool
Click on Forms in the Home Tab of the EQuIS Professional ribbon, then double-click on EQuIS Migration Tool. This will open the EMT, displaying the Source Data tab.
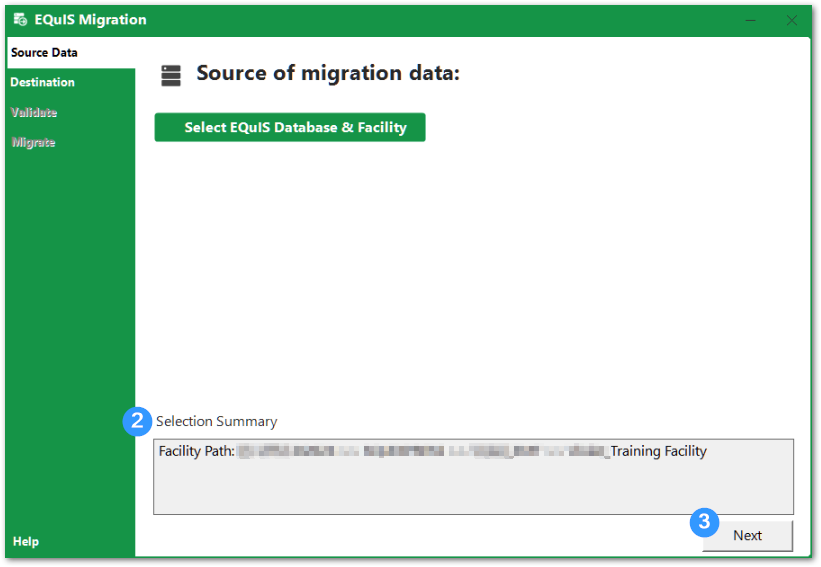
Step 3 – Select Source
Click the Select EQuIS Database & Facility button (1). In the EQuIS Login window that opens, select the EQuIS database and facility that contain the data to transfer.

Confirm that the Selection Summary shows the desired source database and facility (2).
Click the Next button (3) to proceed to the next step: Review Destination.
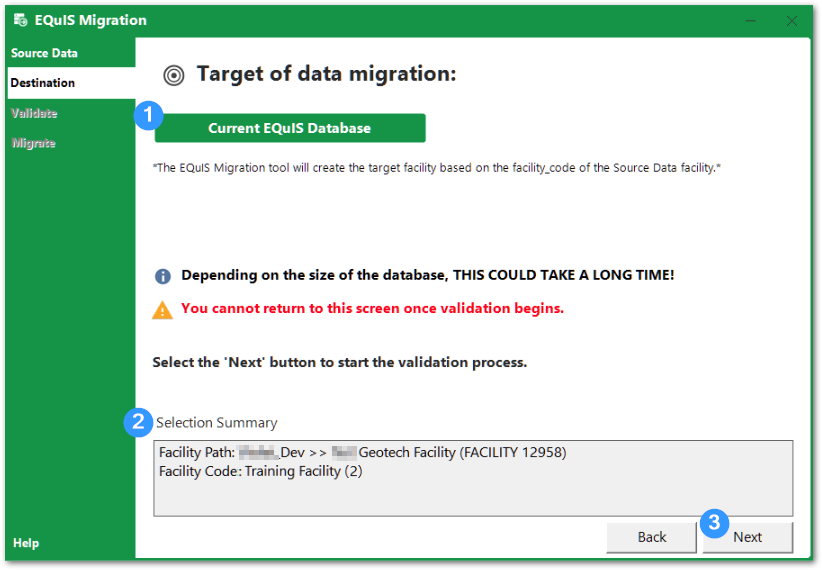
Step 4 – Review Destination
Navigate to the Destination tab, then click the Current EQuIS Database button (1).
Review the Selection Summary box (2), which displays:
a.The path to the currently selected database and facility.
b.The auto-generated code for the facility into which the selected source data will migrate. If the FACILITY_CODE being migrated is a duplicate of an existing facility in the target database, a number will be appended to the FACILITY_CODE, as with “Training Facility (2)” in the screenshot below.
Click the Next button (3) and proceed to the next step: Validate Data.
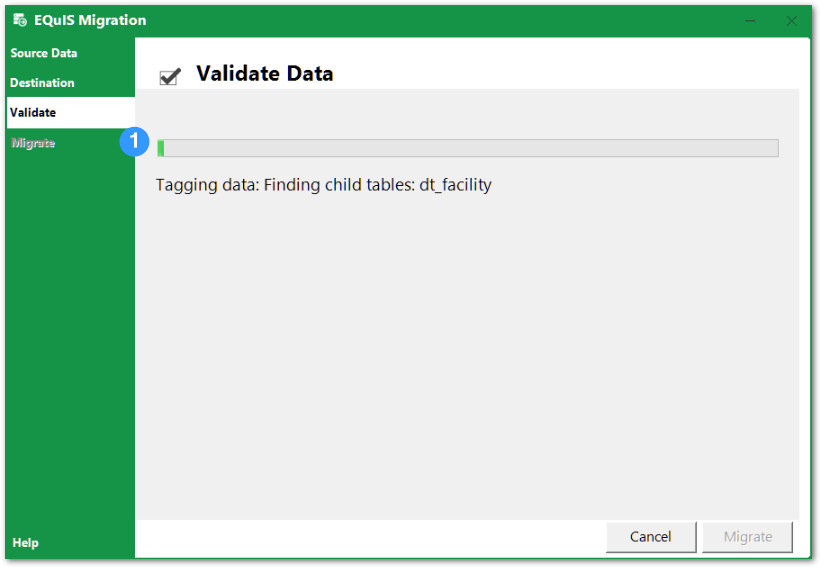
Step 5 – Validate Data
When the Validate tab is activated, the EQuIS Migration Tool begins the validation process. This process consists of three phases:
1.Tagging
2.Transferring
3.Validating
Validation progress is indicated in the Current Database Status Bar (1). The status bar will progress three times, once for each phase of the process. For more information on what occurs during the Tagging, Transferring, and Validating phases, see EQuIS Migration Tool.
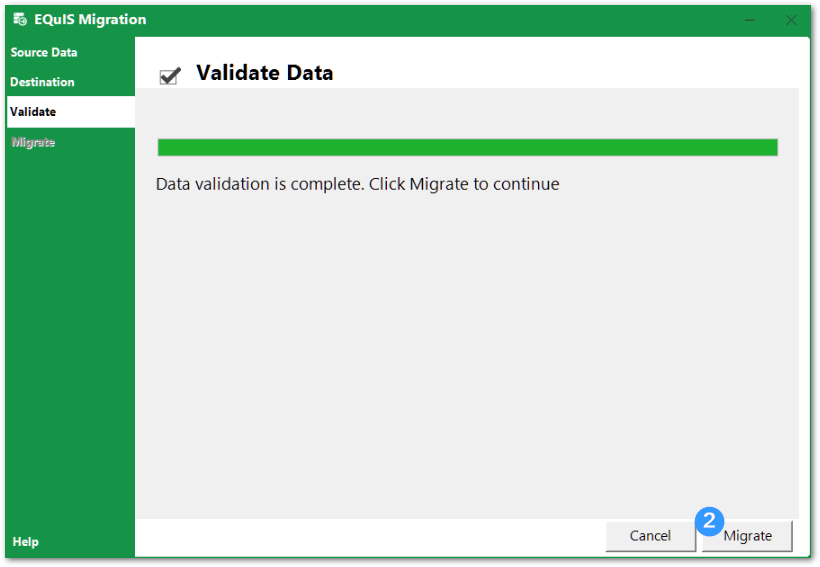
No Flagged Data
If the Validation completes without any data flags, the Migrate button (2) will be enabled. Click Migrate and proceed to the next step: Migrate Data.
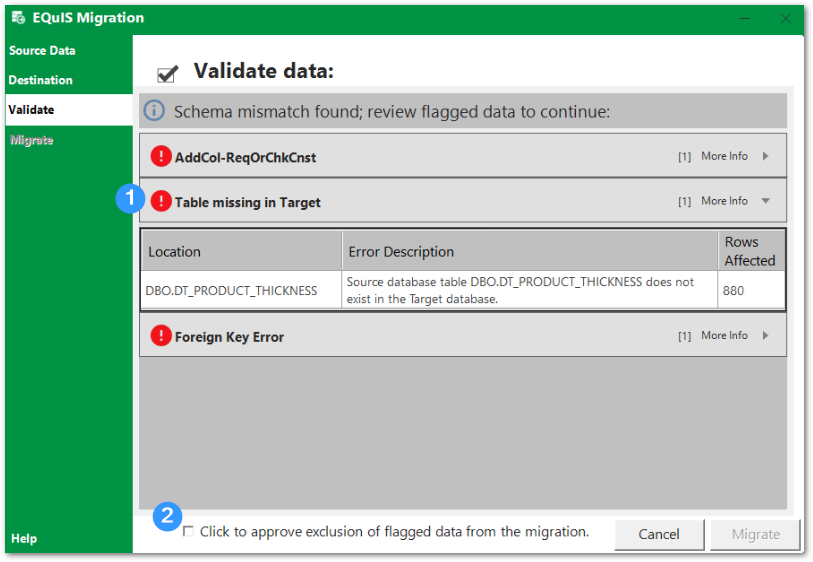
Flagged Data
If the Validation process finds data present in the source facility that will not successfully migrate into the target facility, it is flagged and displayed on the Validate tab (1). A table of errors shows the severity of each error (see Migration Validation Errors), along with the number of instances of each given error. Expand the table to review each instance of the error, including the database table and/or column where the data mismatch is occurring, a detailed description, and an estimate of the number of rows that will be affected by the issue (either the number of rows that will not transfer, or the number of rows that will have truncated data).
To cancel data migration at this point, select the Cancel button. This will roll back all changes and return the user to the Destination selection page.
To continue, despite flagged errors in the validation table, check the box (2) to approve excluding the flagged data from the migration. Clicking this check box will enable completing a partial migration – i.e., some data will be lost during the process. This could include loss of precision (i.e., decimal points), truncation of data (i.e., text length), missing data, and missing cascaded or child data. Click the check box and then click Migrate. Proceed to the next step: Migrate Data.
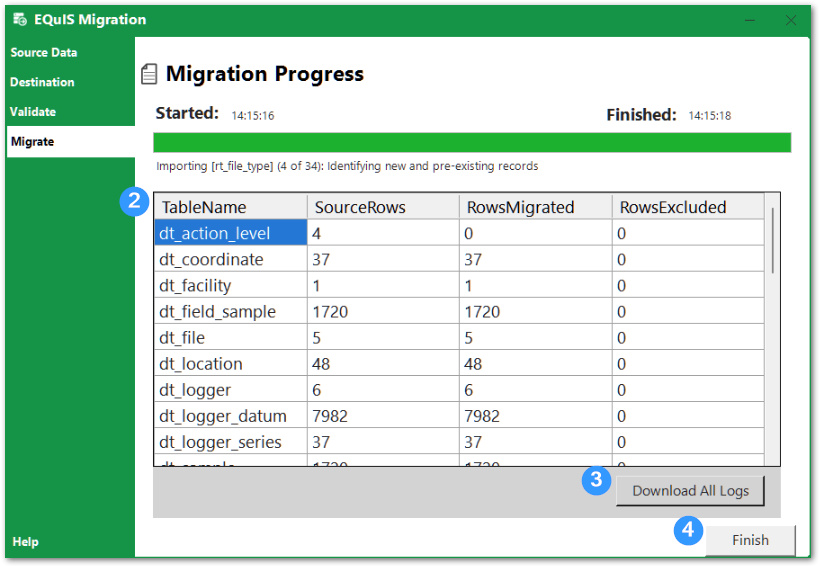
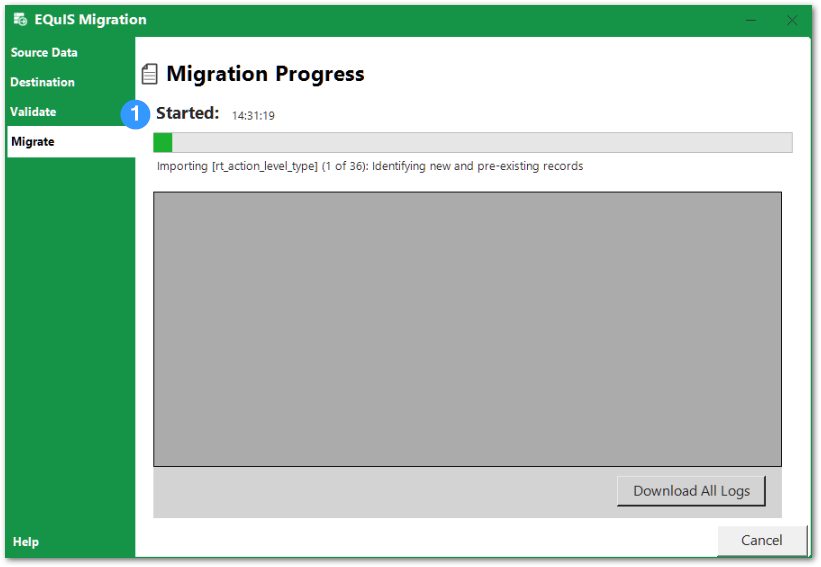
Step 6 – Migrate Data
Clicking Migrate will begin the migration and bring the user to the Migrate tab. A status bar displays the progress of transferring data to the target facility (1).
Once the migration has completed, all the database tables that were migrated are listed in a grid (2). The grid also displays the:
•number of rows that were in a given table, in the source facility/database
•number of rows that were successfully transferred to the new facility/database
•number of rows that were not migrated for some error
Note: Flagged data (and all of its children) indicated in Validation step will not be migrated in this step. |
The last row of the table will give a summary of the entire transferred dataset.
Click the Download All Logs button (3) to download the log files created throughout the entire migration process. The logs are the status and progress tables used to keep track of all data being migrated. They also contain details on any errors that occurred, and possibly why they occurred and how to fix them. These logs are useful for reference and may be helpful for troubleshooting should any question or concern arise regarding the data migration.
Click the Finish button (4) to close the EQuIS Migration Tool.