To change the properties of the Map widget, open the Widget Editor by selecting the More Options ![]() icon in the upper right corner of the widget to display the drop-down menu and then select the Edit menu option. The Map widget properties are divided into six tabs in the Widget Editor. Changes made on any tab will not be preserved until the user clicks Save on the Widget Editor header.
icon in the upper right corner of the widget to display the drop-down menu and then select the Edit menu option. The Map widget properties are divided into six tabs in the Widget Editor. Changes made on any tab will not be preserved until the user clicks Save on the Widget Editor header.
The General tab controls if and how the Facility Layer is displayed on the Map widget.
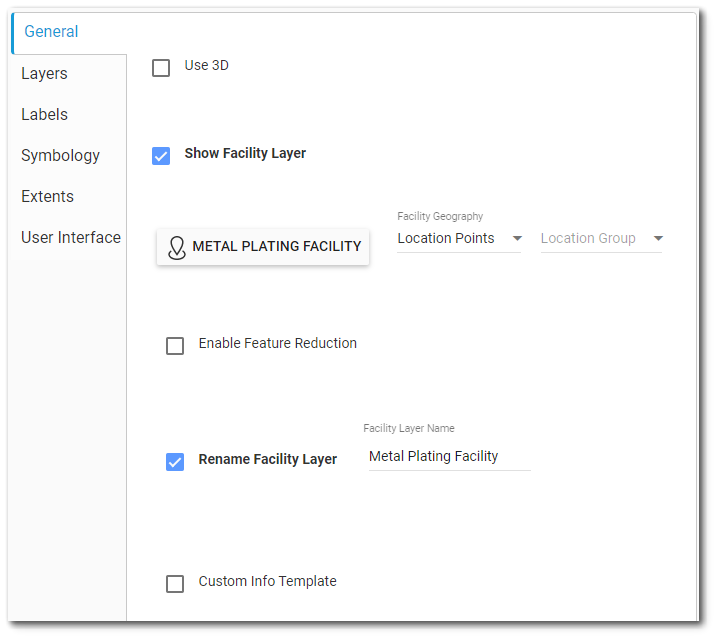
Use 3D – When checked, the map will render in 3D and additional tools are available on the map to allow different view perspectives by panning and rotating.
Show Facility Layer – When checked, the map will show the current session facility. If no session facility is selected, the map displays the facility selected in the Facility field. The Session Facility will still be displayed if this box is not checked. To remove a facility layer, do not select a Session Facility or the Show Facility Layer button.
Facility – Select a facility to view on the map if no session facility is selected (refer to Facility Chooser for more information).
Facility Geography – This section contains a drop-down menu to set the geography type to use for the facility layer. This option is only visible if Show Facility Layer is checked. The drop-down menu list includes Location Points, Facility Polygon, and Location Polygons.
Location Group – Allows the user to select a location group in the Map widget. This option is only visible if Show Facility Layer is checked.
Facility Filter – Allows users to select a filter based on the selected facility. This option is only visible if Show Facility Layer is checked.
Location Type – Allows users to filter locations by DT_LOCATION.LOC_TYPE when Location Type is selected as the option for Facility Filter. This option is only visible if Show Facility Layer is checked.
Notes: If the facility has a large number of locations, it is recommended to divide them into location groups and plot the location groups in the Map widget. A location group will not plot: •If the GROUP_CODE contains a carriage return (extra blank space) at the end of the facility group. •If the group contains non-ASCII characters. •If the session facility is set and RT_GROUP.FACILITY_ID is not populated for the location group. |
|---|
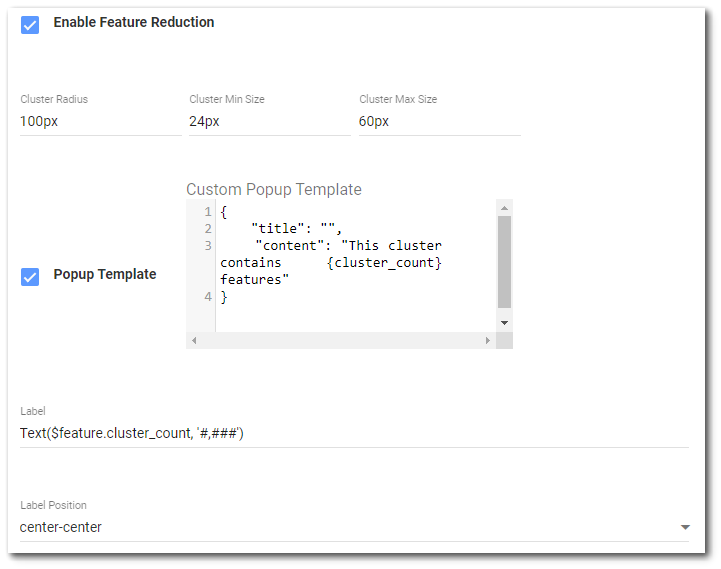
Enable Feature Reduction – When checked, point feature locations are displayed in clusters based on the parameter values set by the user. The Enable Feature Reduction check box is only visible if the Show Facility Layer check box is also checked. Checking the Enable Feature Reduction check box expands the modal to show additional parameters that the user can modify to customize how the clusters will appear. The values displayed in the image below are the default values, but after changing one or more and saving the Widget Editor, the new values will persist.
The additional parameters are:
•Cluster Radius – Radius in pixels where points that fall within the circle will be grouped and displayed as a single cluster.
•Cluster Min Size – Symbol size for the smallest cluster of points.
•Cluster Max Size – Symbol size for the largest cluster of points.
•Popup Template – A check box, checked by default, for displaying the custom popup template. The popup template can be disabled by unchecking the check box.
•Custom Popup Template – Title and content fields for displaying in the popup template.
•Label – A label that is displayed on top of the cluster symbol that shows the number of features contained in the cluster by default.
•Label Placement – Location of the label relative to the cluster symbol.
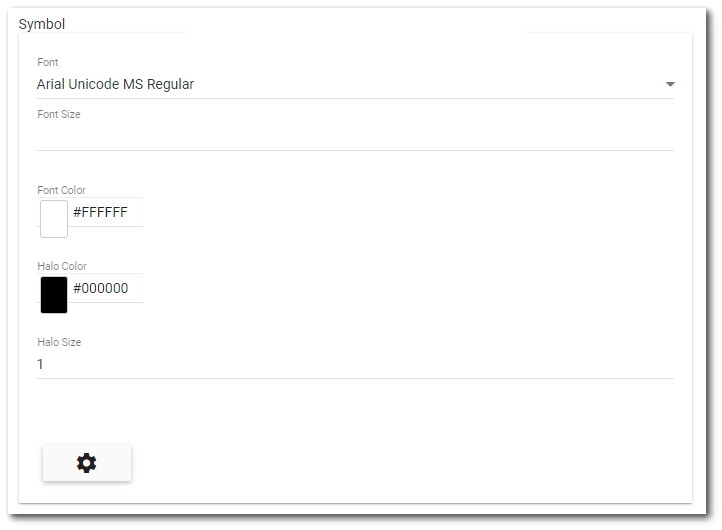
•Symbol – Properties for the text symbol.
•Font – Font for the display text.
•Font Size – Numeric size of the text font.
•Font Color – Color of the text font.
•Halo Color – Color of the halo around the text.
•Halo Size – Numeric width of the halo, which must be equal to zero or greater.
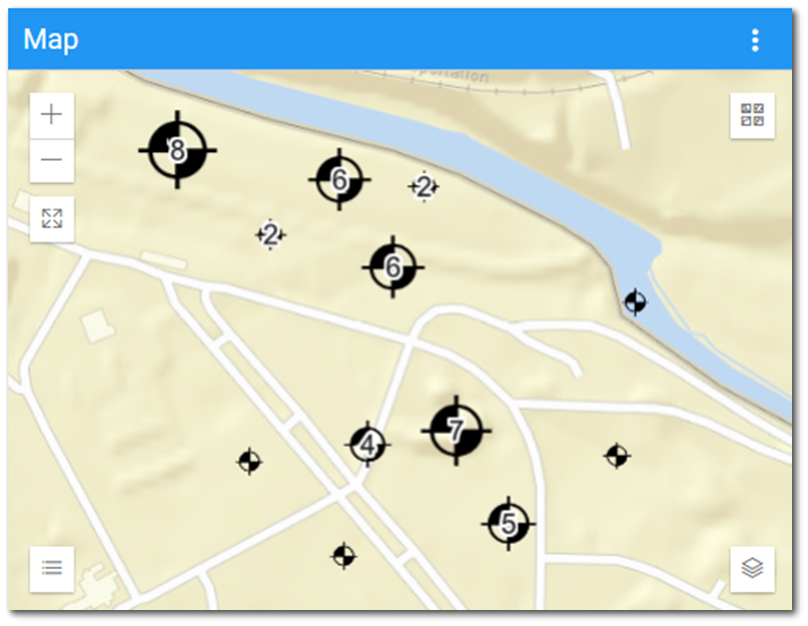
The example below displays the feature clusters with the largest cluster symbol displaying “8” in the label, the smallest clusters displaying “2” in the labels, and individual locations that fall outside of the cluster radius.
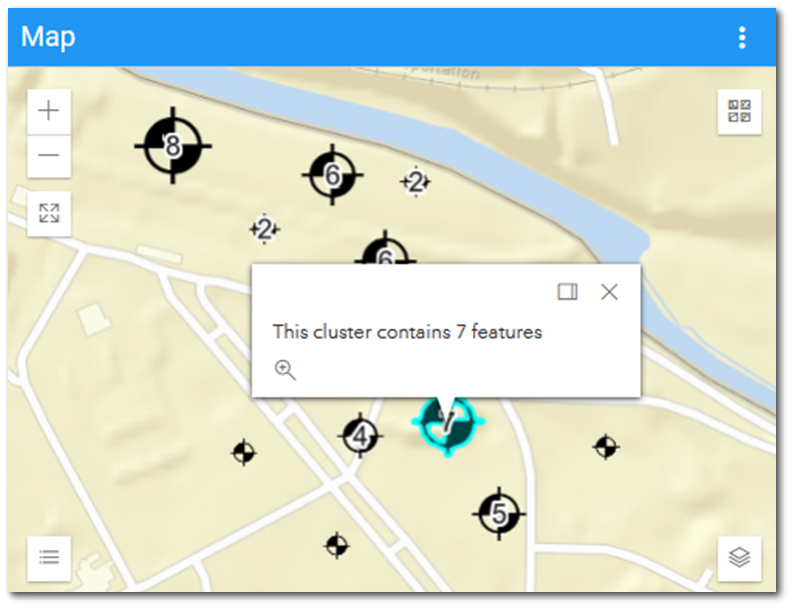
The example below shows the popup template with the default content displayed.
Note: Enable Feature Reduction is designed to only work with point geometries. |
|---|
Rename Facility Layer – Allows the user to rename the facility locations layer in the Layer List. This option is only visible if Show Facility Layer is checked. If "Rename Facility Layer" is deselected, the facility layer name will revert to "Facility Layer" and this name will persist.
Custom Info Template – This option allows the user to define a custom Info Template (popup when clicking a facility location) using the JSON editor. HTML is acceptable with inline CSS. JavaScript is not supported. A list of available fields (aka columns) shows on the right-hand side.
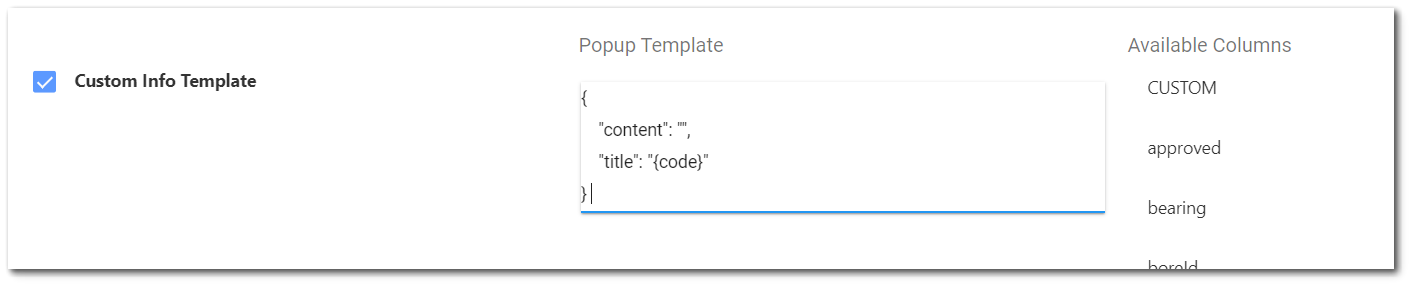
Note: The "Available Columns" list populates with columns from database tables, such as DT_LOCATION, DT_FACILITY, and DT_COORDINATE, but the text listed in "Available Columns" does not necessarily match the corresponding database table column names. Most naming conventions follow a consistent pattern (e.g., dataProvider in the Available Columns list corresponds with DATA_PROVIDER in DT_LOCATION). Below is a table of commonly used column names that shows the database table, the column name used in the data base table, and the name displayed in Available Columns:
|
|---|
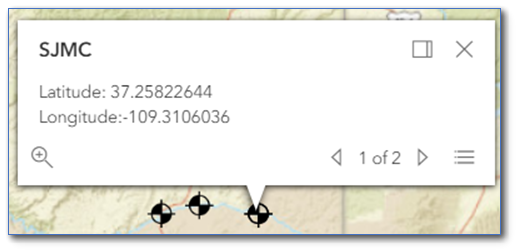
It is possible to include location information (and latitude, longitude, etc.) by referencing the location that has been clicked as follows:
{
"content": "Latitude: {latitude}<br>Longitude: {longitude}",
"title": "{code}"
}
This example will display the SYS_LOC_CODE as the title and the latitude and longitude will appear below in the content of the Tooltip. Note that the values for these fields are based on DT_COORDINATE data for the locations, and may not have values for all facilities or locations.
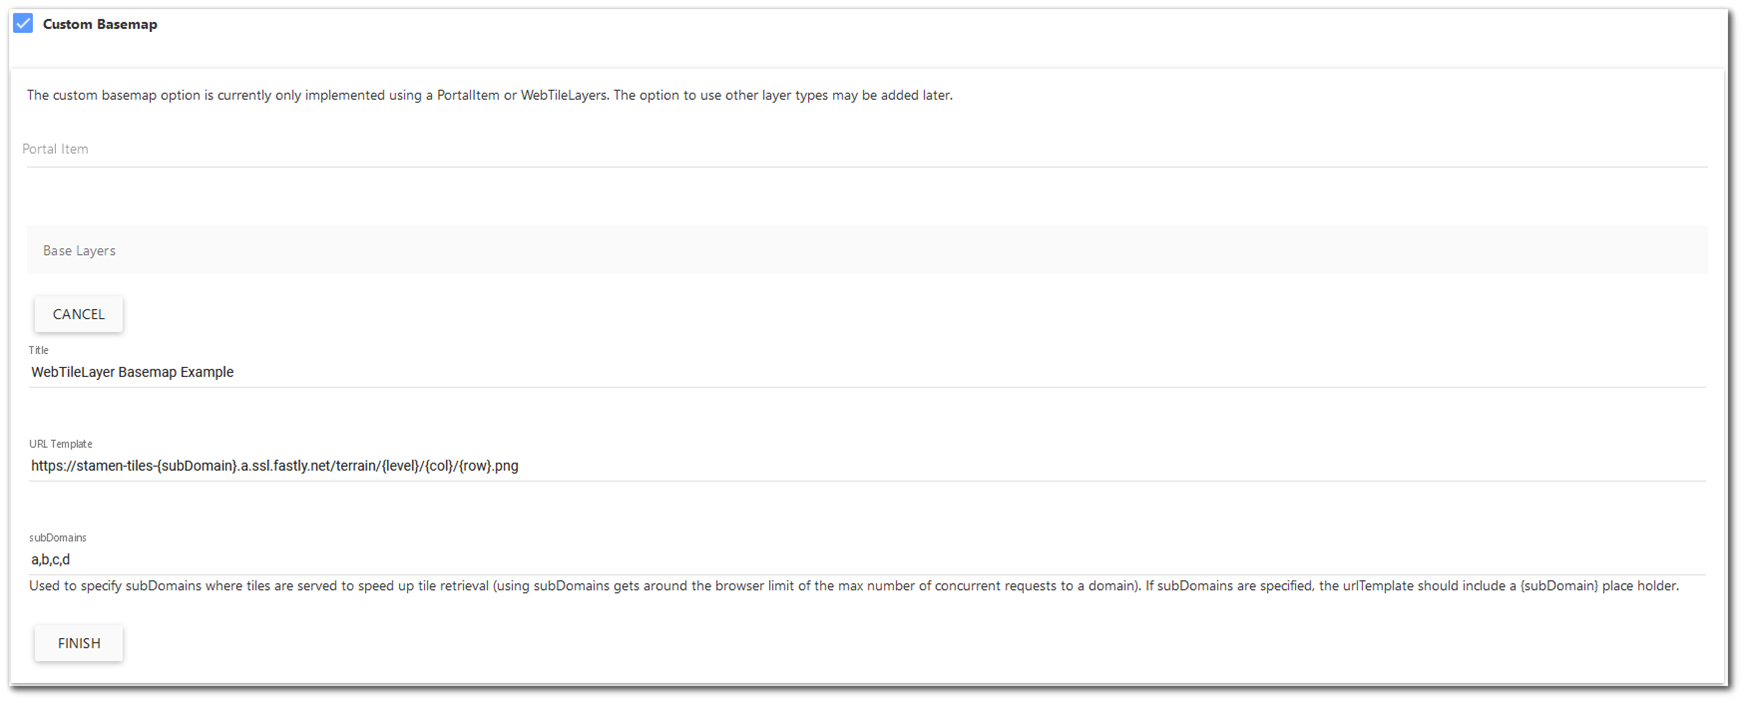
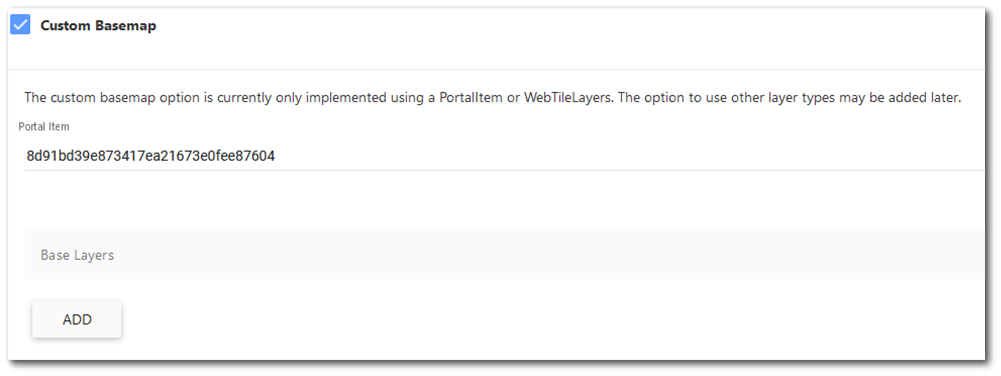
Custom Basemap – When checked, two options become available for adding a custom basemap to the Map widget. The first option allows a user to enter a Portal Item via the Esri Portal. The second option allows a user to add a WebTileLayer via a URL template. Unchecking Custom Basemap will restore the default basemap.
Additional information about the Esri Portal can be found here: https://enterprise.arcgis.com/en/portal/latest/use/what-is-portal-for-arcgis-.htm
Additional information about WebTileLayers can be found here: https://developers.arcgis.com/javascript/latest/api-reference/esri-layers-WebTileLayer.html
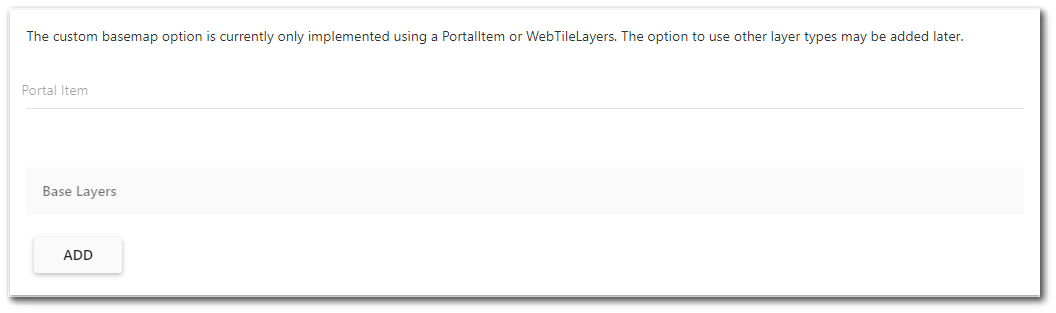
The additional parameters to create a custom basemap are:
•Portal Item ID – To add a custom basemap via the Portal Item option, enter the Portal Item ID in the Portal Item input field. Save the Map Widget Editor and the Map widget should display the custom basemap. To remove a Portal Item basemap, select the Portal Item ID and delete it.
•Base Layers – To add a custom basemap via a WebTileLayer, click the Add button. This displays additional fields for Title, URL Template, and subDomains. Enter the appropriate information and click Finish. Save the Map Widget Editor, and the map should display the custom basemap. To remove a WebTileLayer basemap, click Remove.
•Title – Enter a user-defined basemap title.
•URL Template – Enter the URL for the basemap.
•SubDomain – This field is used to increase the speed of tile retrieval, and is required if the URL Template includes a {subdomain} place holder.