•Playing Videos in the HTML Widget
•Simple Examples using the Plain Text Editor
Overview
This widget displays Hyper Text Markup Language (HTML) snippets. HTML is the standard markup language for creating web pages. The HTML widget is not intended for creating full web applications. It is designed for light HTML, Cascading Style Sheets (CSS), and JavaScript use. Some example uses for the HTML widget are embedding images, videos, text, etc. Other uses of the widget include adding hyperlinks to other resources or a closed circuit television feed of your facility. The HTML widget displays the content as it has been configured in the widget properties.
The HTML widget is intended for users that have a basic understanding of HTML, CSS, and JavaScript. Refer to external documentation to learn the fundamentals of these languages.
Warning: The HTML widget does not support the use of external JavaScript libraries or frameworks. The use of external libraries may clash with Enterprise and cause unintended abnormalities (e.g., broken CSS). |
Use of CSS
CSS applied within the HTML widget is not independent from the application CSS. CSS modifications within the HTML widget will persist outside of the widget view itself. For example, if the following CSS is added to the widget, the entire page will have a blue background color.
body {
background-color: blue;
}
If a user would like to style one element, an ID should be assigned to the element. If a user would like to apply the same style to several elements, add a class to those elements. When configuring the CSS, the user should always use CSS ID and class selectors to avoid applying styles globally. Inline CSS can also be used to avoid this problem. See the examples listed below.
Use This Code |
Do Not Use This Code |
|---|---|
<h1 style="color: blue;">Hello, World!</h1>
(Or this)
<h1 style id="helloWorldHeader">Hello, World!</h1> <style> #helloWorldHeader { color: blue; } </style> |
<h1>Hello, World!</h1> <style> h1 { color: blue; } </style>
|
Use of Iframe
Content within the HTML widget can be displayed using an iframe, which will render the HTML in a nested browsing context. This will isolate the code from the rest of Enterprise. Using an iframe can be helpful for the following:
•Embedding a chart from a third party application (e.g., Google Charts API).
•JavaScript is loading in the wrong order causing the user to need to refresh the HTML widget to render the content.
•Isolating style changes to only this widget.
Check the Use Iframe checkbox in the Widget Editor to enable this functionality.
Note: Using an iframe embeds a page inside Enterprise.
For example, when using a button to open a dashboard, the href will need to be the full path and the dashboard will open inside the HTML widget. |
Playing Videos in the HTML Widget
Videos can be displayed in the HTML widget by using either an iframe or the HTML <video> Tag with a web-accessible URL to the content. The domain or the direct URL to the video will need to be added to the content security policy in the web.config file, unless it is already a trusted source. By default, Enterprise recognizes the following sources:
*.googleapis.com
*.gstatic.com
*.arcgis.com
*.arcgisonline.com
*.microsoftonline.com
*.openstreetmap.org
The following is example HTML that could be added to the HTML tab in the Widget Editor, where "URL" would be replaced with the URL for the desired video file:
<video width="640" height="360" controls>
<source src="URL" type="video/mp4">
</video>
Note: Youtube creates a simple embed snippet for all their videos through their sharing menu. Right-click on the window and select the Copy embed code and paste the snippet on the HTML tab in the Widget Editor. |
|---|
The image below depicts a video displayed in an HTML widget using the snippet from Youtube (URL has been added to the web.config file).
<iframe width="900" height="506" src="https://www.youtube.com/embed/Os776Myw47E" title="YouTube video player" frameborder="0" allow="accelerometer; autoplay; clipboard-write; encrypted-media; gyroscope; picture-in-picture" allowfullscreen></iframe>

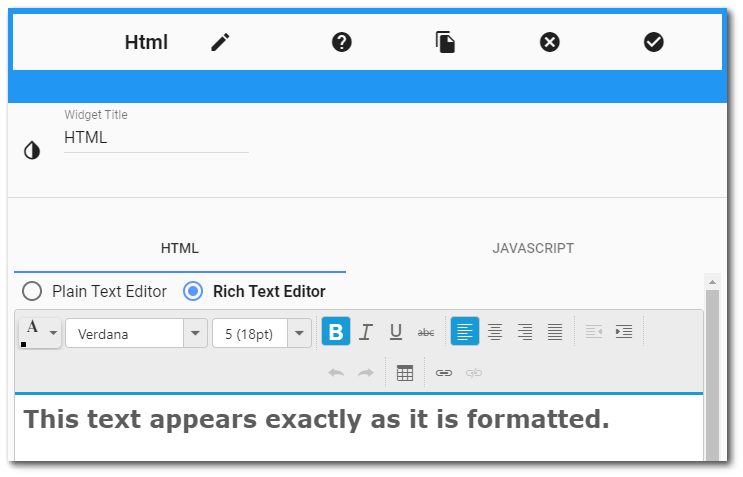
Widget Properties
To add content or change properties of the HTML widget, open the Widget Editor by selecting the More Options ![]() icon in the upper right corner of the widget to display the drop-down menu and then select the Edit menu option.
icon in the upper right corner of the widget to display the drop-down menu and then select the Edit menu option.
Widget Title – By default, the widget title is HTML. The title can be modified.
Widget Description – The description field provides a caption of the widget content for screen readers. This field improves accessibility by allowing visual elements such as charts to be given accessible text descriptions. It also displays a tooltip when hovering on the widget header. Default text (of the widget type's description) is provided but can be edited by users for additional context. This field has a 250-character limit.
Widget Color – The color of the widget can be changed using the Widget Theme![]() icon to the left of the widget title.
icon to the left of the widget title.
Widget Object Editor – To set various appearance properties of the widget, select the Object Editor ![]() icon in the widget header to open the Widget Object Editor. See the Widget Editor article for more details.
icon in the widget header to open the Widget Object Editor. See the Widget Editor article for more details.
Help – The Help ![]() icon connects to the online documentation related to the specific widget.
icon connects to the online documentation related to the specific widget.
Copy Settings – Select the Copy Settings ![]() icon to to copy the settings from another widget of the same type. See the Copy Widget Settings article for more information.
icon to to copy the settings from another widget of the same type. See the Copy Widget Settings article for more information.
Cancel – Select the Close without Saving ![]() icon to exit the Widget Editor without saving changes.
icon to exit the Widget Editor without saving changes.
Save – Changes will be applied to the widget by clicking on the Save ![]() icon. The Widget Editor screen will close after the save operation is complete.
icon. The Widget Editor screen will close after the save operation is complete.
The Widget Editor includes two tabs used to define what and how the widget contents are displayed:
HTML Tab – Use this tab to define the HTML tags and content that will be displayed in the widget. Content can be edited using either the Plain Text Editor or the Rich Text Editor. The Rich Text Editor, also known as a WYSIWYG (What You See Is What You Get) editor, allows users to edit and format text as it will be displayed in the HTML widget. Some formatting includes font size, font style, font color, indentation, and inserting tables. Note that when inserting tables, the rich text editor does not properly allow formatting of the tables, however, the tables can still be formatted by using Cascading Style Sheets (CSS) styling.
Use Iframe – Check this option to display content using an iframe (see Use of Iframe section).
JavaScript Tab – Use this tab to define JavaScript that will be included when the widget is displayed.
Simple Examples using the Plain Text Editor
Javascript
In the HTML section, place the following code:
<p id="testP">Test</p>
In the Javascript section, place the following code:
$(document).ready(function () {
//alert("test");
$("#testP").click(function () {
alert("testP clicked");
});
});
Users can now click the word "testP" and an alert should fire.
Video
Videos can be displayed by using the HTML <video> Tag with a web-accessible URL to the content. The domain or the direct URL to the video will need to be white listed, meaning added, to the content security policy in web.config.
On the HTML tab, paste:
<video width="320" height="240" controls>
<source src="URL" type="video/mp4">
</video>