•Prior to Installing EQuIS Enterprise
Notes: •Please read this entire article carefully, and plan appropriately before beginning. •This article is for clients that are upgrading from an existing Enterprise 7 installation. |
Prerequisites
Prior to installation, please review the hardware and software requirements and release notes.
Be aware that changing the Windows Registry could cause problems. It is highly recommended that you back up the registry before making any changes.
Note: EarthSoft Assumes no liabilities for problems introduced when making changes to the registry. |
To back up the registry in Windows:
1.Select Start , type regedit.exe in the search box, and then press Enter. If prompted for an administrator password or for confirmation, type the password or provide confirmation.
2.In the Registry Editor, locate and click the registry key or subkey that you want to back up.
3.Select File > Export.
4.In the Export Registry File dialog box, select the location to which you want to save the backup copy, and then type a name for the backup file in the File name field.
5.Select Save.
For more information, see Microsoft's How to back up and restore the registry in Windows article.
Prior to Installing EQuIS Enterprise
The following 3 setup requirements should be completed prior to installing EQuIS Enterprise.
1.Install EQuIS Professional 7. See the Installation and Upgrade article for Professional for further information.
2.Enable the following Windows roles and features using Windows Server Manager:
a..Net Framework 4.8 Advanced Services > ASP.NET 4.8*
b.Internet Information Services (installs with default selections)
c.Internet Information Services > World Wide Web Services > Application Development Features
i..NET Extensibility 4.8*
ii.ASP.NET 4.8* (this will enable ISAPI Extensions and Filters)
*If using an older version of Windows Server, and Microsoft .NET Framework 4.8 is unavailable, select NET Framework 4.7, ASP.NET 4.7, and .NET Extensibility 4.7.
Warning: The "WebSocket Protocol" Windows feature is not compatible with EQuIS Enterprise. |
3.Install the URL Rewrite module and create a registry key to allow Enterprise to correctly handle URL Rewriting in local (non-Azure) IIS Server environments. If you are running Enterprise in a local IIS Server environment and the URL Rewrite Module is not installed and enabled, you may encounter 500 server errors when navigating to your site.
a.Download the URL Rewrite module from https://www.iis.net/downloads/microsoft/url-rewrite and install on the machine hosting Enterprise.
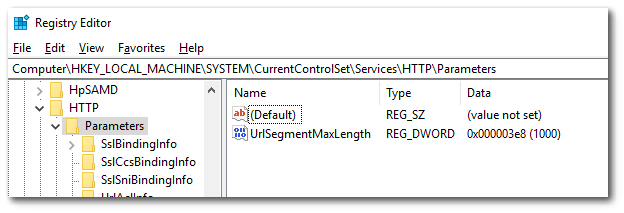
b.Create a "UrlSegmentMaxLength" registry key in the Registry Editor: [HKEY_LOCAL_MACHINE\SYSTEM\CurrentControlSet\Services\HTTP\Parameters]
i.Type: DWORD
ii.Data: decimal value of 00001000
iii.The result will appear as in the screenshot below:
Back Up Database Files
Prior to upgrading, it is highly recommended that existing files and the database have been backed up.
•Make a backup of your SQL database.
•Make a backup of the Enterprise Installation Directory (\Program Files\EarthSoft\Enterprise7).
•Back up the standard example dashboards if they were modified (i.e., Welcome, Admin, EDP, Explorer, EZView, and Notices) by navigating to the dashboard, noting the DASHBOARD_ID and replace default.aspx in the URL with /api/download/dashboard/[dashboard_id] in the browser URL (e.g., https://enterprise.somwhereonline.com/api/download/dashboard/8733).
Upgrade Instructions
The EQuIS Enterprise 7 download links are available for download at the EarthSoft Community Center.
1.Download the EQuIS Enterprise 7 installer (.zip) from the Download Dashboard (Products> EQuIS Enterprise> 7).
2.Stop the IIS application pool EnterpriseAppPool.
3.Stop the EQuIS Enterprise 7 Workflow service under Windows Services.
4.Make a backup copy of your *.config file (..\Enterprise7\bin\connectionStrings.config).
5.Uninstall the existing EQuIS Enterprise installation from the Windows Control Panel. Delete the Enterprise7 folder.
6.Unblock and extract the files downloaded in Step 1.
7.Run the EQuIS Enterprise 7 application (.exe) as administrator and step through the installation wizard.
8.Update your database(s) with the equivalent version of EQuIS Professional using the steps outlined in the following article: Update EQuIS Database.
9.Restore the backed up *.config file backed up in Step 4 (..\Enterprise7\bin\connectionStrings.config). If this connection string fails, recreate the connection string with the structure outlined in Step 4d of New Enterprise Installation Instructions.
10.If you are not using SSL (aka HTTPS), do the following:
a.Browse to your installation folder (e.g., C:\Program Files\EarthSoft\Enterprise7).
b.Open the Web.config file with a text editor (e.g., Notepad).
c.Find <httpCookies requireSSL="true" lockItem="true"/>.
d.Change it to <httpCookies requireSSL="false" lockItem="true"/>.
e.Save and close the file.
11.If you are running in a local IIS Server environment, it may be necessary to comment out the staticContent block in the Web.config file, depending on which MIME Types are enabled in IIS. For example, if the MIME Type ".woff2" is enabled in IIS setup, this line can be commented out in the Web.config file.
a.Browse to your installation folder (e.g., C:\Program Files\EarthSoft\Enterprise7).
b.Open the Web.config file with a text editor (e.g., Notepad).
c.Find <staticContent>.
d.Comment out the staticContent as seen below:
<!--<staticContent>
<mimeMap fileExtension=".json" mimeType="application/json"/>
<mimeMap fileExtension=".woff" mimeType="font/woff"/>
<mimeMap fileExtension=".woff2" mimeType="font/woff2"/>
</staticContent>-->
e. Save and close the file.
12. (Optional) Configure log4net.config. See Configure log4net for more information.
13.Start the EnterpriseAppPool application pool in IIS if it has not already been started.
14.Open your web browser to your installed web application URL (e.g., https://localhost/equis7/default.aspx).
15.Login using an EQuIS Enterprise administrator account (default account is administrator/admin).
Warning: For security reasons, the default administrator password of "admin" should be changed immediately after initial login is successful. |
16.If dashboards were backed up, copy the *.dashboard files into the ..\Enterprise7\deploy\ directory.
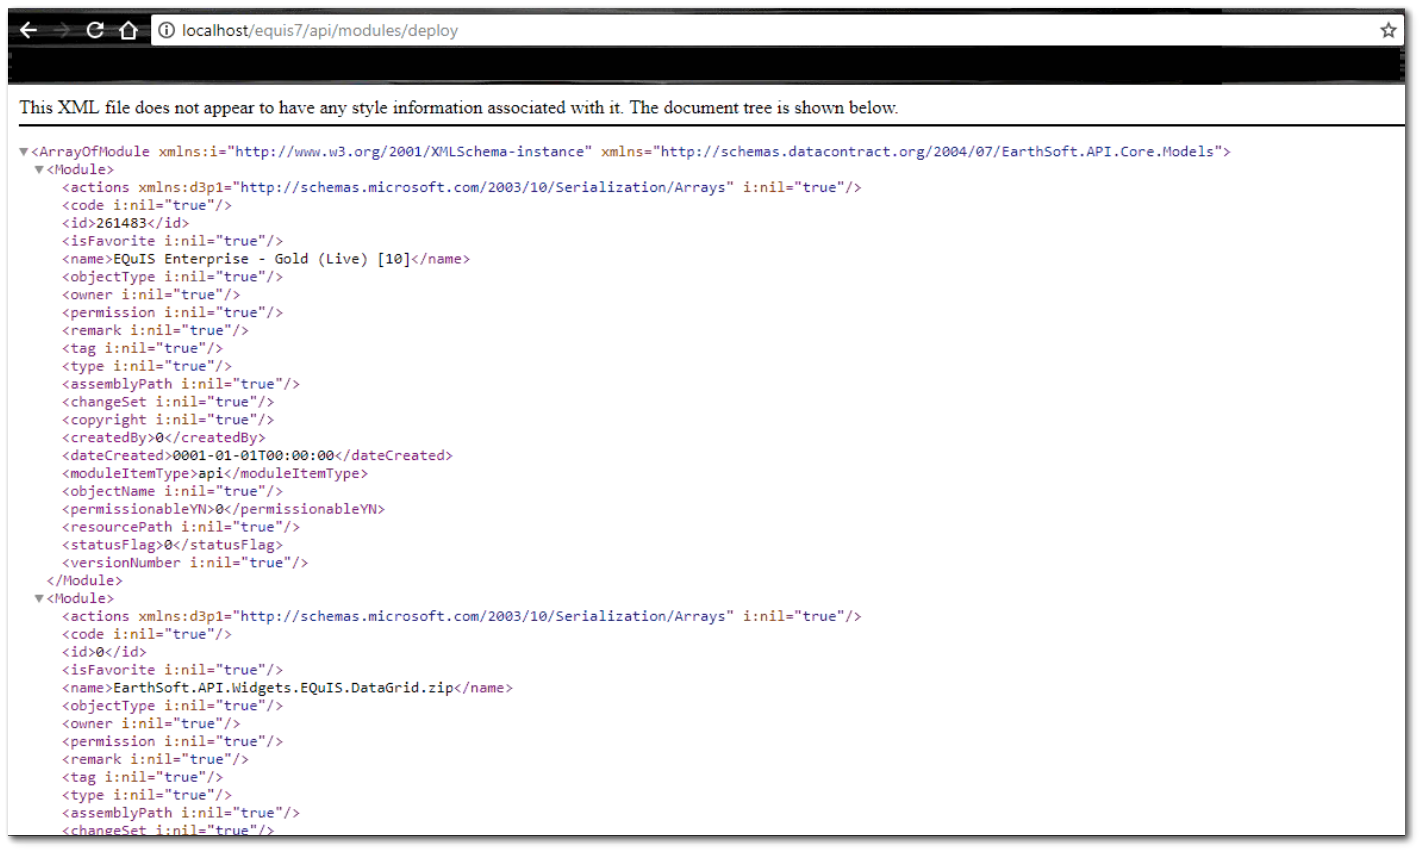
17.Append "action=deploy" to the URL to complete the deployment step. (e.g. https://localhost/equis7/default.aspx?action=deploy). You should see a list of files that were successfully processed as shown below:
18.Start the EQuIS Enterprise 7 Workflow service under Windows Services.
19.Navigate to the web application URL (e.g., https://localhost/equis7/default.aspx) to use EQuIS Enterprise.
20.If configuring Windows Authentication (LDAP Authentication), modifications are needed in the web.config file. See Using LDAP Authentication for more information.
Note: The \Enterprise7\App_Data folder contains the original installed widget, dashboard, and ST_CONFIG.DATASET deployment files. These can be copied from this folder into the \Enterprise7\deploy folder |