The first step in the DQM data qualification process is to start a DQM Event. For each DQM Event, the analytical data sets requiring qualification and the DQM QAPP specific checks must be selected. During the Start Event step, the automated checks for the selected DQM QAPP are run and DQM adds several new columns to the Analytical Results output table, including DQM_QUALIFIERS, DQM_REMARK, APPLY_QUALIFIER and APPLY_REMARK. When DQM discovers an exception to a DQM rule, both QUALIFIER columns are populated with that rule's qualifier. The DQM_QUALIFIERS and DQM_REMARK columns are not editable; this is to preserve the records of the DQM suggested qualifiers.
Once the DQM Event is started, the review continues with Processing a DQM Event (the next step in the DQM data qualification process).
Creating the DQM Event
•Step 4 – Select Holding Time Types
•Step 5 – Select Surrogate Association QAPP
•Step 8 – Only Include Unvalidated Results
•Step 10 – Review Selections and Start Event
Step 1 – Start Event button
Click the DQM Start Event button on the Data DQM ribbon. This will open the DQM - Start Event Form.
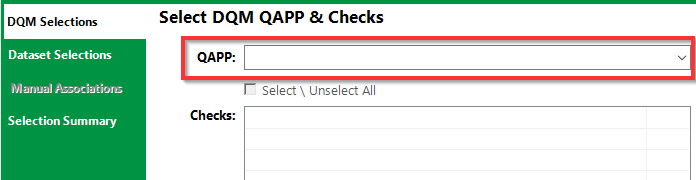
Step 2 – Select QAPP
From the DQM Selections tab click the QAPP drop-down to select the DQM_QAPP_CODE group to run checks from.
Note: QAPPs that have been disabled by having RT_DQM_QAPP.STATUS_FLAG set to "R" will not be available in the drop-down menu. |
Step 3 – Select Checks
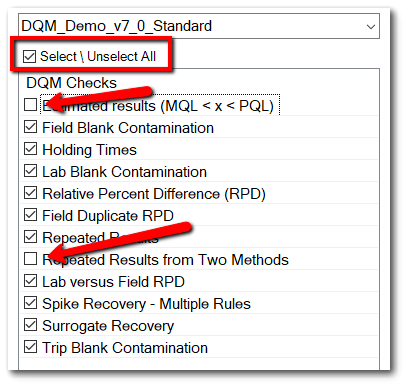
Click the Check box(es) to select one or more checks to run.
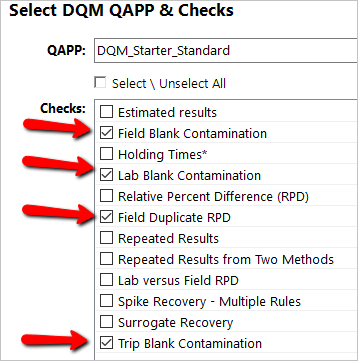
or click the Select All check box and run all checks or deselect some checks.
Step 4 – Select Holding Time Types
If Holding Time (HT) is one of the selected DQM checks, then the Holding Time Types must also be selected from the list to the right of the checks.
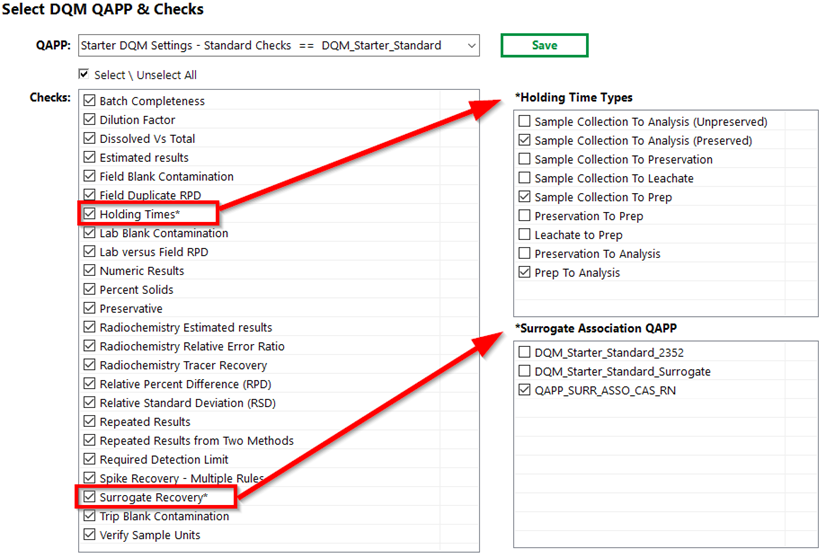
Step 5 – Select Surrogate Association QAPP
If Surrogate Recovery is one of the selected DQM checks and the ‘asso_acid_base_yn’ check parameter = ‘Y’. Then optionally, select a Surrogate Association QAPP. The selected QAPP CODE will be used as the surrogate-specific list of CAS_RNs to associate.
By default the QAPP selected above will be selected if available in the Surrogate Association QAPP list. Otherwise, if the reserved QAPP CODE ‘QAPP_SURR_ASSO_CAS_RN’ is available it will be selected.
Step 6 – Save Selections
Optionally, click Save to store these DQM Checks as default input for the selected QAPP and current user. The current Check selections will be saved as a new user report in ST_USER_REPORT, named after the selected QAPP and with status_flag = ‘D’.
Previously saved QAPP Check defaults will automatically load when that QAPP is selected in the Start Event Form.
The Overwrite option for saved QAPP Check defaults is enabled when current default selections are changed.
Note: By design, the saved QAPP Checks defaults do NOT include Holding Time Types. |
Step 7 – Select Dataset
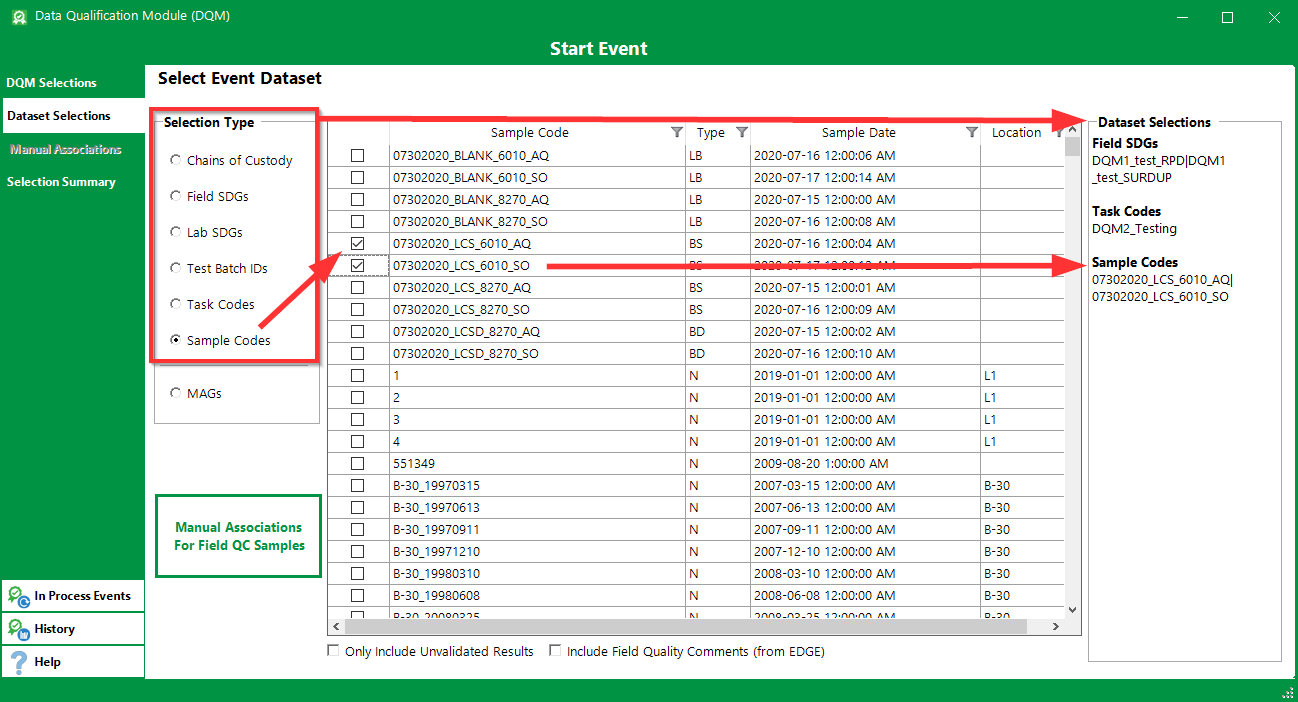
Select the Dataset Selections tab. Chose the analytical results for qualification by Selection Type. The following types are available:
•Chain of Custody
•Field SDGs
•Lab SDGs
•Test Batch IDs
•Task Code
•Sample Code
•MAGs – Only displays MAGs from the RT_MTH_ANL_GROUP table where FACILITY_ID is null or is the session facility.
•Analytic Method – If this option is selected, a table displays all methods in the RT_ANALYTIC_METHOD table with STATUS_FLAG = "A".
Select the desired option(s) from the Selection Type list. When one of the radio buttons is selected, all available data sets pertaining to that option will display in the selection pane.
For the dataset Selection Type “Field SDGs” and “Lab SDGs”, the columns can be resized by the user to view all the information in a single screen without having to scroll. Additional columns are displayed for these two dataset selection types, including the “EDD Loaded Date” and the “ebatch”.
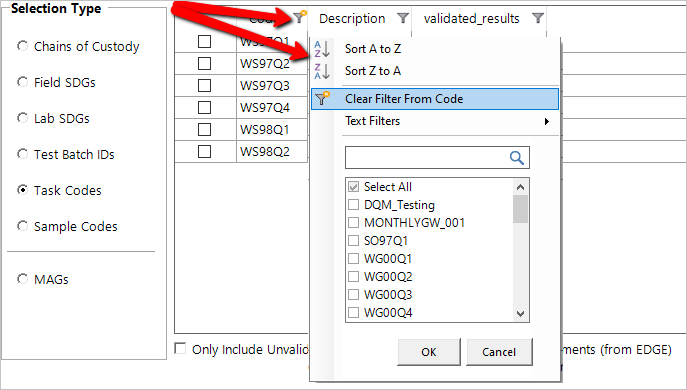
Click the check boxes for all the data sets that are needed for the data qualification event. The Filter button on any column header can be used to find the desired data set(s).
As analytical data sets are selected, their identifiers will appear in the Dataset Selections summary box on the right side of the form. This provides a summary of all the analytical results input selections.
At least one data set must be selected from the list to start a DQM Event. Multiple data sets of each type can be selected. Data sets from different types can be incorporated into the same DQM Event.
Notes: •Unlike most other EQuIS reports and excluding the MAGs type, these selections are additive. Therefore, when multiple selections are made, the DQM Event will include samples that have one or another of the selections, not just the samples that have all of them (The optional MAGs input behaves in the typical EQuIS report selection manner of excluding all results that are not in the specified Method Analyte Group). •If using a MAG that has duplicate MAG members that are indistinguishable from one another, an error will be received when attempting to save an Event. To avoid this, make sure the duplicate MAG members can be distinguished by analytic_method, fraction, or matrix. |
Step 8 – Only Include Unvalidated Results
If desired, check the Only include Unvalidated Results check box to restrict the event to results with DT_RESULT.VALIDATED_YN = 'N'.
Optionally, check the Include Field Quality Comments check box to add a Field Quality Comment column to the Review Samples > SAMPLES table output, and populate it from DT_SAMPLE_PARAMETER.PARAM_VALUE where PARAM_CODE = FieldQualityComment (These DT_SAMPLE_PARAMETER records are created by EDGE when a Field Quality Comment is added during field data collection).
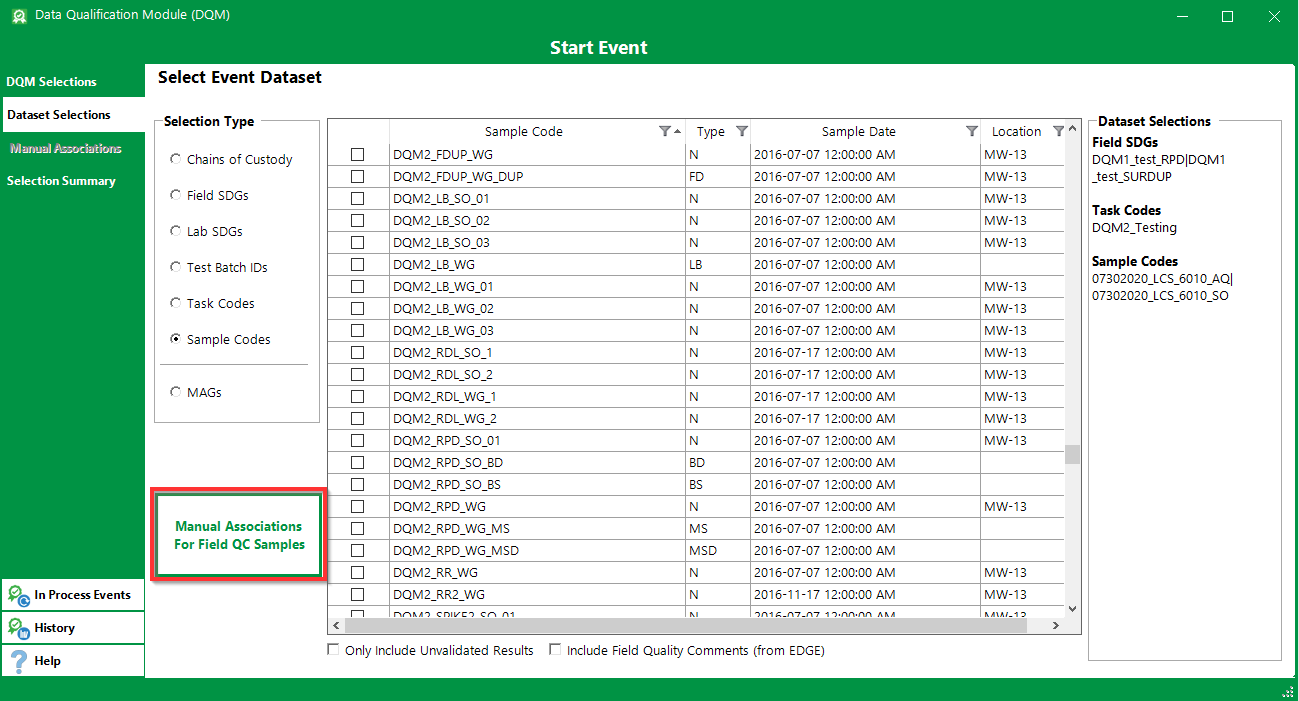
Step 9 – Manual Associations
Optionally for Field Blank Contamination and/or Trip Blank Contamination Checks, click the “Manual Associations for Field QC Samples” button to open the Manual Associations tab. Use this tab to manually associate field-collected blanks (e.g. Trip Blanks, Equipment Blanks, Ambient Blanks, Field Blanks, etc.) to your Normal samples.
Selecting to manually associate the field-collected blanks overrides the automated associations made by DQM (See Field Blank Contamination and Trip Blank Contamination for details about how field-collected blanks are associated with a dataset).
Notes: •The “Manual Associations for Field QC Samples” button is disabled until the Field Blank Contamination Check and/or the Trip Blank Contamination Check are selected, and the Dataset Selections are complete. •The Start Event Form will not be populated with prior Manual Associations; however, these associations will be evaluated/included when the corresponding check is executed. |
The Manual Associations tab displays the samples from the input data, with the Normal samples in rows (sorted alphanumerically) and the field-collected Blank samples in columns (sorted alphanumerically).
Sample types for Field Blank Contamination and Trip Blank Contamination Checks are configured on the Parameters tab in DQM Settings (RT_DQM_CHECK_PARAM).
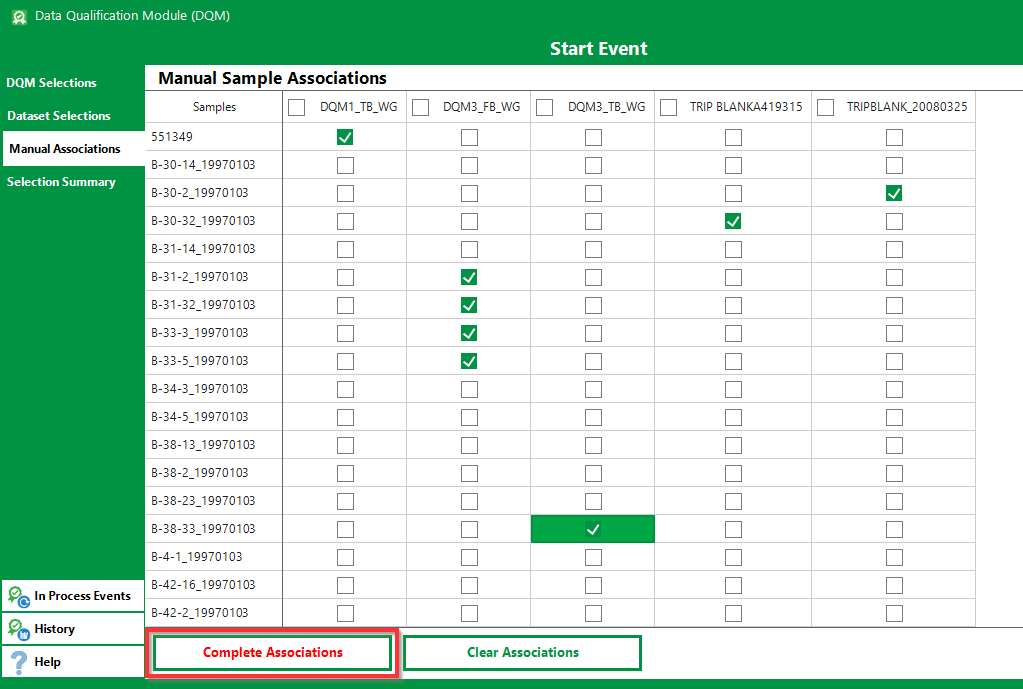
Check the box in the column header of a Blank sample to associate it with all of the Normal sample rows.
Click the check boxes individually within the table to associate a subset of Normal sample (rows) with each Blank sample (column).
After checking all sample associations, select to "Complete Associations".
If after completing the associations and reviewing the selections summary you need to change the QAPP or the dataset selection, a warning message will appear to inform you that this action will clear the sample associations.
Uncheck boxes individually to remove the selections or click “Clear Associations” to clear all the selections with one action prior to starting the DQM Event.
Note: After you click the “Complete Associations” button and click the “Start Event” button, the associations are saved to the DT_FIELDQC_BATCH_PARTNER table. Once saved to the DT_FIELDQC_BATCH_PARTNER table, these associations will be used by DQM every time DQM is run on the dataset. Any desired changes to the associations will need to be made directly in the DT_FIELDQC_BATCH_PARTNER table. These associations can also be added to DT_FIELDQC_BATCH_PARTNER with a custom format, see Field Batch Partner for additional information. |
Step 10 – Review Selections and Start Event
Select the Selection Summary tab and review selections.
Click the Start Event button to start the DQM Event. When the qualification finishes, the DQM Event Review Form opens to allow the user to Process a DQM Event.