The Grid View feature allows specified fields to be displayed in a grid view (i.e., table view) on the mobile device. This allows for easy viewing of form records while in the field. The grid view is created while designing the form on the Template Designer page.
When using a form with grid view on the mobile device, after generating and saving the first record, a new record can be easily created in the grid display by clicking on a cell in the empty row at the bottom of the grid. This empty row will display an independent cell for each column available/displayed in the grid. Clicking on an empty cell will open up that field for data entry. If that field belongs to a combined field group, the combined field group window will open displaying all fields within the combined group.
Grid View Design Considerations
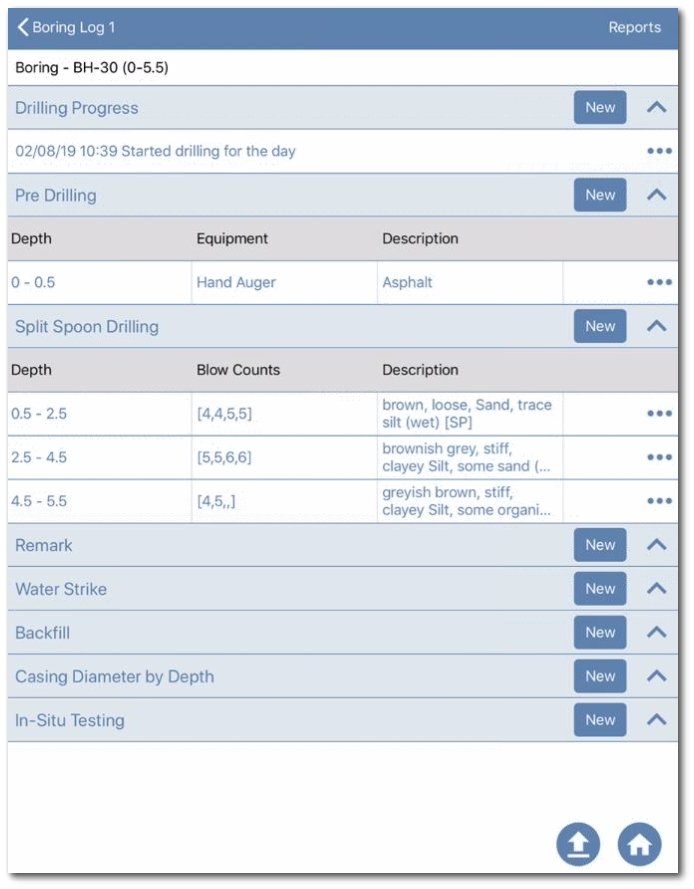
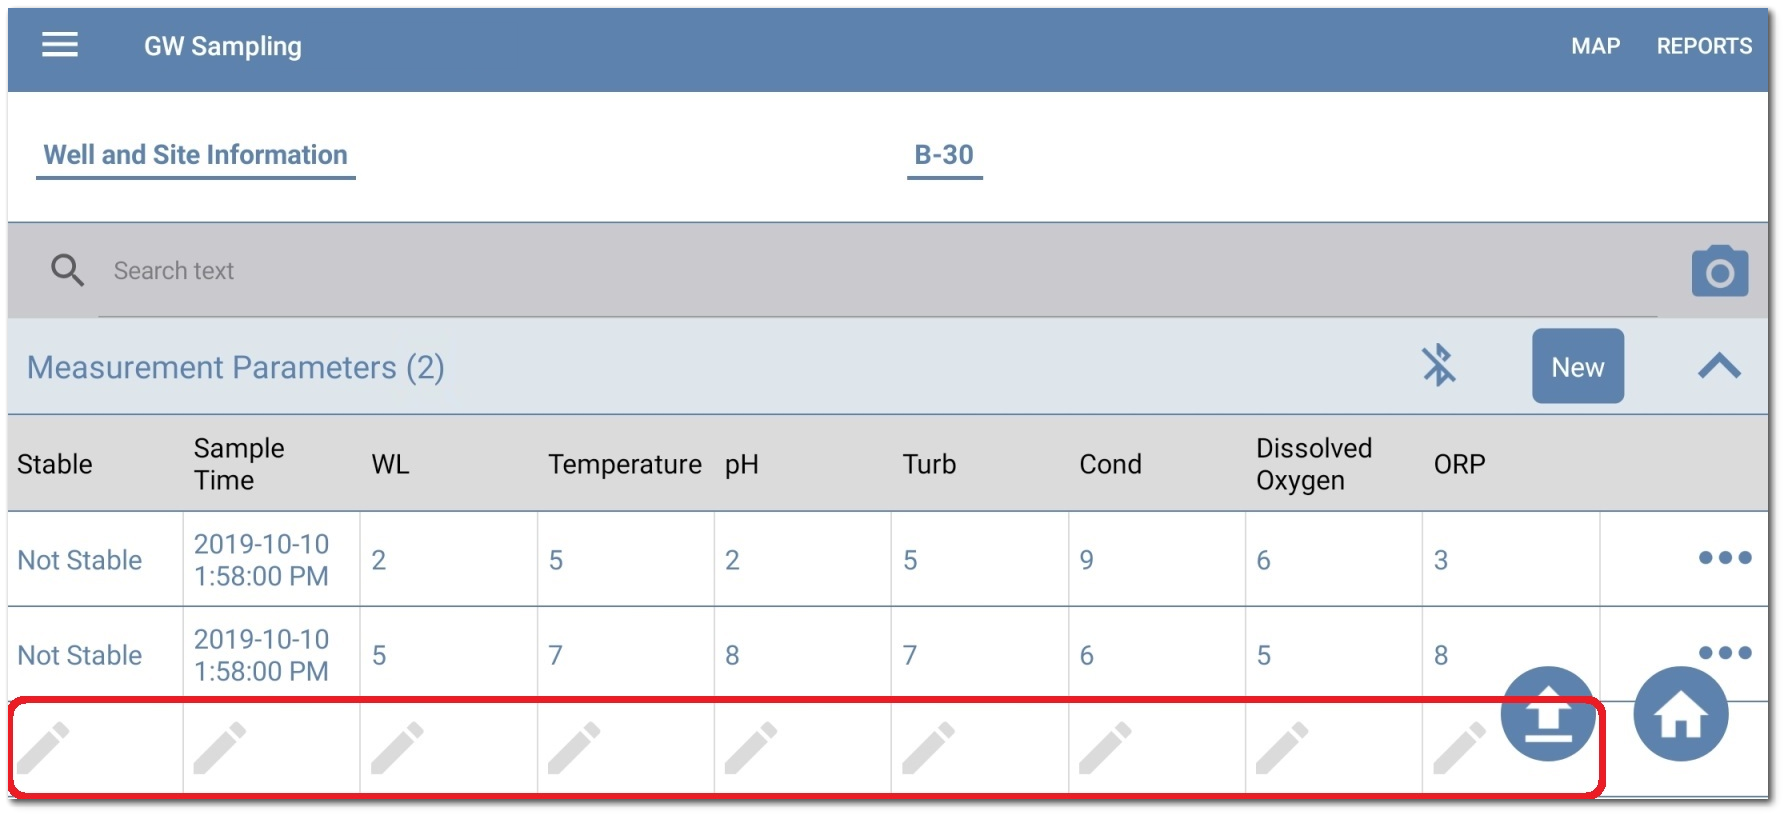
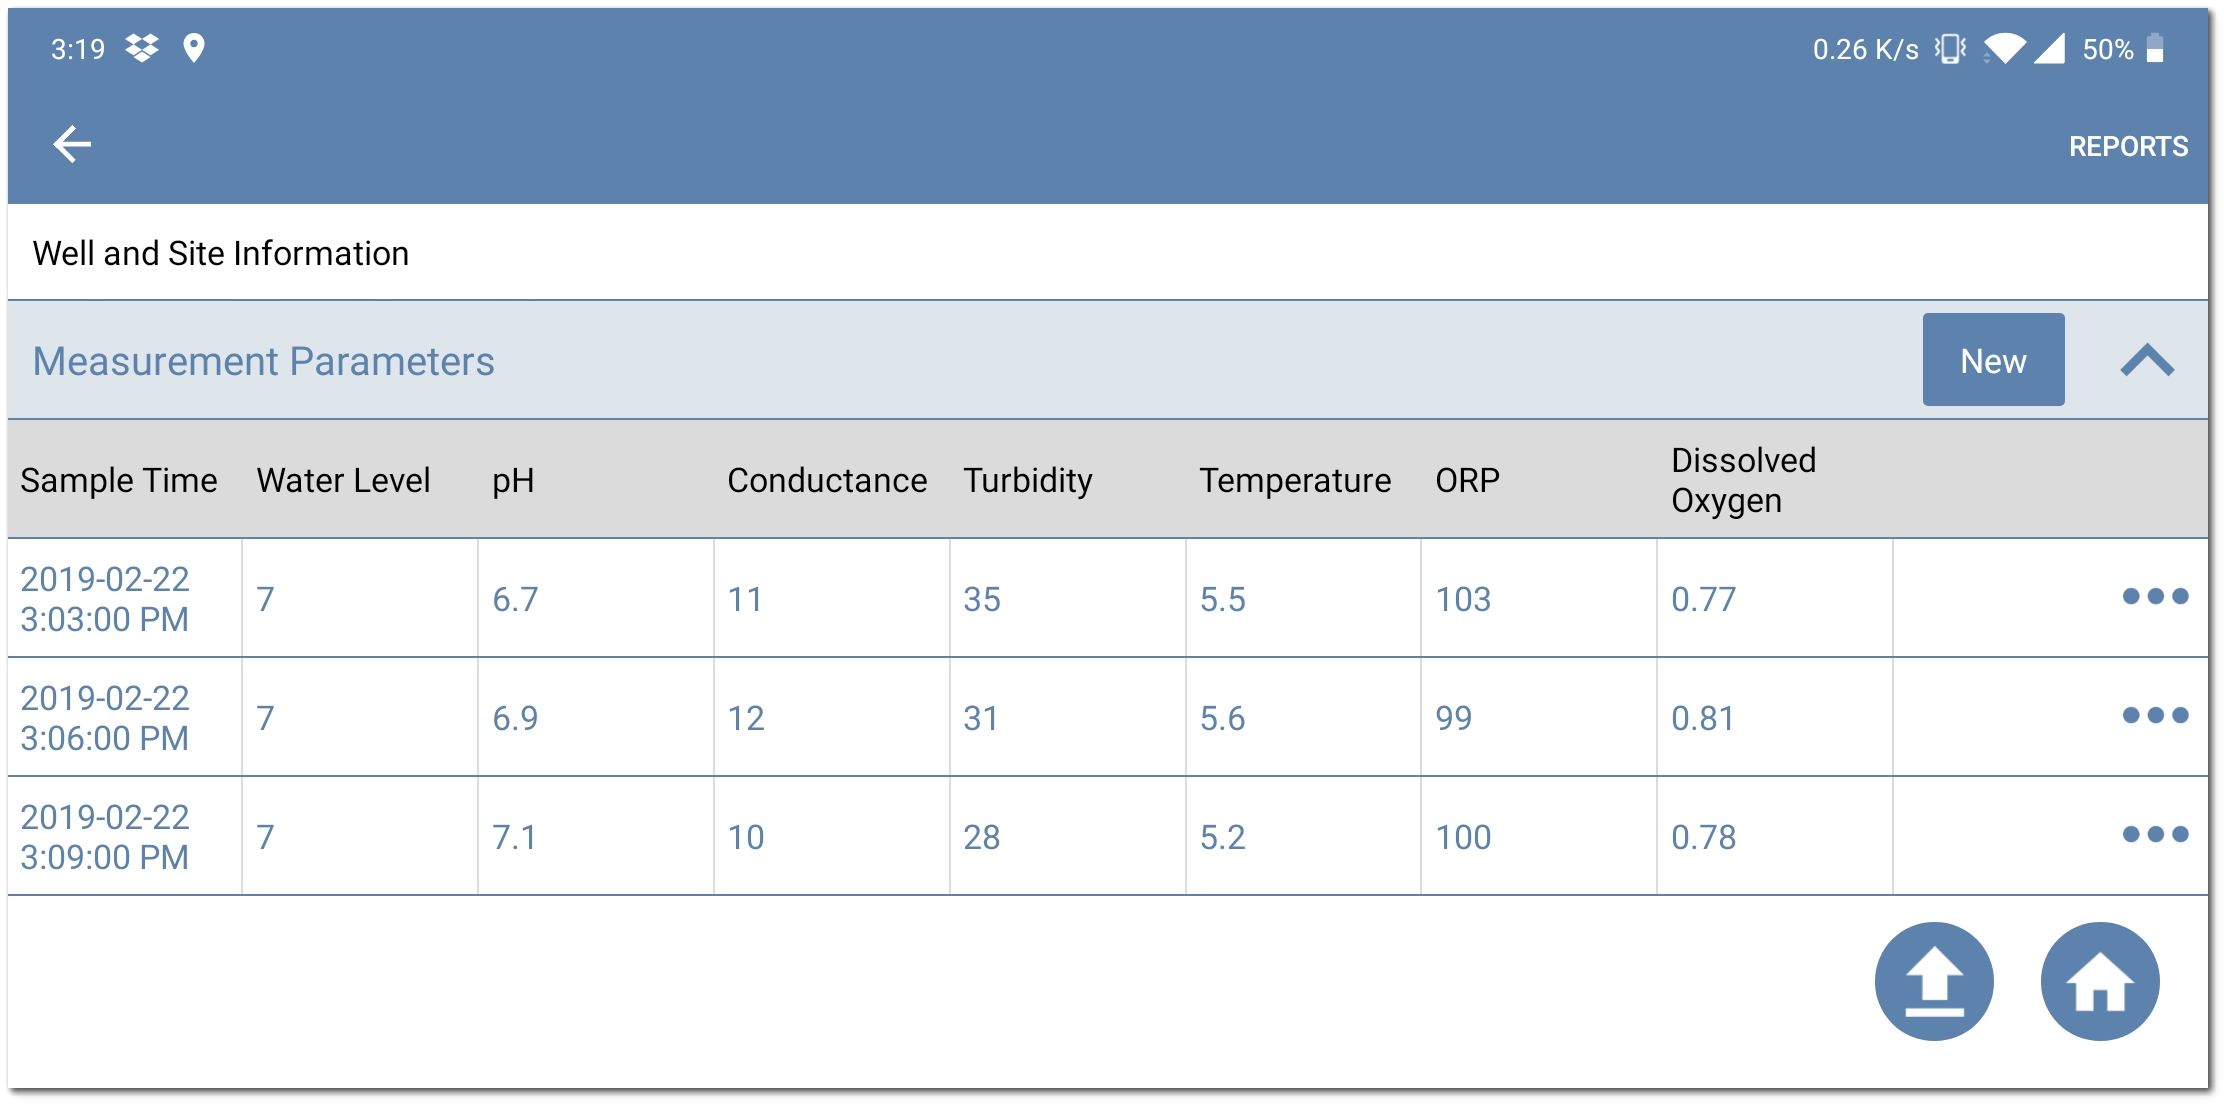
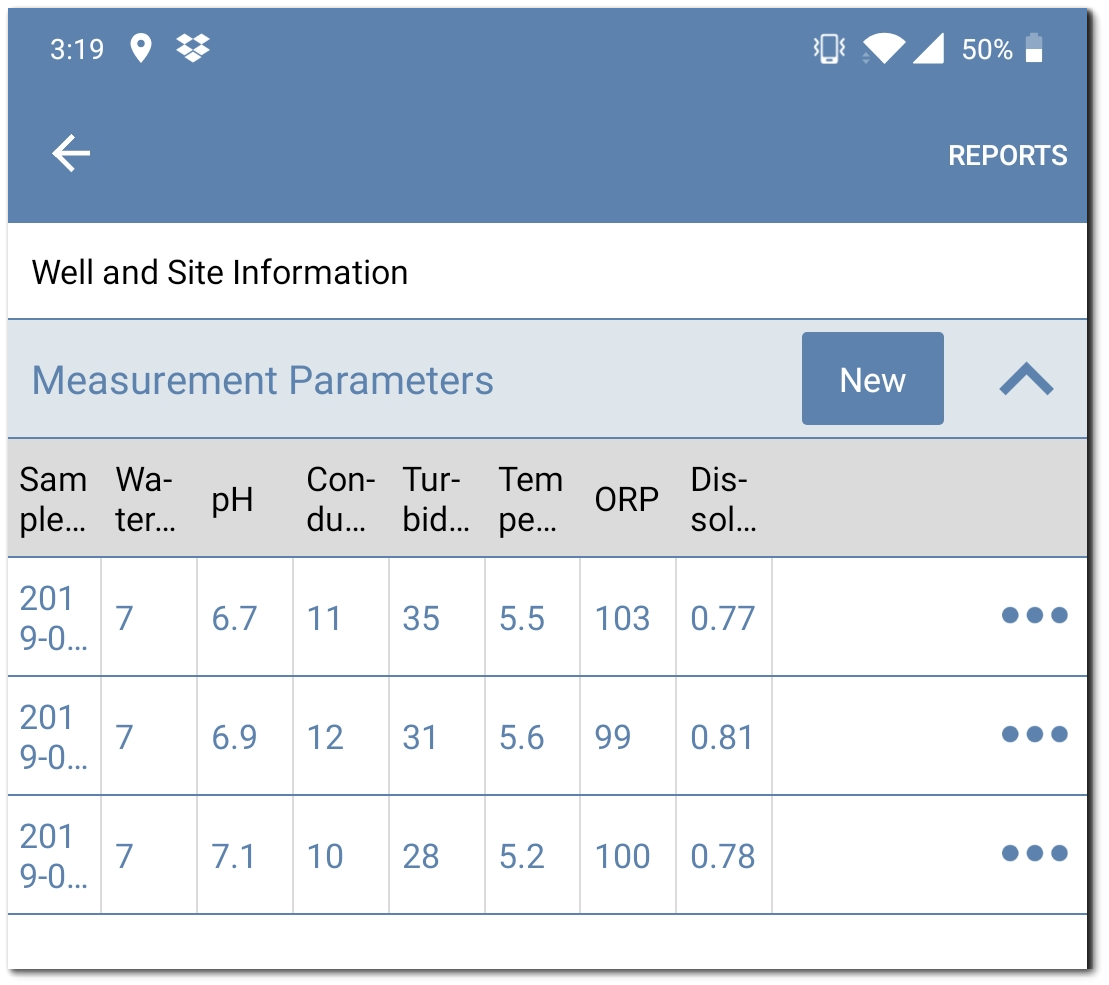
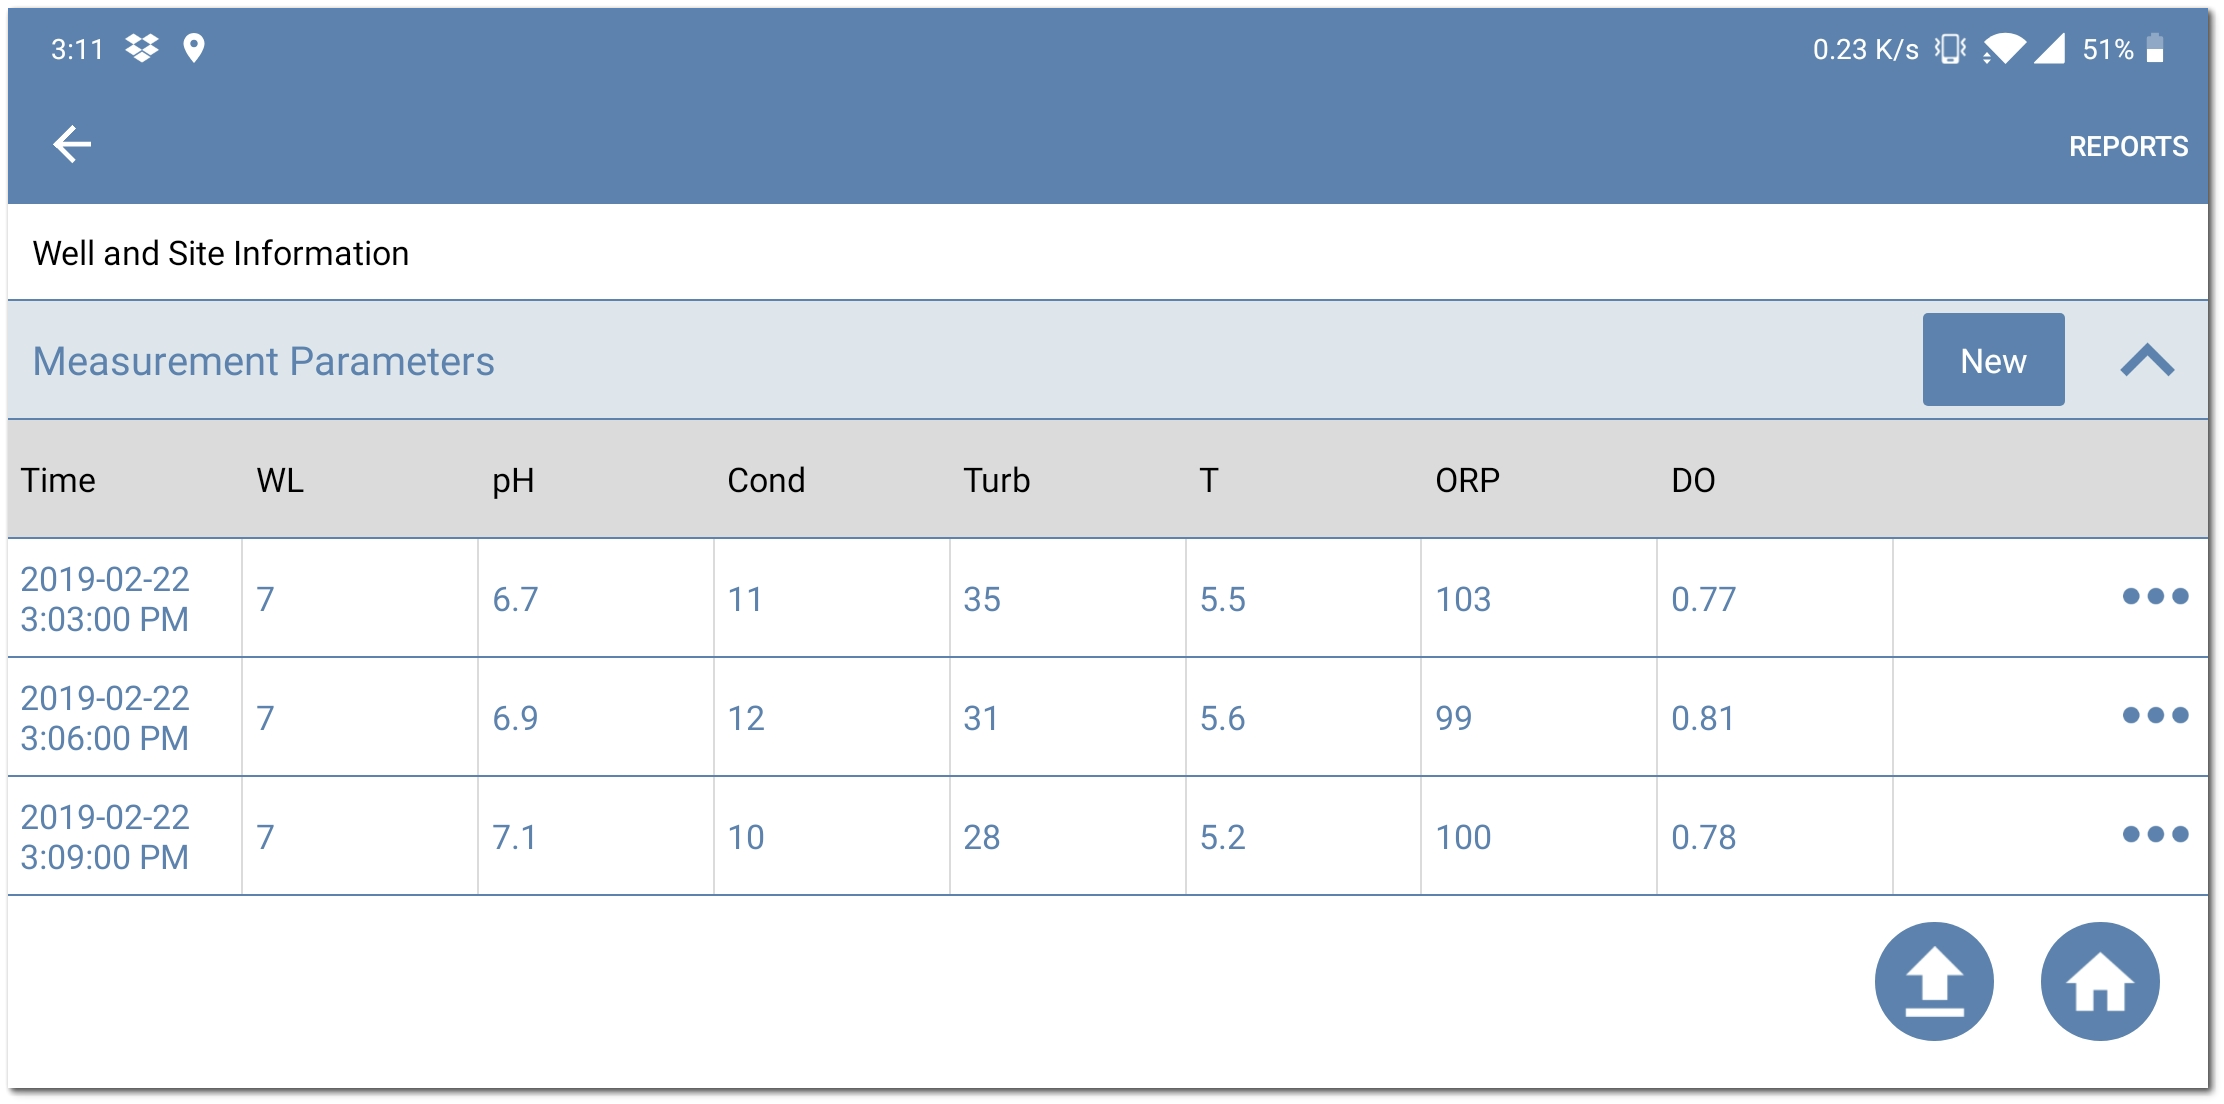
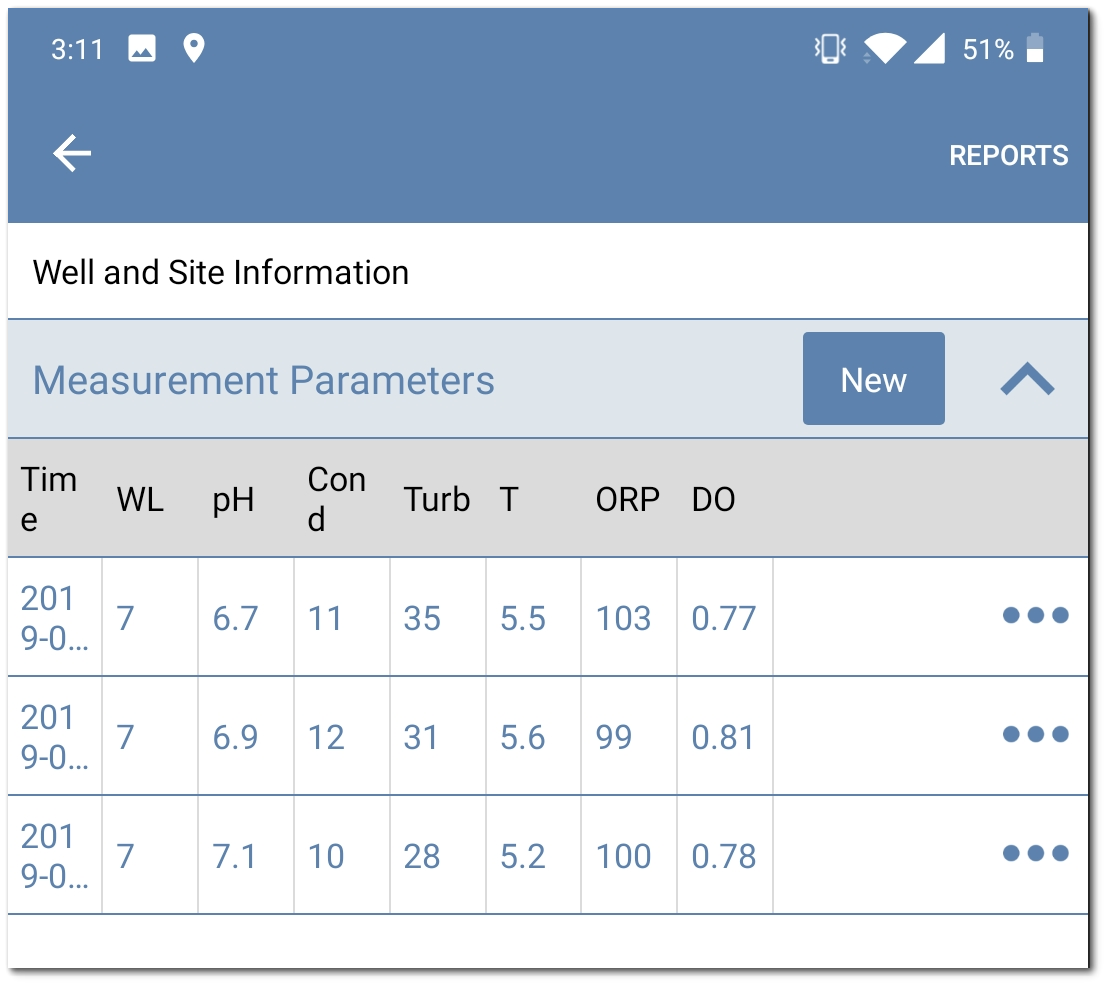
An important design consideration is how the grid will display on the mobile device based on screen size. The form will look different on a smart phone compared to a tablet. Therefore, grid column header names should be concise to maximize readability with a limited screen size. In the example below, designing the field parameter grid view with abbreviated field names improves clarity for the user in the field.
Tablet
|
Smart Phone
|
Tablet
|
Smart Phone
|
How to Add Grid View to a Form
There are two ways to assign and set fields to be displayed in Grid View on the form: (1) Use the Grid button on the Form Setup page to open the Grid View Builder window, or (2) use the Attribute Section while editing a field.
Grid Button on Form Setup Page
To assign fields to the Grid View click the Grid button in the Form Setup section of the Template Designer page.
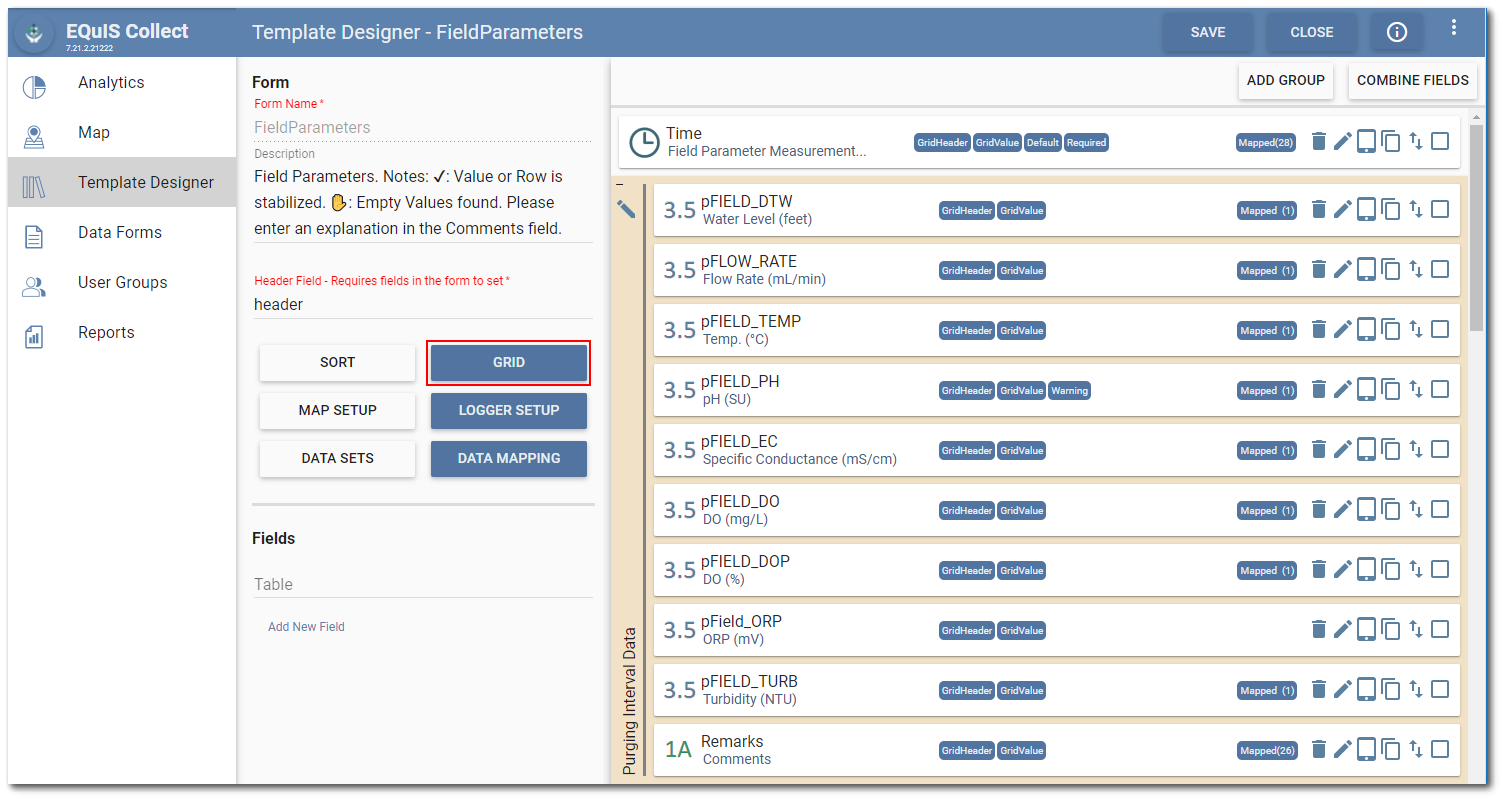
The Grid View Builder window will open. The Field drop-down menu contains all fields in the current Template. Select the desired field in the drop-down menu and click the Add button. The field is added to the Grid View Builder with GridValue, GridHeader, GridVisible, and Remove buttons.

When adding fields to the Grid View Builder, fields will automatically be organized in the same order as in the template. Once a field has been added to the Grid View Builder, the field will no longer be displayed in the drop-down menu preventing fields from being duplicated in the Grid View.
GridValue – The GridValue button is used to assign how the field value will be displayed and will default with the current field set as the field value. Select the GridValue button to assign value or logic to the specified field using the Formula Builder. Fields with no assigned grid values will be displayed with red text in the Grid View Builder.

GridHeader – The GridHeader button is used to assign which grid field will be used as a grid header value. Select the GridHeader button to assign value or logic to the specified field using the Formula Builder.
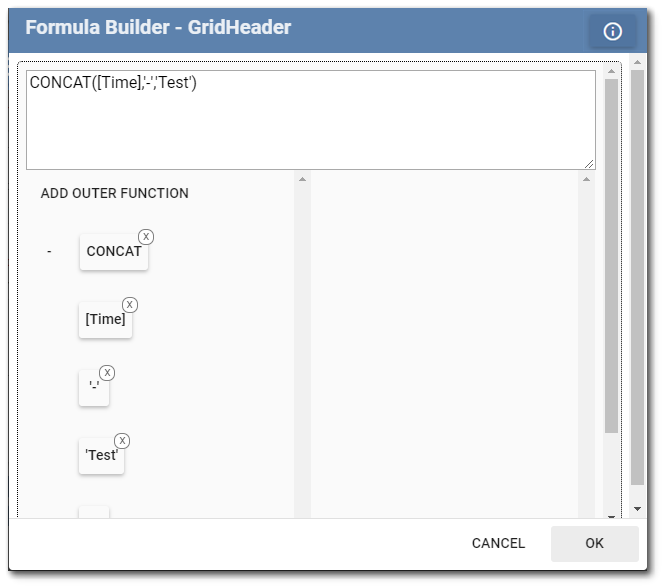
GridVisible – The GridVisible button is used to determine whether the field is visible in the Grid view on the mobile device. The True option is set by default. Select the GridVisible button to assign a value or logic to the specified field using the Formula Builder. For example, a formula can be assigned to the GridVisible attribute to display a field in the Grid View on the mobile app only if the field was planned in SPM or if they have data.
Note: If a formula applied to the GridVisible attribute makes a field visible on the form based on entered data and the formula criteria are met, all values for that field will be visible in the grid regardless of whether or not they meet the formula criteria. |
Remove – Fields can be removed from the Grid View by selecting the Remove button. The user will be prompted for confirmation prior to removing the field from the Grid View. This action will not delete the field from the form.
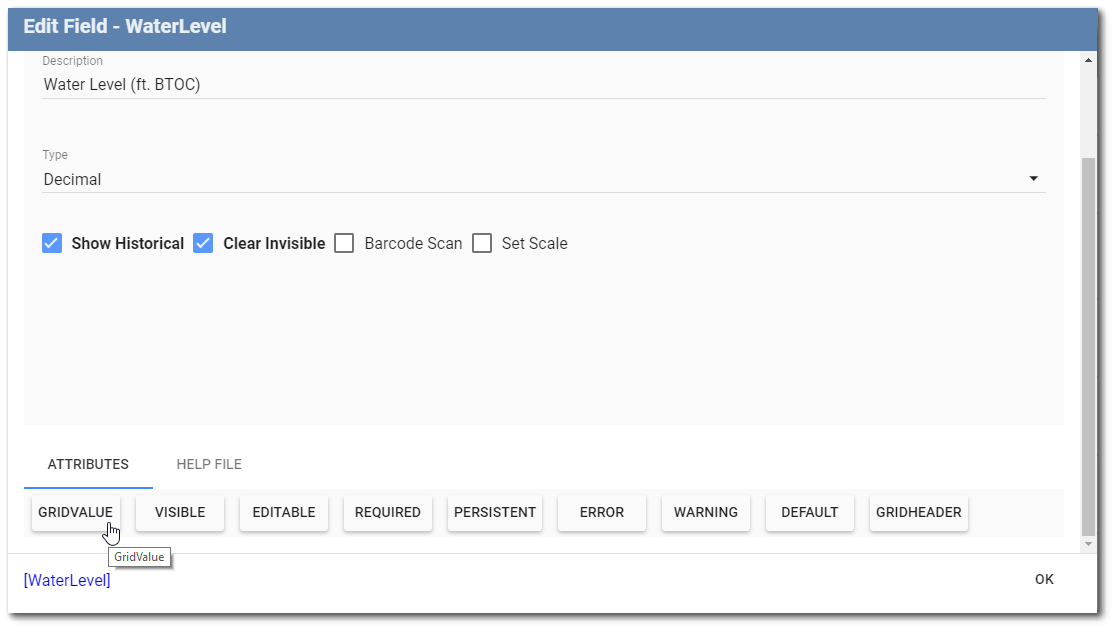
Edit Field Page
Fields can be assigned to the Grid View without using the Grid View Builder. When generating or editing a field, the GridValue and GridHeader buttons are available on the Attributes tab of the Edit Field page. Select the GridValue, GridHeader and/or GridVisible buttons to assign value or logic to the specified field using the Formula Builder. Hovering the mouse over either buttons will display the current value.
Fields that have been assigned GridValue and GridHeader values using the Attributes Tab in the Edit Field page will also be displayed in the Grid View Builder.