•Configuration for Microsoft Entra ID
•Microsoft Entra ID Admin Consent
•Enable Blanket Admin Permissions
•Use a Specific ID_TOKEN Claim to Identify the User
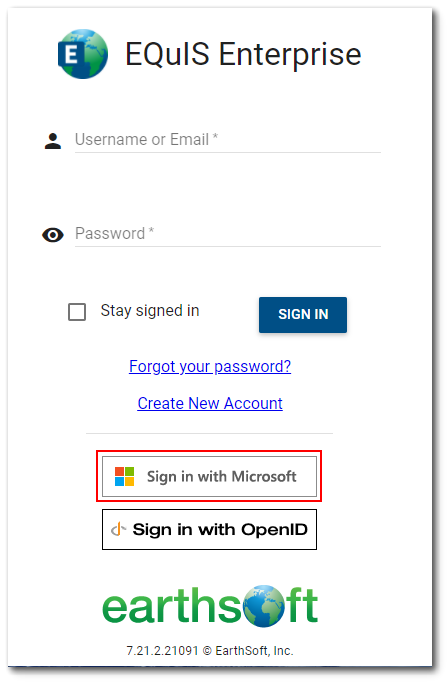
If configured, Enterprise users may be authenticated with Microsoft Entra ID, formerly known as Azure Active Directory (AAD). A "Sign in with Microsoft" button will be visible on the EQuIS Enterprise Login Screen. Clicking that button will redirect the browser to https://login.microsoftonline.com/, where the user can login with a Microsoft Entra ID account. Upon successful login, the user will be automatically redirected back to Enterprise as an authenticated user.
Note: Their Enterprise user account must exist and be assigned to the proper role(s). The account must have an email address that matches the user's Microsoft Entra ID account email address. While an Enterprise password is required when creating the account, the password will not be used if using Sign in with Microsoft for authentication. |
|---|
If an administrator wants all EQuIS users to use only Microsoft Entra ID user authentication, basic user authentication (i.e., EQuIS username and password) can be disabled. The EQuIS username and password text boxes and the Sign In button will no longer be displayed on the Login Screen. See the Configure Login Screen article.
Configuration for Microsoft Entra ID
Microsoft Entra ID will only allow authentication from a known, registered application. EarthSoft has registered “EarthSoft EQuIS” as a known application with Microsoft. The Application ID (sometimes called “Client ID”) that Microsoft assigned is 4d627659-bb7b-428b-aa0a-32d1b6e77e1a. This value must be used exactly as-is in the steps outlined below. The first time a user for your Microsoft Entra ID directory authenticates from EQuIS, s/he will be prompted to accept “EarthSoft EQuIS” as an application in your directory.
The following steps must be completed before end users will see the “Sign in with Microsoft” button and successfully login to Enterprise using Microsoft Entra ID.
1.For security purposes, Microsoft Entra ID will only send ID tokens to known sites. For Microsoft Entra ID authentication to work, EarthSoft must register your site URL as a known URL for the “EarthSoft EQuIS” application. Send your fully qualified site URL (e.g., https://sub.domain.com/dir/default.aspx or https://sub.domain.com/default.aspx) and the EQuIS Enterprise build number of this site to EarthSoft Support explaining that you are enabling authentication for your site.
Microsoft Entra ID will only redirect to approved URLs upon successful authentication, and it only allows a limited number of URLs. Microsoft recommends creating a "shared" redirect target to workaround the limited number of URLs. Successful Microsoft Entra ID authentication will redirect to https://aad.equisonline.com where the actual target URI will be validated (to avoid CSRF vulnerabilities). Upon validation, the user will be further redirected back to their Enterprise site.
2.Upon receiving confirmation from EarthSoft Support that your site URL is registered, determine your Microsoft Entra ID “Directory ID” (sometimes called “Tenant ID”). This ID is a globally unique identifier (GUID) that is assigned by Microsoft and looks similar to 13fa23a6-890b-4833-95e2-3e09d52aa512. For more information, see How to find your Microsoft Entra tenant ID.
The Microsoft Entra ID/network administrator can find this ID as follows:
a.Log into https://portal.azure.com/
b.Select Microsoft Entra ID
c.Ensure that you are viewing the correct directory (if necessary, switch directories)
d.Click Properties
e.Copy the Directory ID (Tenant ID)
Note: For EQuIS Online customers, EarthSoft IT will assist with this configuration, but you must provide your Microsoft Entra ID Directory ID as explained above. Please send your Directory ID (and site URL) to EarthSoft Support and request that Microsoft Entra ID authentication be enabled. |
3.Insert the following records into your ST_CONFIG table:
CONFIG_SECTION |
CONFIG_KEY |
OBJECT_TYPE |
OBJECT_VALUE |
STRING_VALUE |
|---|---|---|---|---|
Authorization |
AzureActiveDirectory |
authority |
https://login.microsoftonline.com/{directoryId}/ |
(null) |
Authorization |
AzureActiveDirectory |
clientId |
4d627659-bb7b-428b-aa0a-32d1b6e77e1a |
(null) |
Authorization |
Token |
iss |
https://login.microsoftonline.com/{directoryId}/v2.0 |
~/openid |
Note: For certain Enterprise sites, you may wish to authenticate users from multiple Microsoft Entra ID tenants (e.g., your own corporate Microsoft Entra ID tenant for internal users and a different Microsoft Entra ID tenant for subcontractors). When configuring multiple Microsoft Entra ID tenants for authentication, each separate tenant must be added as a token issuer (i.e., CONFIG_KEY = ‘Token’ and OBJECT_TYPE = ‘iss’), but the ST_CONFIG table should always only contain a single "authority" record (i.e., OBJECT_TYPE = ‘authority’). To support multiple Microsoft Entra ID tenants, the "authority" OBJECT_VALUE should be changed to: https://login.microsoftonline.com/common That site is a generic Microsoft Entra ID login page that allows the user to enter their email address, and will then redirect them to the specific Microsoft Entra ID tenant to complete the authentication process. See Convert single-tenant app to multitenant on Microsoft Entra ID for more information. |
|---|
4.It is necessary to restart the web server after the configuration changes are completed for the changes to take effect.
The following records will be added automatically the first time Enterprise validates a token (i.e., when a user attempts to authenticate using Microsoft Entra ID). These records are used by Enterprise to issue/validate tokens. EarthSoft recommends you backup both the {baseUri} and {SigningKey} values in a safe off line place for Disaster Recovery purposes.
CONFIG_SECTION |
CONFIG_KEY |
OBJECT_TYPE |
OBJECT_VALUE |
STRING_VALUE |
|---|---|---|---|---|
Authorization |
Token |
aud |
4d627659-bb7b-428b-aa0a-32d1b6e77e1a |
(null) |
Authorization |
Token |
iss |
{baseUri} |
{signingKey} |
Microsoft Entra ID Admin Consent
When integrating any application with Microsoft Entra ID, that application defines what permissions are expected/required. The first time any user within an Microsoft Entra ID directory attempts to login to that application, Microsoft Entra ID will require either user consent or admin consent based on the permissions that the application requests. The "EarthSoft EQuIS" application (i.e., 4d627659-bb7b-428b-aa0a-32d1b6e77e1a) requests the following Microsoft Graph permissions:
User.Read
User.ReadBasic.All
These permissions are defined by Microsoft at Microsoft Graph permissions reference.
As noted the link above, both User.Read and User.ReadBasicAll do not require admin consent. Because these specific permissions do not require admin consent, the user can grant consent.
Note: If a client wishes to use their own custom ClientId, the redirect URL should be as explained by Microsoft at Redirect URI. Without that redirect URL, EQuIS Professional will not work with the client's Microsoft Entra ID. If using your own clientID, it is necessary to manually add the additional record below to ST_CONFIG for EarthSoft's clientId:
|
|---|
Enable Blanket Admin Permissions
To enable blanket admin permission so that users do not need to request admin permission when logging onto their Microsoft Entra ID sites, a Microsoft Entra ID admin can follow these instructions:
1.Select the Directory ID as documented in the previous section.
2.In the browser, replace"{directoryId}" in the following link with the Directory ID:
https://login.microsoftonline.com/{directoryId}/v2.0/adminconsent?client_id=4d627659-bb7b-428b-aa0a-32d1b6e77e1a&state=12345&redirect_uri=https://aad.equisonline.com/redirect.html&scope=https://graph.microsoft.com/user.read%20https://graph.microsoft.com/user.readbasic.all
3.Navigate to the link from the previous step. This endpoint allows the global admin to provide consent for the user administrator.
4.Select the Microsoft Entra ID login account for your company.
5.A "Permissions Requested" page will appear for User.Read and User.ReadBasic.All permissions. This is admin consent so that individual users do not have to consent.
6.Select Accept, and the EarthSoft Validating redirect... page will appear.
To check the organization's EQuIS permissions, a Microsoft Entra ID admin should follow these instructions:
a.Log into https://portal.azure.com/ and select "Enterprise Applications".
b.Select the EarthSoft EQuIS application.
c.Under Security, click on Permissions.
d.Review permissions.
e.Have users log onto the site to confirm they can log on using Microsoft Entra ID without getting a consent prompt.
For more information, see Quickstart: View enterprise applications.
Use a Specific ID_TOKEN Claim to Identify the User
Microsoft Entra ID ID_TOKENS may contain multiple claims that contain different user attributes. In the EQuIS Enterprise 7.20.2 Build and earlier builds, the "preferred_username" claim was used to identify the user. In EQuIS Enterprise 7.20.3 through 7.21.2 Builds, any of the following claims will be used (whichever is found first in the Microsoft Entra ID ID_TOKEN): "preferred_username", "unique_name", "email", "upn". This creates a problem when the EQuIS ST_USER table record contains specific values, but the ID_TOKEN contains different values in those other claims—as whichever claim is found first in the token is used, and that may not match the value in the EQuIS ST_USER record. In this situation, users may want to specify exactly which claim (from the ID_TOKEN) should be used to identify the user when comparing to the EQuIS ST_USER record. This may be done by modifying the ST_CONFIG table record for the issuer such that the STRING_VALUE is a JSON object containing a "jti_claim" property with a value that is the exact (case sensitive) claim name that should be used (the "key" property with value of "~/openid" is also required).
CONFIG_SECTION |
CONFIG_KEY |
OBJECT_TYPE |
OBJECT_VALUE |
STRING_VALUE |
|---|---|---|---|---|
Authorization |
Token |
iss |
https://login.microsoftonline.com/{directoryId}/v2.0 |
{"key":"~/openid","jti_claim":"<claim>"} |
For example, create the ST_CONFIG record as follows to use "preferred_username" as the ID_TOKEN claim that identifies the user in EQuIS:
CONFIG_SECTION |
CONFIG_KEY |
OBJECT_TYPE |
OBJECT_VALUE |
STRING_VALUE |
|---|---|---|---|---|
Authorization |
Token |
iss |
https://login.microsoftonline.com/{directoryId}/v2.0 |
{"key":"~/openid","jti_claim":"preferred_username”} |
If the Microsoft Entra ID authentication stops working, it may be due to Microsoft resetting their signing keys and will require a site restart. If this occurs, there will be an "Invalid bearer token" error in the error logs. Functionality was implemented in EQuIS 7.22.3 and later builds to automatically retrieve new tokens, with a delay of up to five minutes. Builds prior to 7.22.3 require a manual restart.