•Configure EQuIS as an Application in Your Identity Provider
•Configure EQuIS to Authenticate with Your Identity Provider
If configured, Enterprise users may be authenticated by an external, third party identity provider using OpenID Connect (see https://openid.net/connect/). Many commercial identity providers support OpenID Connect, such as Auth0, OneLogin, and Ping Identity.
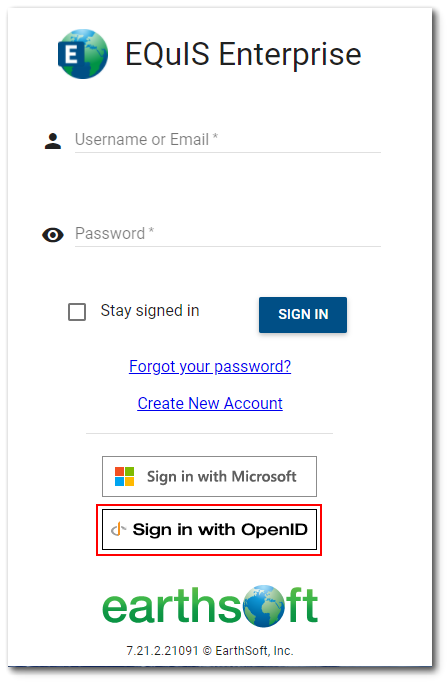
When OpenID Connect is properly configured (both in EQuIS and the third party identity provider), a “Sign in with OpenID” button will be visible on the Enterprise Login Screen. Clicking that button will redirect the browser to the identity provider login screen, where the user will authenticate with the identity provider (including any additional verification steps, such as 2FA/MFA). Upon successful login, the user will be automatically redirected back to the Enterprise site as an authenticated user. If OpenID Connect is the only authentication mechanism supported by your organization, basic authentication (i.e., EQuIS username and password) may be disabled (see the Configure Login Screen article).
Note: Successfully authenticating with the identity provider does not automatically grant a user access to Enterprise. They must have an existing Enterprise user account that is assigned to the proper role(s) and matches (either username and/or email address) the email address associated with their account for the identity provider. |
|---|
Configure EQuIS as an Application in Your Identity Provider
Before EQuIS can authenticate users via an identity provider, EQuIS must be registered as an application within that provider. There are many identity providers that support OpenID Connect, and instructions for registering an OpenID application should be available from that specific provider. Follow the provider-specific instructions to add EQuIS as an application for OpenID Connect authentication. Consider the following items when registering EQuIS with your identity provider:
•Most identity providers require a specific list of “Redirect URIs”. This is a security mechanism to ensure that authentication tokens are only provided to known applications. You will need to specify your full EQuIS Enterprise URL, followed by “/token.html”. For example, you may add the following as the Redirect URI for the EQuIS application: https://companyabc.equisonline.com/token.html or https://equis.mycompany.com/clienta/token.html.
•To use OpenID to authenticate users in EQuIS Professional, EQuIS Sample Planning Module, and/or EQuIS Collect, you must also add the following URL to the list of known “Redirect URIs”. Note that this URI is always the same, regardless of your Enterprise URI, and must be added exactly as shown here: https://4d627659-bb7b-428b-aa0a-32d1b6e77e1a/oidc
•To have the browser redirect to EQuIS Enterprise after the user logs out, add your EQuIS Enterprise URL as an approved logout URL. Do not include “/token.html” in the logout URL; instead, it should be “/default.aspx” (e.g., https://companyabc.equisonline.com/default.aspx or https://equis.mycompany.com/clienta/default.aspx).
•The identity provider configuration should allow a response_type of "id_token" to work properly with EQuIS.
•During/after the EQuIS application has been added to your identity provider, you will need to obtain values assigned by the identity provider to the application. At a minimum, you will need the following:
oAuthority – A URL that identifies your identity provider (e.g., https://my-company.us.auth0.com).
oClientId – A unique identifier assigned by your identity provider (e.g., hrSXQxJQCytnMRk7gJJHsE1YLqhC9qiu).
•In addition to Authority and ClientId, your identity provider may have a specific URL that should be visited when the user logs out of the application—not this URL, as it will be used when configuring EQuIS (see below).
Configure EQuIS to Authenticate with Your Identity Provider
Note: For EQuIS Online customers, EarthSoft IT will configure EQuIS for you, but you need to provide the information from your identity provider as described in this section. |
|---|
After adding EQuIS as an application within your identity provider, you are ready to configure EQuIS to use your identity provider for OpenID Connect authentication. The first step is to gather the necessary information from your identity provider and create a JSON (JavaScript Object Notation) string with the appropriate values. The property names must match the exact case shown here (the names are case sensitive). You must include values for both the Authority and ClientId properties, as specified by your identify provider. The following are example values:
{
“Authority”:”https://my-company.auth0.com”,
“ClientId”:” hrSXQxJQCytnMRk7gJJHsE1YLqhC9qiu”
}
Note: In JSON, whitespace is ignored (so you may include whitespace or not, as preferred. Visit https://jsonformatter.org/ to easily validate/format your JSON syntax. |
|---|
If you want EQuIS Enterprise to automatically redirect to a specific URL after the user logs out, include the PostLogoutRedirectUri property. Some identity providers provide a mechanism for the logout endpoint to make a subsequent redirect back to the application. If applicable and desired, use the text %BaseUri% as a placeholder for your EQuIS Enterprise URL and EQuIS will automatically populate the value. In the example above, add the following PostLogoutRedirectUri to redirect to Auth0 and then back to EQuIS (see https://auth0.com/docs/logout/redirect-users-after-logout):
{
“Authority”:”https://my-company.auth0.com”,
“ClientId”:” hrSXQxJQCytnMRk7gJJHsE1YLqhC9qiu”,
“PostLogoutRedirectUri”:”https://my-company.auth0.com/v2/logout?returnTo=%BaseUri%”
}
Note: If you do not provide PostLogoutRedirectUri, then EQuIS Enterprise will not attempt to logout of the identity provider when the user logs out of EQuIS Enterprise—which means that their browser session will still be logged into the identity provider and may not be prompted again when accessing other sites. If your identity provider provides a logout URL/endpoint, we encourage you to include it to ensure that the user is logged out of the identity provider. |
|---|
If you want EQuIS Enterprise to use a specific claim as the JTI (aka the identifier for the EQuIS user), include the jti_claim property with the value set to the name of the claim you want to use. In the example above, add the following jti_claim to use the "sub" claim in the id_token as the identifier for the user:
{
“Authority”:”https://my-company.auth0.com”,
“ClientId”:” hrSXQxJQCytnMRk7gJJHsE1YLqhC9qiu”,
"jti_claim":"sub"
}
Once you have your complete and valid JSON string, enter that full JSON string into your ST_CONFIG table (STRING_VALUE column) as follows:
CONFIG_SECTION |
CONFIG_KEY |
STRING_VALUE |
|---|---|---|
Authorization |
OpenIDConnect |
… full JSON string … |
Note: You may only have one OpenID Connect provider configured; multiple providers (at the same time, in the same database) are not supported. |
|---|
You can verify that the OpenID Connect information is configured correctly by using Postman to make a GET request to your EQuIS Enterprise site /api/config/anon endpoint (i.e., https://companyabc.equisonline.com/api/config/anon). If you see the correct OpenIDConnect information in the response, then the ST_CONFIG table record was created successfully.
After configuring your OpenID Connect information in the ST_CONFIG table, you should see the “Sign in with OpenID” button on the Login Screen of your EQuIS Enterprise site. Before you can successfully authenticate, you must also edit your Web.config file to allow the application to redirect to your identity provider. Search your Web.config file for “Content-Security-Policy”. On about line 87 or so, you should find something that looks like this:
<add name="Content-Security-Policy" value="default-src 'self' 'unsafe-inline' 'unsafe-eval' blob: data: *.googleapis.com *.gstatic.com *.arcgis.com *.arcgisonline.com *.microsoftonline.com http://a.tile.openstreetmap.org"/>
That list controls the other websites that may be used by your EQuIS Enterprise site. To successfully authenticate with OpenID, you must add your identity provider:
<add name="Content-Security-Policy" value="default-src 'self' 'unsafe-inline' 'unsafe-eval' blob: data: *.googleapis.com *.gstatic.com *.arcgis.com *.arcgisonline.com *.microsoftonline.com http://a.tile.openstreetmap.org my-company.auth0.com"/>
After adding the DNS name of your OpenID Authority, save and close the Web.config file and restart your application.
During the authentication process, EQuIS Enterprise will request two scopes from the provider – “openid email”. The email address of the user as known by the identity provider will be included in the id_token that is sent to EQuIS. EQuIS will validate that token, then use the email address to find the user in EQuIS.
Using OpenID Connect for authentication creates two authentication sessions in the user’s web browser. After a successful login, the user has an active EQuIS Enterprise session and an active session with the identity provider. As noted above, the Logout menu in EQuIS will always end the EQuIS Enterprise session. If PostLogoutRedirectUri is specified, then EQuIS will redirect to that URI (which should end the session with the identity provider). If PostLogoutRedirectUri is omitted, then the identity provider session will not end—it will remain active.
EQuIS will not automatically terminate the identity provider session if the user is not an EQuIS user. For example, suppose a user named Betty is a valid user in your identity provider, but is not a valid user in EQuIS. Betty clicks the “Sign in with OpenID” button to login to EQuIS and it redirects her to the identity provider, where she then authenticates successfully. However, when the identity provider redirects back to EQuIS, it does not find Betty as a valid user and redirects her back to the EQuIS Login Screen. At this point, Betty does not have an active EQuIS session, but she still has a valid identity provider session. To terminate her session with the identity provider, she will need to navigate directly to the identity provider and logout from there.