•Modify Access Agreement Information
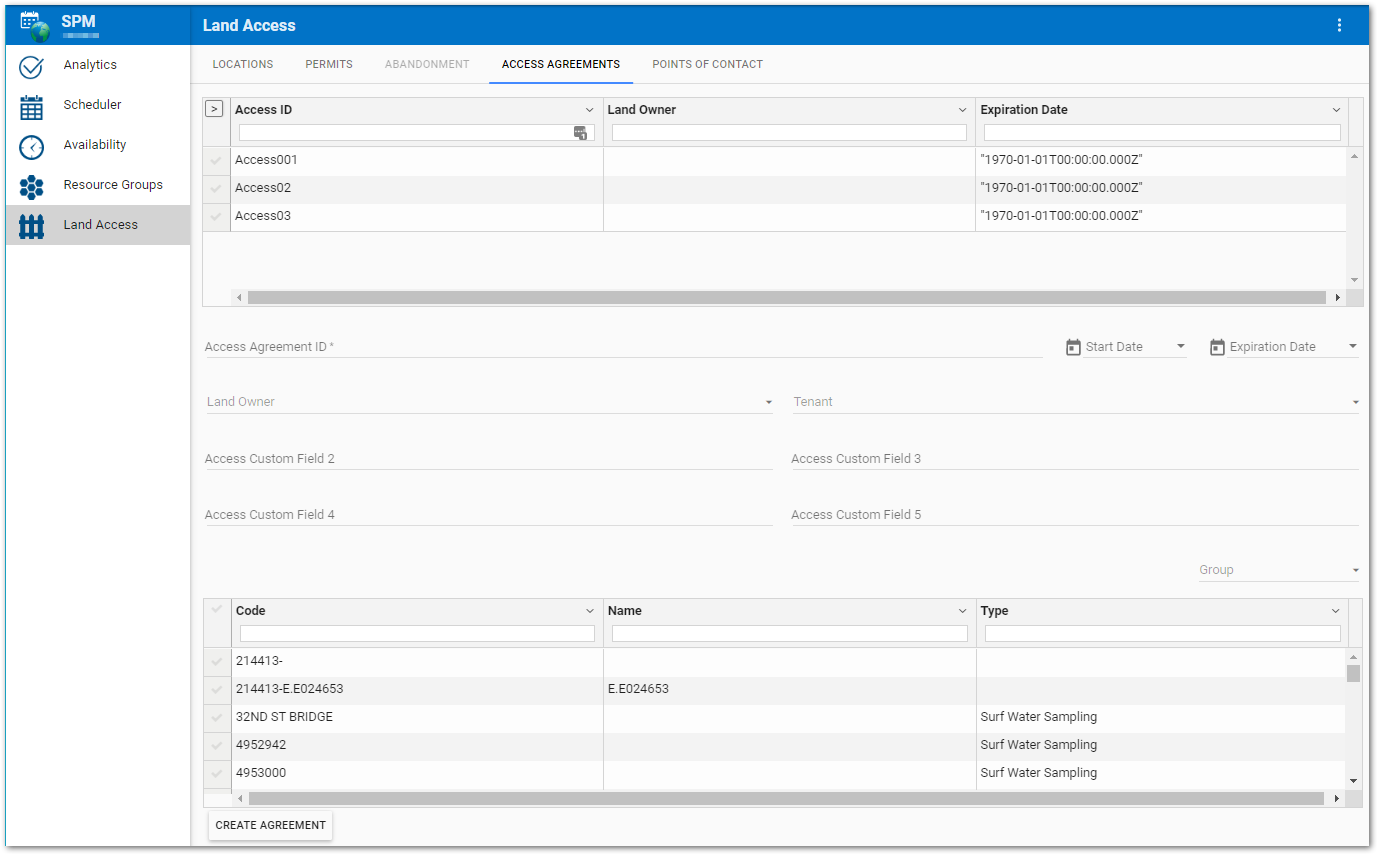
The Land Access page in SPM Enterprise provides an easy way to view, create, or edit land access information for a specific facility. Select the Access Agreements tab to add, modify, or remove an access agreement. Existing access agreements are displayed in the grid.
If a specific location or point of contact was previously selected, then the only access agreements associated with the selected location or point of contact are displayed in the grid.
Note: If the DT_PERSON table is used to store point of contact information, the land owner and tenant fields on the access agreement tab will include all records from the DT_PERSON table. |
Setup Grid View
By default, the Access Agreement grid displays the access ID, land owner code, and expiration date for each access agreement. However, users can change which access agreement fields are displayed, either permanently using the gridColumns tab settings or temporarily using the Setup Grid View.
Create New Access Agreement
To create a new access agreement, click the CREATE AGREEMENT button at the bottom of the page, ensure that no existing access agreement record is selected and then enter in the desired information. Type directly in the text boxes. Land Owner and Tenant fields are drop-down menus based on the information from the Points of Contact tab.
Note: Access Agreement ID should be a unique identifier for the access agreement. Stored in DT_SPM_ACCESS.CUSTOM_FIELD_1. |
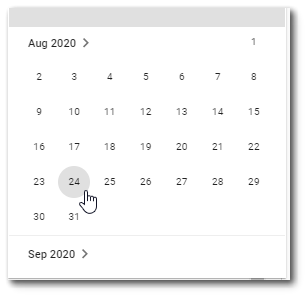
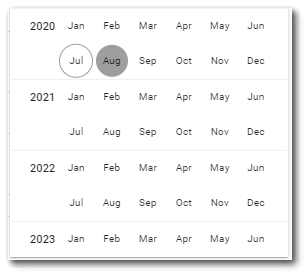
The Start Date and Expiration Date fields may be edited using the calendar tool or by entering the date manually in the text box. Click the calendar tool icon ![]() to use the calendar tool. Changing the value in the text box will also update the calendar tool. The calendar shows the selected date highlighted with a solid circle and today's date highlighted with a circle outline. If Today's date is selected in the calendar tool, it will remain highlighted with a solid circle. To select a different month or year using the calendar control, click on the name of the month or the arrow pointing forward at the top of the control. This changes the calendar tool from the month view to the year view. Once in the year view, scroll through the available years as desired. The current selected month will be highlighted with a solid circle. Select the desired month/year combo to return to the month view to pick a specific date.
to use the calendar tool. Changing the value in the text box will also update the calendar tool. The calendar shows the selected date highlighted with a solid circle and today's date highlighted with a circle outline. If Today's date is selected in the calendar tool, it will remain highlighted with a solid circle. To select a different month or year using the calendar control, click on the name of the month or the arrow pointing forward at the top of the control. This changes the calendar tool from the month view to the year view. Once in the year view, scroll through the available years as desired. The current selected month will be highlighted with a solid circle. Select the desired month/year combo to return to the month view to pick a specific date.
Month View
|
Year View
|
|---|
Use the Location grid to select the location(s) to which the access agreement will pertain. At least one location must be selected. To find the desired location in the grid, either scroll through the list or use the filter box beneath each column header. Enter a search term (one or more characters) in the filter box beneath the appropriate column header. Only records that contain the search term will be displayed. Filtering is cumulative if multiple columns are filtered. To clear a filter, either manually delete the entered characters or click on the X in the right-side of the filter box.
Click the Create Agreement button and the new record will be added to the database and will appear in the Access Agreement grid. The SPM Enterprise Land Access feature stores the access agreement information in the DT_SPM_ACCESS table.
Modify Access Agreement Information
To edit an existing access agreement record, click on the desired Access Agreement in the grid. To find the desired access agreement, the grid can be filtered and/or sorted as previously described. Once selected, any existing information for the access agreement is displayed in the text boxes beneath the grid. Enter or modify the access agreement as needed.
Warning: The SPM Enterprise Land Access page is directly connected to the EQuIS database. Information entered, changed, or deleted on the page will immediately be reflected in the database tables. |
Click the Add/Remove Locations button to add or remove locations. All available locations will be displayed in the Locations grid. Users can filter by location group by selecting the Group drop-down menu. Scroll, sort, or filter to find the desired location(s). Select or deselect locations as needed. Clicking the Add/Remove Locations button again will disable the selection process and only display locations associated with the selected access agreement.
To remove an access agreement, click the Delete Agreement button.