The Filter-Map widget allows the user to select locations and filter the report output for reporting widgets (e.g., EZView, Traffic Light, Traffic Light Map, Time Series Chart, Map, Boring Log, and Data Grid) on the dashboard. See the Dashboard Filter Widgets article for more information on filter functionality, limitations, and interactions with other widgets.
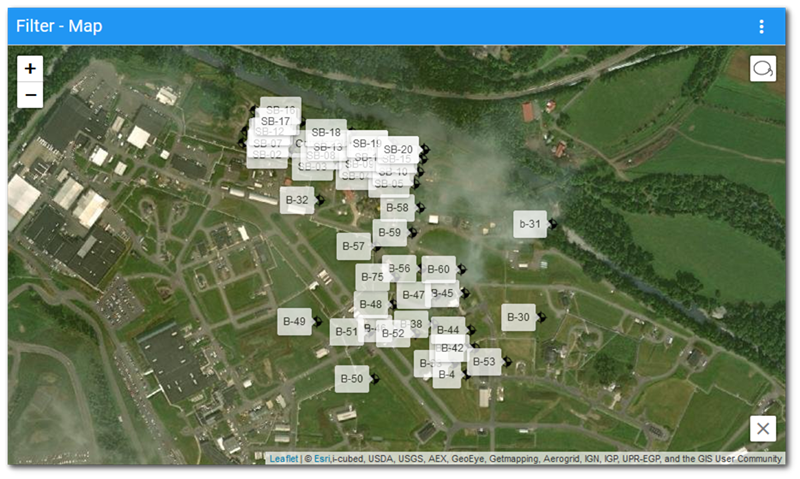
The Filter-Map widget is built using LeafletJS and displays facility point features (i.e., locations) that can be selected, with the selections filtering the report output of reporting widgets displayed on the dashboard.
If no session facility is set, polygons denoting facility extents are displayed. Selecting a facility polygon will zoom to and display that facility’s point locations. If a session facility is set on the dashboard, the session facility will be updated for the dashboard and the facility point features for that facility will be displayed on the map. This will also update the session facility for the dashboard. Changing the session facility will result in the Filter-Map widget being set to the extent of the new session facility extent and displaying the new session facility point locations.
Note: The Filter-Map widget does not work with facility groups. |
Widget Interface
The Filter-Map widget has the following functions in the user interface:
•Zoom In and Zoom Out – Click either the Zoom In (![]() ) or Zoom Out (
) or Zoom Out (![]() ) buttons to view the page as needed. These buttons are located on the top-left of the widget. Users can also zoom in and out by using the scroll button on the mouse.
) buttons to view the page as needed. These buttons are located on the top-left of the widget. Users can also zoom in and out by using the scroll button on the mouse.
•Select Locations – Click the Select Locations ![]() button to choose multiple locations that will be used to filter the dashboard. Click the left mouse button and drag to draw a line around one or more facility points. The line will automatically close when the mouse drag event stops. The selected points will result in filterable widgets only displaying data associated with the selected facility points. The button will only be displayed when facility point features are displayed on the map.
button to choose multiple locations that will be used to filter the dashboard. Click the left mouse button and drag to draw a line around one or more facility points. The line will automatically close when the mouse drag event stops. The selected points will result in filterable widgets only displaying data associated with the selected facility points. The button will only be displayed when facility point features are displayed on the map.
Note: The Select Locations button requires freehand movements and is not keyboard-operable. The Filter-Date Range and Filter-List widgets are keyboard-operable and might be viable alternatives for users that require keyboard accessibility. |
•Clear – Click the Clear ![]() button to clear all selected features, clearing the filter. The button will only be displayed when facility point features are displayed on the map.
button to clear all selected features, clearing the filter. The button will only be displayed when facility point features are displayed on the map.
Interaction with Other Widgets and Filters
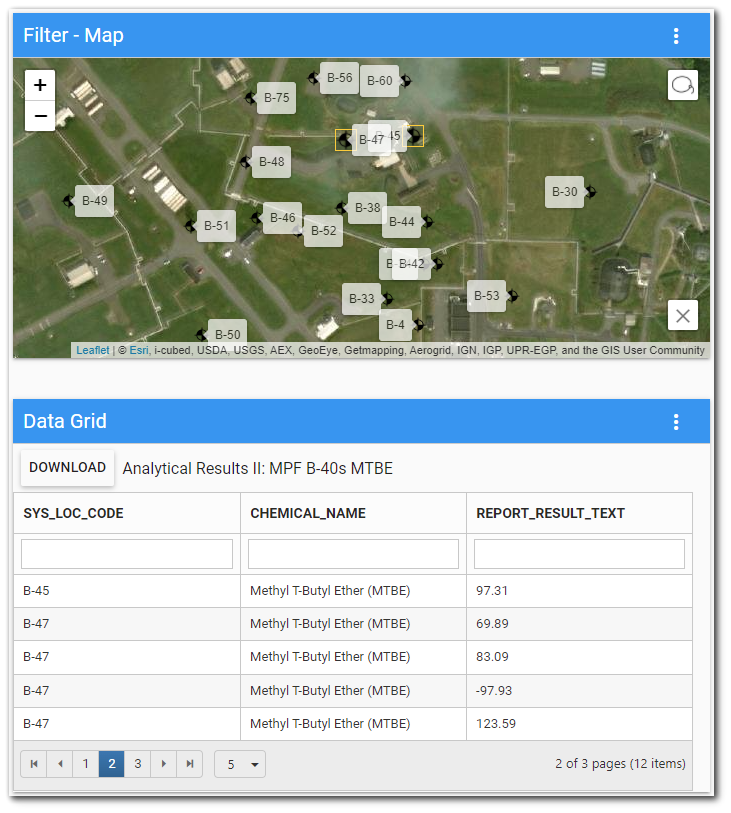
To select facility location points, either click on an individual facility location or click the Select Locations button to choose multiple locations. Each selected point will be highlighted with an orange square and will result in filterable widgets on the baseboard only displaying report results that match the locations selected in the Filter-Map widget.
Example with Data Grid Widget
In this example, a facility layer is displayed in the Filter-Map widget and a user report based on the same facility is displayed in the Data Grid widget.
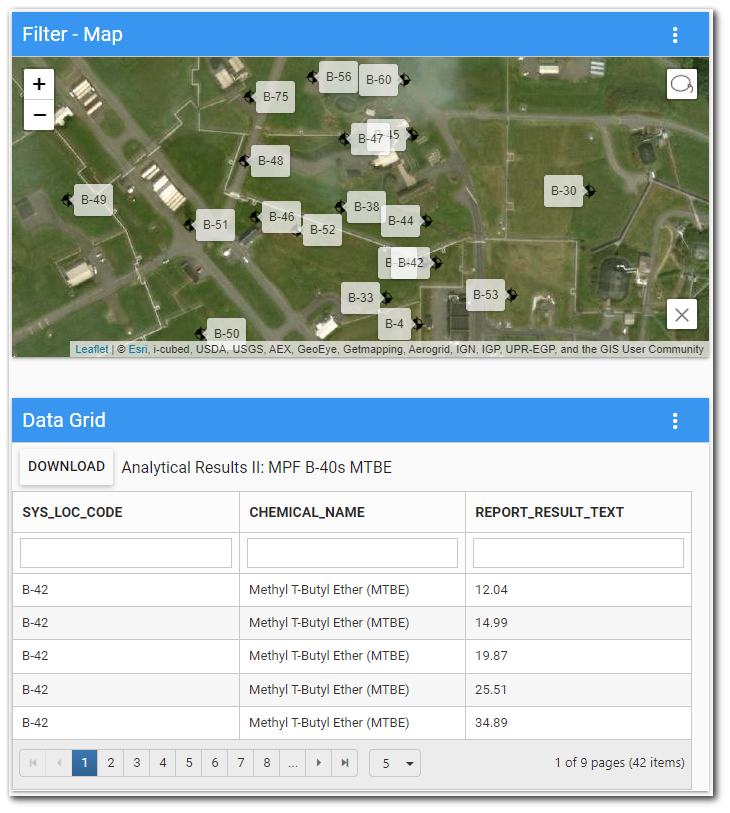
Facility locations “B-45” and “B-47” were selected in the Filter-Map widget and are highlighted with orange boxes. The report displayed on the Data Grid widget has been filtered by the selection made in the Filter-Map widget and only the “B-45” and “B-47” report locations are displayed.
Widget Properties
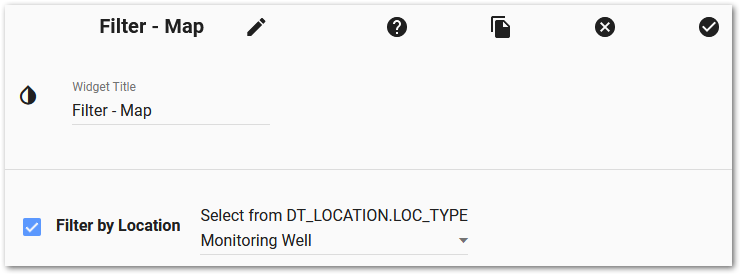
To change the title or color of the Filter-Map widget, open the Widget Editor by selecting the More Options ![]() icon in the upper right corner of the widget to display the drop-down menu and then select the Edit menu option.
icon in the upper right corner of the widget to display the drop-down menu and then select the Edit menu option.
Widget Title – By default, the widget title is Filter-Date Range. The title can be modified.
Widget Description – The description field provides a caption of the widget content for screen readers. This field improves accessibility by allowing visual elements such as charts to be given accessible text descriptions. It also displays a tooltip when hovering on the widget header. Default text (of the widget type's description) is provided but can be edited by users for additional context. This field has a 250-character limit.
Widget Color – The color of the widget can be changed using the Widget Theme![]() icon to the left of the widget title.
icon to the left of the widget title.
Filter by Location – Select the Filter by Location checkbox to filter by DT_LOCATION.LOC_TYPE using the drop-down list.
Help – The Help ![]() icon connects to the online documentation related to the specific widget.
icon connects to the online documentation related to the specific widget.
Copy Settings – Select the Copy Settings ![]() icon to to copy the settings from another widget of the same type. See the Copy Widget Settings article for more information.
icon to to copy the settings from another widget of the same type. See the Copy Widget Settings article for more information.
Cancel – Select the Close without Saving ![]() icon to exit the Widget Editor without saving changes.
icon to exit the Widget Editor without saving changes.
Save – Changes will be applied to the widget by clicking on the Save ![]() icon. The Widget Editor screen will close after the save operation is complete.
icon. The Widget Editor screen will close after the save operation is complete.