The "Generic XML" data source option allows users to load XML data into any EQuIS format using EQuIS Link. The option can be used to load any type of data with an XML structure, including EQuIS Collect data files, EQuIS Collect templates, DIGGS files, etc.
The XML document must be constructed properly for the data mappings to be successful in Link. Extensible Markup Language (XML) defines a set of rules for encoding documents in a format that is readable by both humans and machines. XML uses a markup construct called "tag pairs" to define key structural elements and content that are read by software applications. Tag pairs use the < and > symbols to bracket content with a start tag (e.g., <content>) and an end tag (e.g., </content>). Tags are not pre-defined like HTML, and must be defined by the user. See this XML Tutorial article for more information.
XML files use a hierarchical or tree structure that is defined by the tags and may begin with an XML declaration or document node that provides metadata about the document, such as <?xml version="1.0" encoding="UTF-8"?>. EQuIS Link will read the XML file and "flatten" the tree structure such that all nodes (or tag pairs) after the document node are considered data source tables and the paths to the leaf nodes attribute or text value are the field name. Repeated sub-tags are automatically read as tables by EQuIS Link. The examples below illustrate how EQuIS Link interprets XML files as data sources.
To successfully implement EQuIS Link to map data from an XML file to an EQuIS format, users must understand the structure of both the XML file and the tables/fields of the EQuIS format to which the data are being mapped. Once understood, use the formula builder and normal data mapping processes to load the XML data to the format.
Example 1 |
<?xml version="1.0" encoding="UTF-8"?> <Data> <subData Attribute1="Sub1"> <Element1 ID="1">E1</Element1> <Element2 ID="1">E2</Element2> <Element1 ID="2">EE1</Element1> <Element2 ID="2">EE2</Element2> </subData> </Data>
Link reads: •4 Tables = Data, subData, Element1, and Element2 Data is the highest level tag; others are tables because the tag is duplicated within the hierarchy. •7 Fields = Data, subData, subData_Attribute1, Element1, Element1_ID, Element2, and Element2_ID (includes tags and attributes) |
Example 2 |
<?xml version="1.0" encoding="UTF-8"?> <Data> <subData> <Element1>E1</Element1> <Element2>E2</Element2> </subData> <subData> <Element1>E11</Element1> <Element2>E22</Element2> </subData> </Data>
Link reads: •2 Tables = Data and subData Data is the highest level tag; the subData tag is duplicated •4 Fields = Data, subData, Element1, and Element2 |
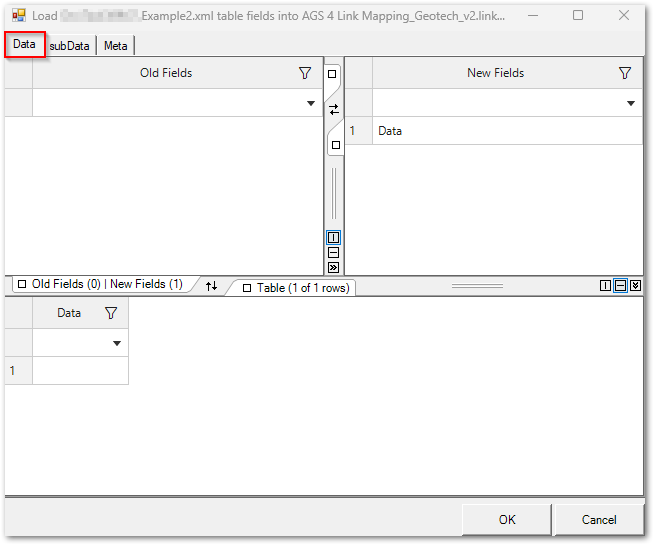
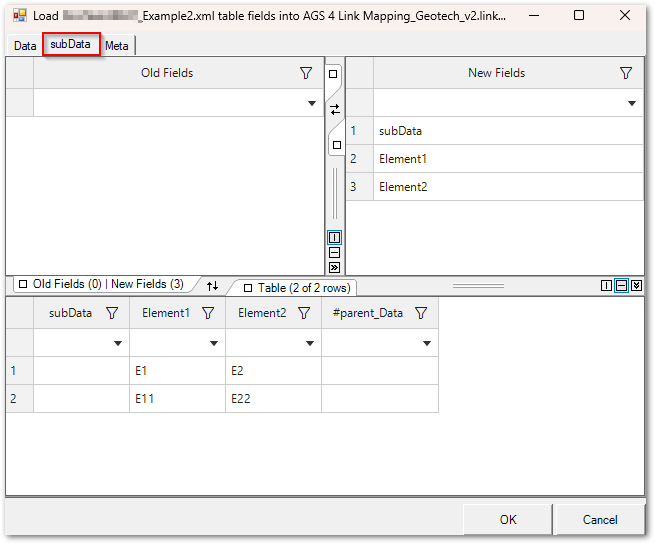
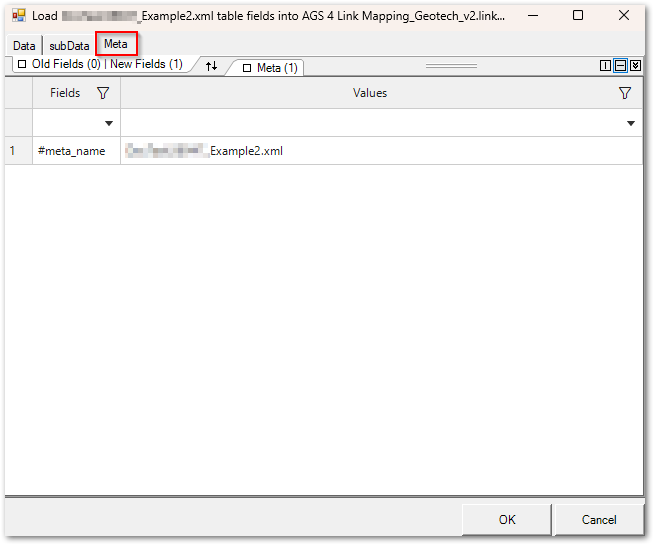
Loading a Generic XML data source table, via the Load Tables button, opens a modal that shows the parent/child relationships between the tables. Based on the values from Example 2 (above), the images below show a flattened view of the XML data, with individual tabs for the levels of XML data. The "Data" tab displays the parent item, the "subData" tab displays the child data, and the "Meta" field displays the loaded .XML file name.
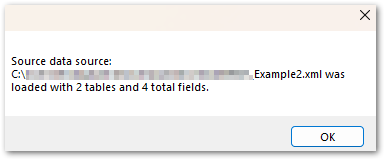
Clicking OK from the Loading Tables modal will display a dialog summarizing the XML data that was loaded into the Link project.
EQuIS Link provides infinite recursiveness through the XML tags. During formula building, data mapping up the XML tree structure can be achieved using the #parent feature.
Tips: •If the data structure of the XML source files will vary, create Link data mappings for each scenario in the project template file. Link will skip data mappings that do not match the source data. •Users can copy (CTRL + c) rows from a Load Tables dialog table and paste (CTRL + v) the rows into Excel to simplify the process of lining up and/or copying the parent column names to use in data mappings. |
|---|
After the structure of the XML data source files is successfully mapped in the Link project template, the XML files can be loaded to populate the format file with the data values. When the XML data source files are loaded, the number of data rows mapped to the selected EQuIS format is defined by number of times the mapped element is repeated.
Example Using XML Data Source
This example is intended to illustrate the steps to use an XML data file within EQuIS Link. The XML file structure is intentionally descriptive (of hierarchy and attributes) and not meant to be a real world example. The Location section of the COLLECT_INSPECTION format is used in the example.
Structure of the Example XML File
<?xml version="1.0" encoding="UTF-8"?>
<Data Attribute1="A1" Attribute2="A2">
<subData Attribute1="Sub1">
<Element1 ID="1">E1</Element1>
<Element2 ID="1">E2</Element2>
<Element1 ID="2">EE1</Element1>
<Element2 ID="2">EE2</Element2>
</subData>
<subData Attribute1="Sub2">
<Element1 ID="3">E11</Element1>
<Element2 ID="3">E22</Element2>
</subData>
<subData>
<Element1 ID="4">E111</Element1>
<Element2 ID="4">E222</Element2>
</subData>
<subData>
<Element1 ID="5">EEE1</Element1>
<Element2 ID="5">EEE2</Element2>
</subData>
</Data>
EQuIS Link will read:
•4 Tables = Data, subData, Element1, and Element2
Data is the highest level tag; others are tables because the tag is duplicated within its parent tag.
•9 Fields = Data, Data_Attribute1, Data_Attribute2, subData, subData_Attribute1, Element1, Element1_ID, Element2, and Element2_ID (includes tags and attributes)
Create Link Project Template with Data Mappings
1.In EDP, Load the COLLECT_INSPECTION format.
2.Select the Link ribbon.
3.Create a New Link Project Template file.
4.Click the Load Source Tables button to display an Open File window. Browse to the folder containing the XML source data file. Use the file type drop-down to filter data files to the Generic XML data type and choose the desired XML file.
5.For the example data file, four data tables will be available (Data, Element1, Element2, and subData).
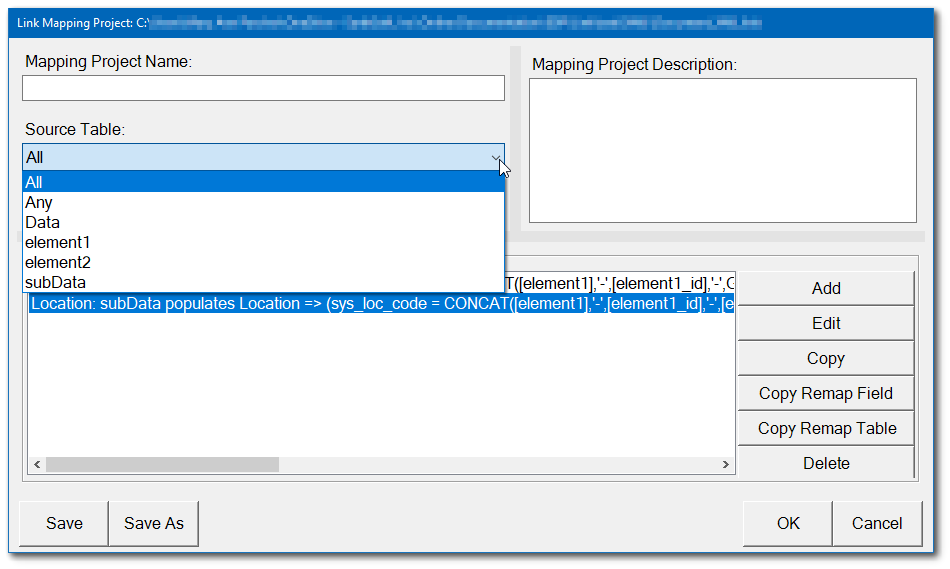
6.Click the Add button to create a data mapping using the XML data. In this example, the following formula is assigned to the SYS_LOC_CODE value in the Location section of the format:
CONCAT([Element1],'-',[Element1_ID],'-',[Element2],'-',[subData_Attribute1],'-',[#parent_Data_Attribute1],'-',[#parent_Data_Attribute2])
7.Save the data mapping and close the Data Mapping window.
Load XML Data to Format File
1.Using the Link mapping project template created above, click the Load button and select the same XML file.
2.Data in the XML source file will be mapped to the COLLECT_INSPECTION format. The Mapper Status dialog box details information on what EDD sections were successfully mapped, which sections were ignored, and if any errors were encountered. Click the Done button to close the Mapper Status dialog box.
3.The mapped data will be in the format sections. For this example, five data rows were created in the Location section with the SYS_LOC_CODE populated with the concatenation of the XML tag and attribute data.
