Administrators can create customized views to appear in Open > Views in EQuIS Professional. SQL Server Management Studio (SSMS) for SQL Server includes a user-friendly diagram pane in which to create these views. As the name implies, views are not editable and are used as a way to view data, similar to a report output.
To avoid conflicts with database upgrades and maintain greater control of permissions, create custom views in a custom schema, as with custom tables.
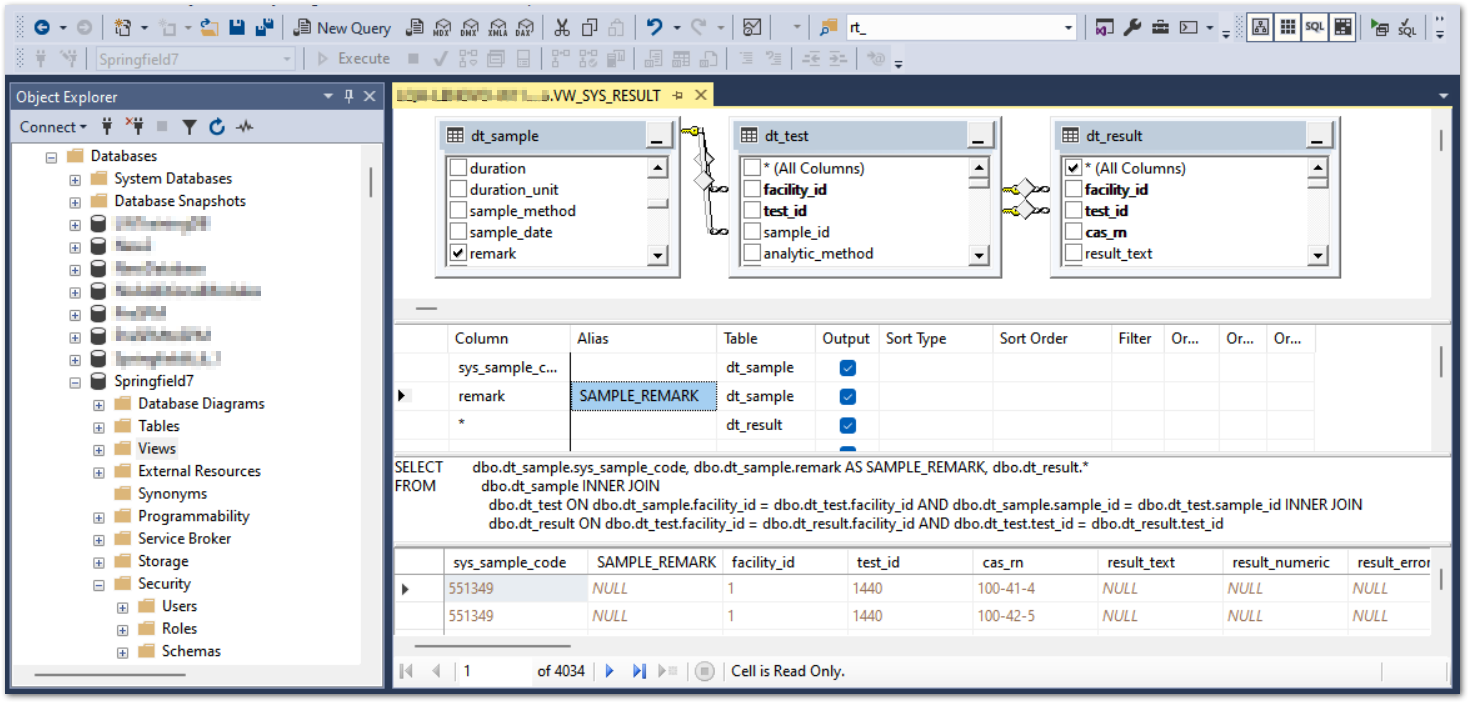
The following example creates a view with the SYS_SAMPLE_CODE column appended to the DT_RESULT table.
1.In SSMS, navigate to the named database > Views.
2.Right-click on Views and select New View.
3.In the prompt window that appears, add the following tables, in this order: DT_SAMPLE, DT_TEST and DT_RESULT.
4.In the diagram pane at the top, select SYS_SAMPLE_CODE from DT_SAMPLE and any additional columns that need to be included. Columns will appear in the order selected.
5.In DT_RESULT select *(All Columns) at the top.
6.Run the query by selecting Execute SQL (Ctrl + R) from the View Designer toolbar.
7.Verify the output.
8.Save the query as VW_[view name]. This view will appear in the main schema, "dbo".
9.Move the view to a custom schema. For example, this code will move view VW_SYS_RESULT to a schema called "custom":
ALTER SCHEMA custom
TRANSFER dbo.VW_SYS_RESULT;
10.Add any required permissions. The view will inherit permissions from the schema.
11.Restart EQuIS Professional, then log into the database. The view should appear in Open > Views.
For multiple fields with the same name in a view, the fields will not show up as options when crosstabbing. Give the fields a new name in the Alias column in SQL Server Management Studio, as shown in the selected field below: