Fields with a selector data type (Selector, Multi Selector, Group Selector, Group Multi Selector) have the following additional options that can be set when editing the field.
Display Mode – Two options are available:
•List – Show all items in one column; ideal for very long lists of options.
•Buttons – Several items per row as buttons.
Note: Selected options in Selector, Group Selector, Multi Selector, Group Multi Selector, and Dynamic Selector field types can be deselected by clicking the selected option(s) again. |
|---|
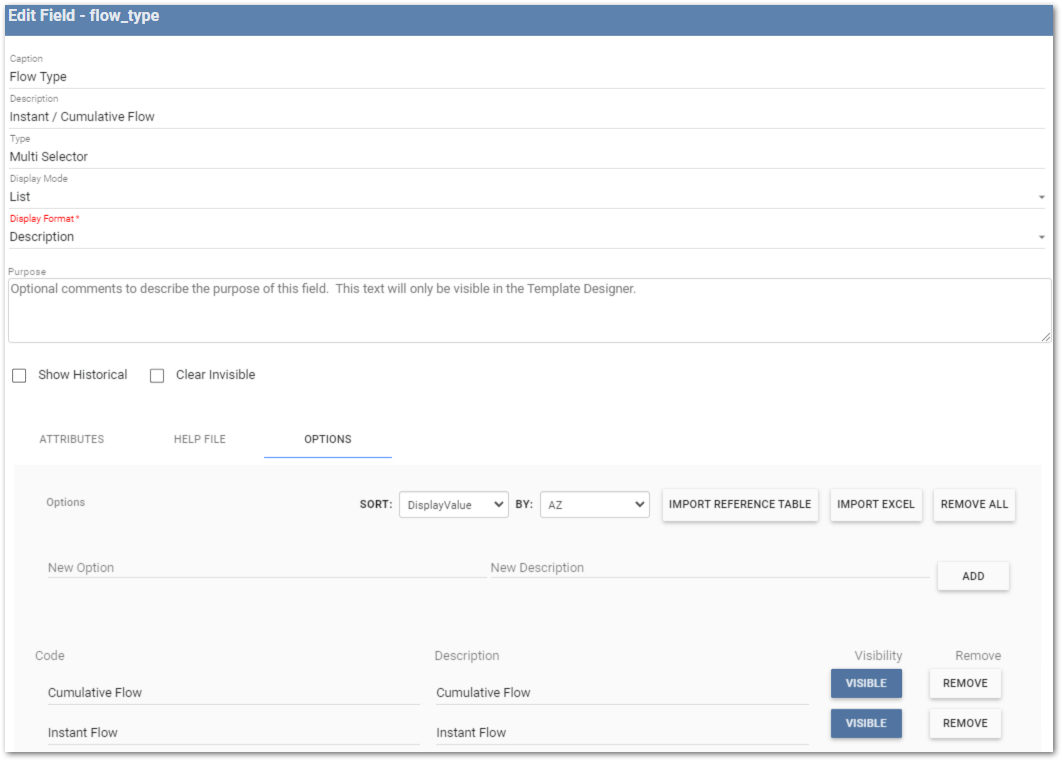
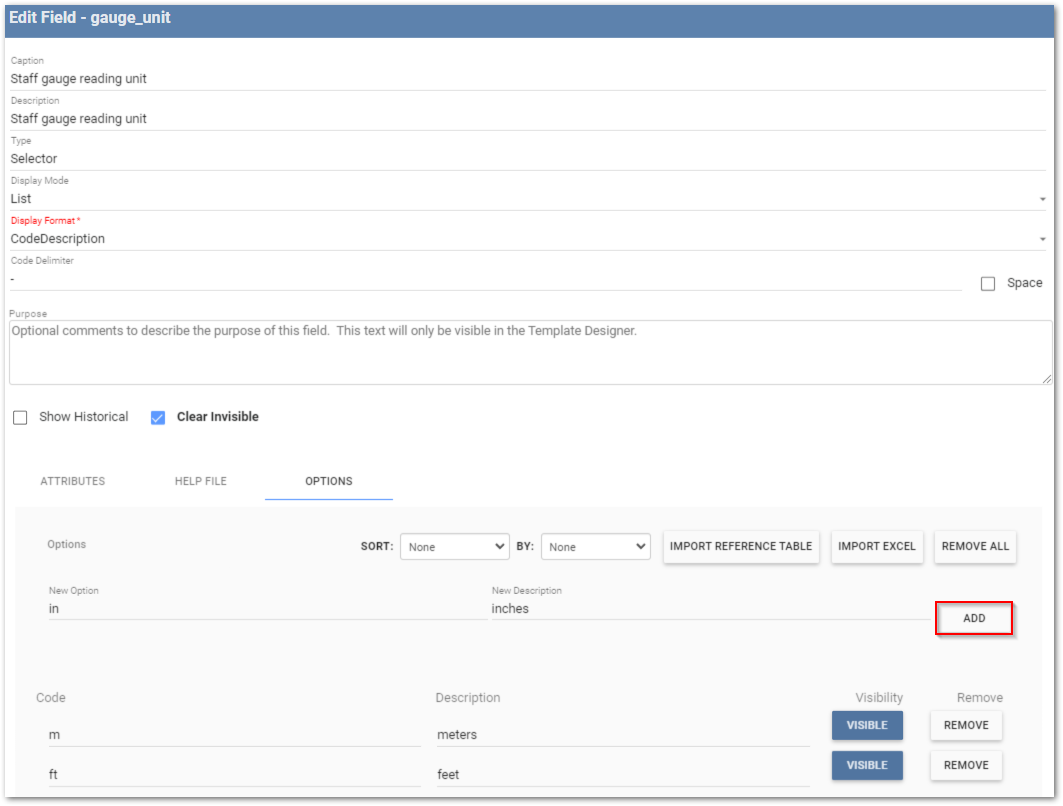
Display Format – Show the Code, Description, or some combination of them in the selection list or buttons displayed to the user in Collect Mobile on their device.
Code Delimiter – Used when selecting a combination of Code and Description for the Display Format option. Sets a character used to separate the Code and Description values (e.g., a dash). Check the Space box to use a space as the separator.
Multi Select Delimiter – Used for Multi Selector or Group Multi Selector. Sets the character used to separate each of the options chosen by the user in the Collect Mobile UI (e.g., a hyphen, comma). Check the Space box to use a space as the separator.
Options Tab
The Options Tab establishes the items in the static list from which the user will select. Selector items are defined by a "Code" and/or a "Description". By default, the description will be used if nothing is selected. If a description is not available, the code value will be displayed in the selector list on the mobile device. The code must be a unique value. If entering the same code value more than once, the existing code and associated description (if present) will be overwritten with the new code and description. In the adjacent column, an item’s Visibility can be configured in a Formula Builder tab.
Note: When creating formulas using fields with any selector fields types, the formula output will reference the code value and not the description. |
|---|
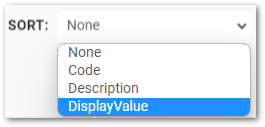
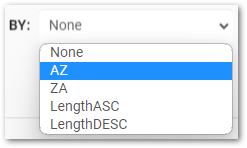
The selector list items or buttons can be ordered by either the code or description values. To define the display order, select either None, Code, Description, or DisplayValue (i.e., the Display Value property set on the form, including: code, description, code delimiter description, and description delimiter code) from the Sort: drop-down. Then click the By: drop-down to choose from None, AZ, ZA, LengthASC, or LengthDESC. The default values for both Sort: and By: is None.
|
|
Notes: •The Sort: and By: fields for Group Selector and Group Multi Selector field types are applied consistently to all groups within the field type, not each group individually. •The order in which values were initially entered (i.e., chronological order) will be displayed if either the Sort: or By: drop-down menus are set to None. |
|---|
The selector options list can be created by: (1) Manually entering the options, (2) Importing a reference table, or (3) Importing a Microsoft Excel file.
Manual Entry
Type a code value in the New Option text box and an accompanying description in the New Description box. Press Enter on the keyboard or click the Add button to add the item to the Options list.
Import Reference Table
This method enables the import of values directly from a reference table in EQuIS. Note that the selector list items imported are still static entries; they will not automatically update if changes are made to the source reference table.
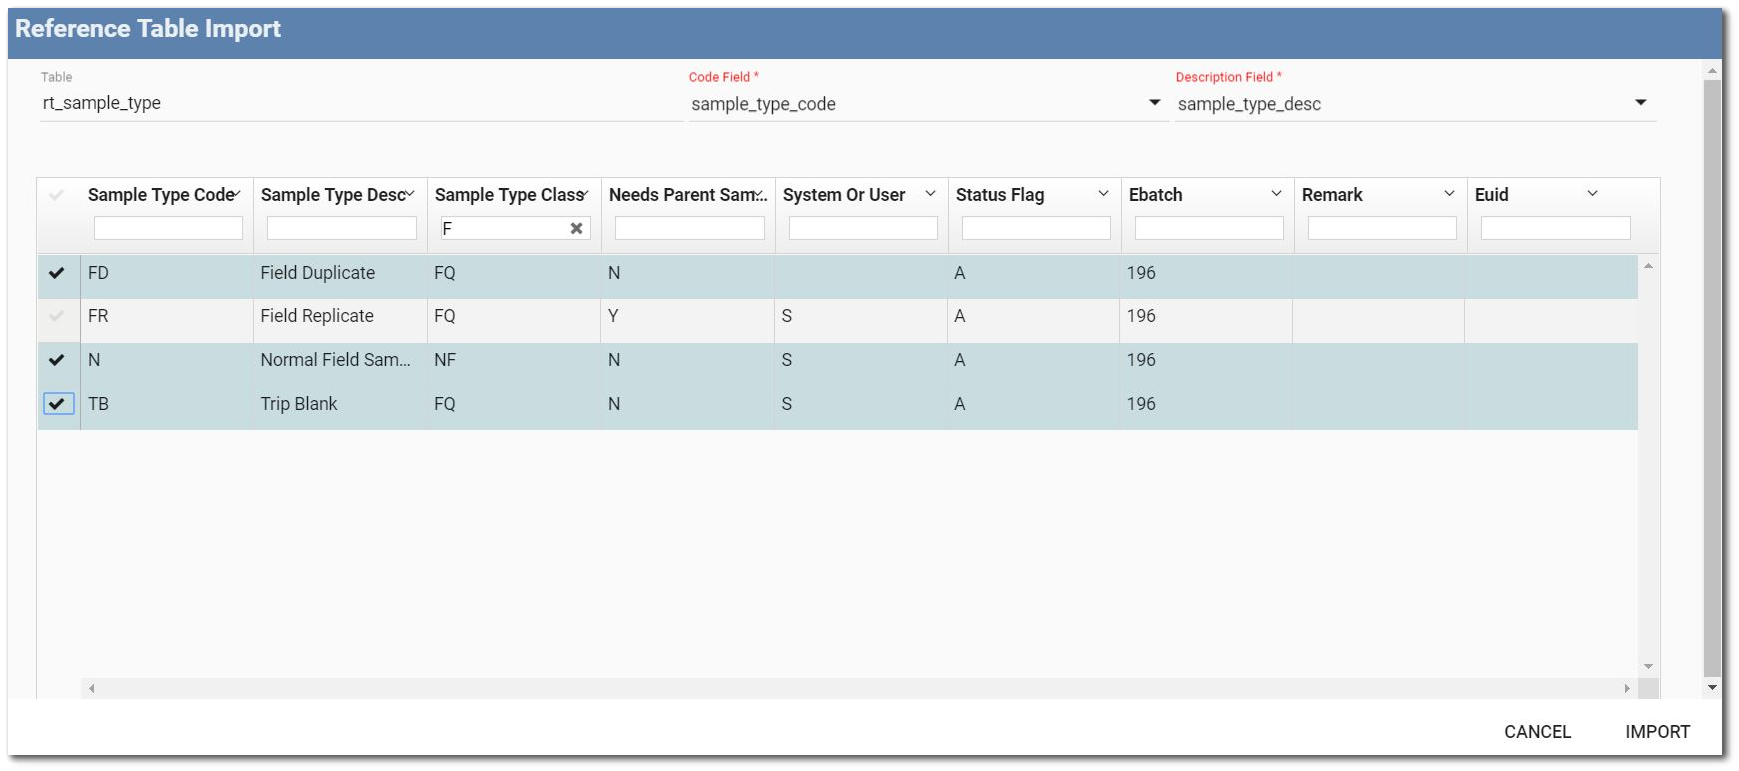
Select the Import Reference Table button to open the Reference Table Import window. Click in the Table box to load the list of available reference tables. The Search box can be used to filter the list of tables to easily find the desired table. Select the desired reference table.
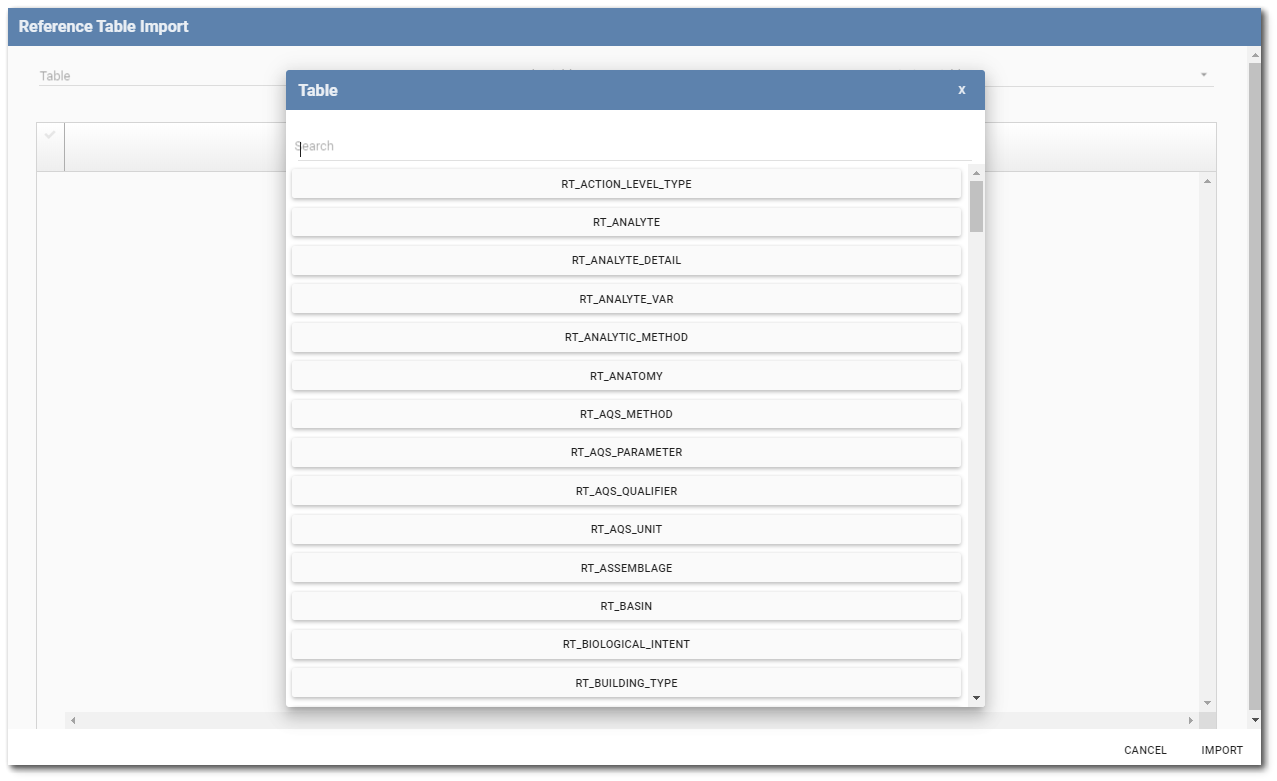
Identify which columns from the loaded reference table will supply the Code and Description fields. These are required fields. If needed, use the filter bar to filter the rows displayed. Check the box next to each item to be imported. Clicking the check box in the upper-left corner of the table will select all visible rows. Click the Import button.
Import Excel File
A Microsoft Excel file can be used to bulk import selector list items. The Excel file should have the following structure on a worksheet:
•In column A, supply values that will be the Code for each list item.
•(Optional) In column B, supply values that will be the Description for each list item.
To import the list items, click the Import Excel button and open the Excel file when prompted. Select which worksheet to import. For single Selector fields, only one worksheet can be selected. For Multi Selector fields, multiple work sheets can be selected.
For Group Selector or Group Multi Selector fields, the Excel file can be organized to supply options in groups. Create a worksheet in the Excel file, configured as explained above, for each desired group of options. The title of each worksheet in Excel will become the title of the resulting option group.