Form Name: Microsoft 365 OAuth
File Name: EarthSoft.Forms.Library.d23880.dll
Software: EQuIS Professional
Source: EarthSoft Community Center (Downloads > Products > Additional Resources > v7.0 > Microsoft_365_OAuth_Form_7.XX.X.zip)
Description: The Microsoft 365 OAuth form may be used in EQuIS Professional to obtain an OAuth token for a Microsoft 365 account to be used for configuring incoming and/or outgoing email in EQuIS Enterprise. Typically, you would follow the instructions on the OAuth Authentication for Microsoft 365 Email help article and use https://aad.equisonline.com/microsoft365_oauth.html to obtain an OAuth token. However, in some environments with restricted network access, you may not be able to use that site. Instead, you can use this form to obtain the OAuth token directly from Microsoft 365 directly within the restricted environment without having to use the https://aad.equisonline.com site. The form may also be used to obtain an OAuth token for a service principal instead of an individual user.
Installation Instructions: Download the file from the EarthSoft Community Center. Starting in 7.24.3, the form is packaged together with other standard-by-request forms, i.e., "EQuIS_By_Request_Forms_All_7.24.3.zip".
Unblock the *.zip file, and extract the DLL to the EQuIS Professional installation folder. For standard installations, this directory is C:\Program Files\EarthSoft\EQuIS; for per-user installations, this directory is %localappdata%\Programs\EarthSoft\EQuIS by default. After the user reopens Professional or refreshes the Open window, the form will appear in the Forms list.
Individual User:
1.Open the Microsoft 365 OAuth form in EQuIS Professional.
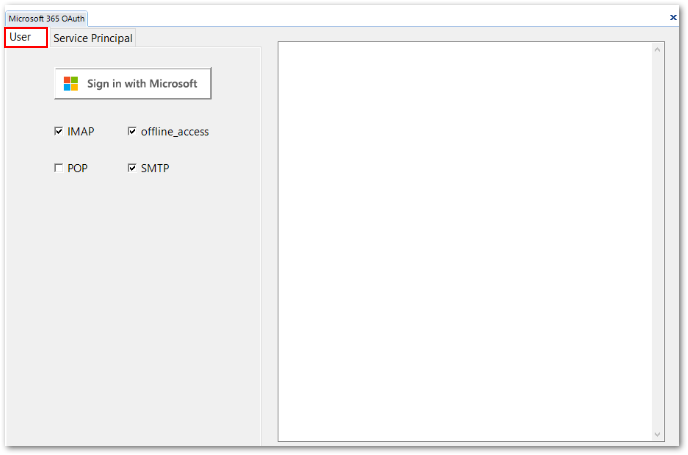
2.Adjust the checkboxes as follows:
a.offline_access: This box should be checked to ensure that the token may be continuously refreshed by the Enterprise email agent(s).
b.SMTP: Check this box if the token will be used by the Email Delivery agent to send outgoing emails.
Note: SMTP must be enabled by your Microsoft 365 administrator for the given Microsoft 365 account. |
c.IMAP: Check this box if the token will be used by the Email Retrieval agent to retrieve incoming emails via IMAP.
Note: IMAP must be enabled by your Microsoft 365 administrator for the given Microsoft 365 account. Typically, you would not need to check both IMAP and POP. |
d.POP: Check this box if the token will be used by the Email Retrieval agent to retrieve incoming emails via POP.
Note: POP must be enabled by your Microsoft 365 administrator for the given Microsoft 365 account. Typically, you would not need to check both IMAP and POP. |
3.Click the Sign in with Microsoft button.
4.Authenticate to Azure Active Directory with the appropriate credentials for the user account to be used for incoming and/or outgoing email.
5.Upon successful authentication, the form will automatically add the OAuth token to the XT_TOKEN table and the text box should display the token name (e.g., "ExternalOAuthToken:12345:username@organization.com").
6.Copy the token name and use it as the password when configuring EQuIS to use this email account for IMAP or POP (incoming email) and SMTP (outgoing email). See the mailSettings and Workflow widget articles for more information.
Service Principal:
1.Open the Microsoft 365 OAuth form in EQuIS Professional.
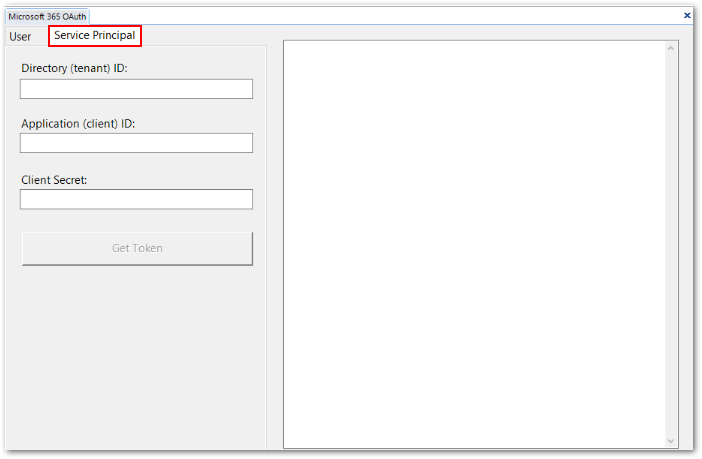
2.Populate the following fields:
a.Directory (tenant) ID
b.Application (client) ID (i.e., service principal ID)
c.Client Secret
Note: Ensure that the service principal has been granted the appropriate API permissions (IMAP.AccessAsApp, POP.AccessAsApp, SMTP.SendAsApp) and that appropriate consent has been given. |
3.Click Get Token.
4.Upon successful authentication, the form will automatically add the OAuth token to the XT_TOKEN table and the text box should display the token name (e.g., "ExternalOAuthToken:[XT_TOKEN.TOKEN_ID]:[service principal ID]".
5.Copy the token name and use it as the password when configuring EQuIS to use this email account for IMAP or POP (incoming email) and SMTP (outgoing mail). See the mailSettings and Workflow widget articles for more information.