Images are typically inserted to serve as high-resolution sitemaps. To insert an image, select Insert> Image from the main menu and select the image file from the dialog box. All of the most common image file formats are supported, which includes PNG, GIF, BMP, TIF and JPG.
Some image files are provided with an accompanying world coordinate file, which locates and scales the image in a consistent real-world coordinate system. The world file must reside in the same folder as the image file and have the same file name, with a modified file extension. Files with TWF, JGW, PGW, and BPW extensions are world files associated with TIF, JPG, PNG, and BMP image files, respectively.
Once inserted, the image can be moved, rotated and scaled. Double click the image in the viewer or the file name from the Plot Control tree to open the Image dialog box. Enter the desired properties in the dialog box to move, rotate or scale the image. Check the Moveable box to allow the image to be moveable by selecting and dragging an image using a mouse. Click OK to save any changes.
Note: Images inserted into a boring log cannot be dragged to the footer area. Use the Easting and Northing Insertion Points to put the image in the desired location. |
The article Georeference Image explains how to georeference an image.
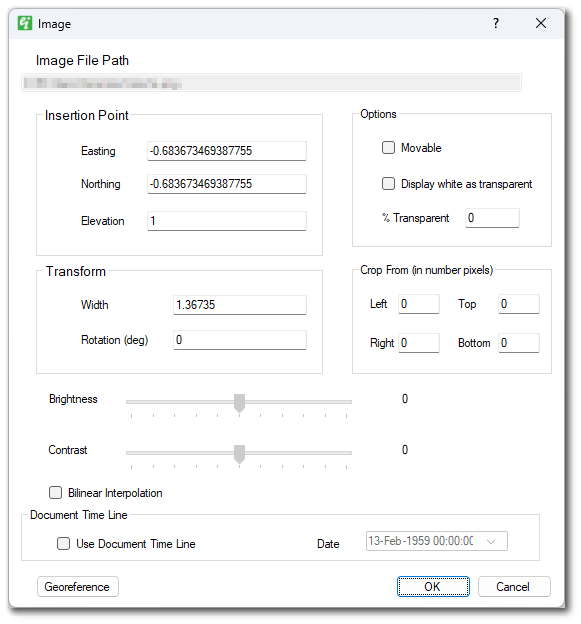
Image File Path – Selected image file name and path, which cannot be changed for this image object. Need to insert a new image to change image.
Insertion Point Coordinates – Easting and Northing insertion point coordinates at the lower left corner of image.
Insertion Point Elevation – The image elevation. Images are plotted as horizontal surfaces. See Surface objects for draping images.
Transform Width – Enter image width in real-world coordinates.
Transform Rotation – Enter rotation about insertion point in degrees clockwise.
Movable – Check to allow movement of image by mouse in View window.
Display white as transparent – Check to display white portions of image as transparent.
% Transparent – Enter percent transparency of image display to adjust the transparency of non-white portions of an image. This setting will only apply if the "Display white as transparent" setting above is unchecked.
Crop From – Enter crop distance from each edge in number of pixels.
Brightness and Contrast – Set image brightness and contrast. "Embed Image" must be checked on the Customize tab in View Options dialog.
Georeference – Click to georeference the image based on known coordinates at specific image points.