New forms for EDGE can be created using the Professional EDP Format Tools and Excel worksheets specifically pre-prepared for each form. It is imperative to name the worksheet the same as the new form in EDGE. The field names from the newly created form will also be listed in the first row of the Generate Format File tool in EDP. Save the Excel file.
Note: If adding a form for a table from EQuIS that does not yet have a form in EDGE, first open the desired table in EQuIS professional. Once opened, use the Export to Excel button to create an Excel file . Open the created file in Excel and rename the worksheet from "Sheet1" to the name intended for the new form in EDGE. |

1.Open EQuIS Professional.
2.Open EDP.
3.Load any EDD format.
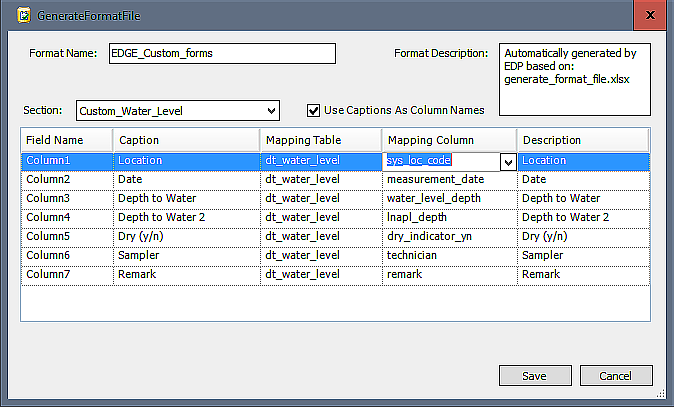
4.Click Generate Format File.

5.Locate the Excel file created in Step 1.
6.Select the worksheet from the “Section” drop-down and complete the mapping if you’re planning to push the data back to EQuIS.
7.Save the format as an *.xsd file.
Note: Use the “Design Format File” in Professional EDP to further refine your custom format. The .xsd files need to reside in an accessible directory, such as the Desktop or Documents directories. They cannot be located in "C:\Program Files\". |
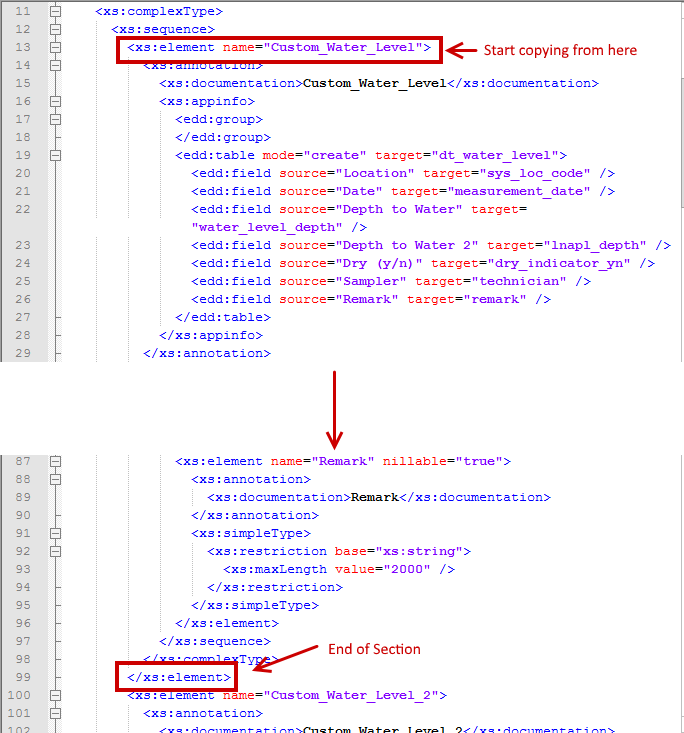
8.Open the *.xsd format in a text editor, like Notepad.
9.Copy the section just created as shown in the image below:
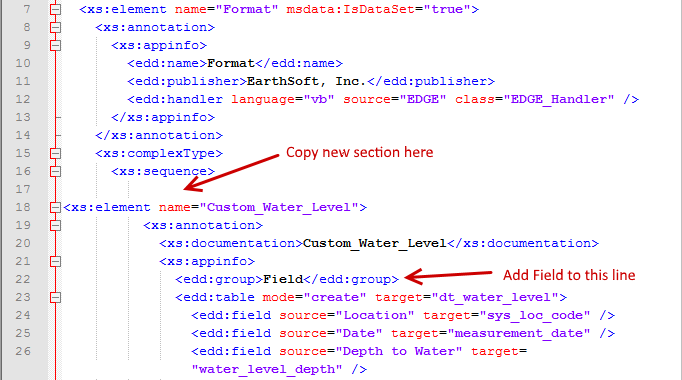
10.In the Plugins folder under the "EDGE\Formats\EDGE" folder, open the Format.xsd in a text editor
11.Paste the section copied from the *.xsd exported from EDP\
12.Add “Field” to the "edd:group" section so that it appears as: <edd:group>Field </edd:group>. Repeat for all sections created in the custom
format.
Note: If connecting to the database from EDGE, the .xsd file must be made secure. Additional information can be found here: Securing EDD Formats. |
13.Restart EDGE
14.Open the EDGE format
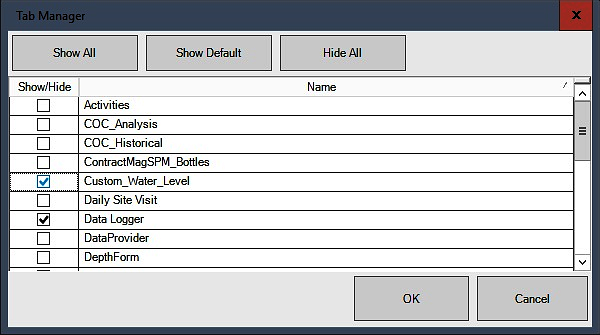
15.Click the application menu (upper left) and select Show/Hide Tabs.
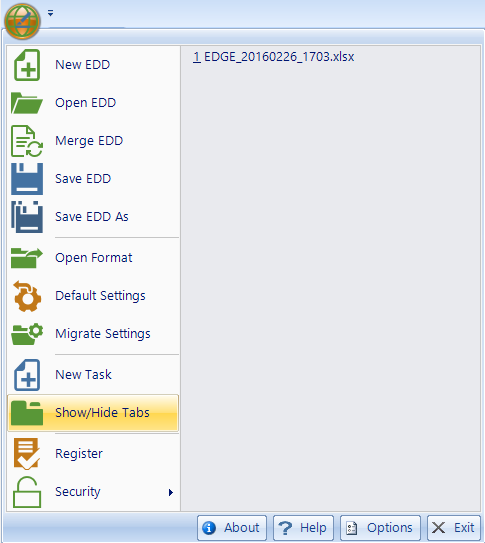
16.Select the custom sections created above.

17.Use the Configuration Plugin Tool in EDGE to define lookups (to enumerations or to reference tables) and designate required fields.