Define Map View Extent
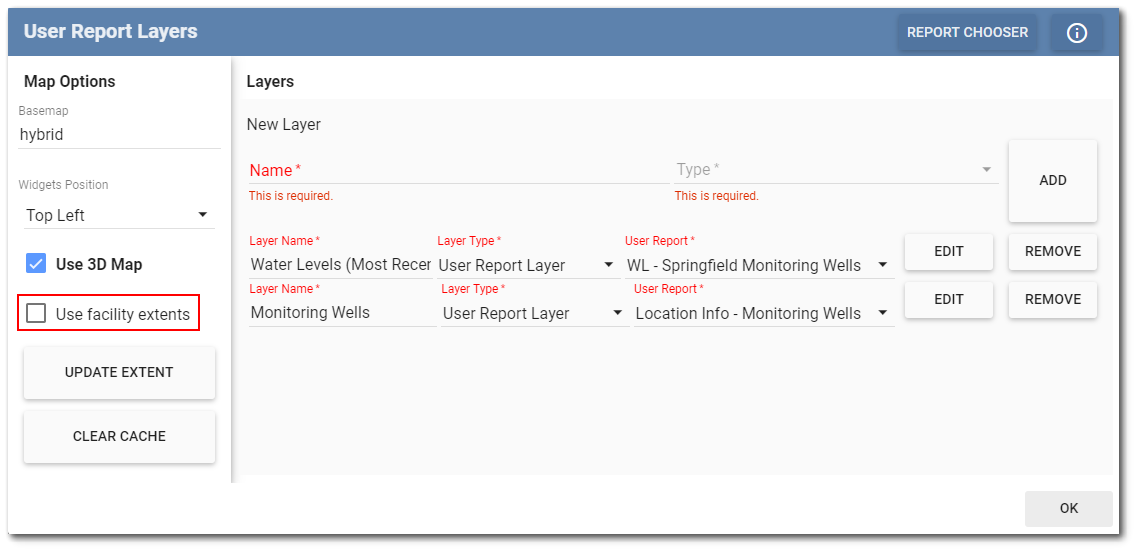
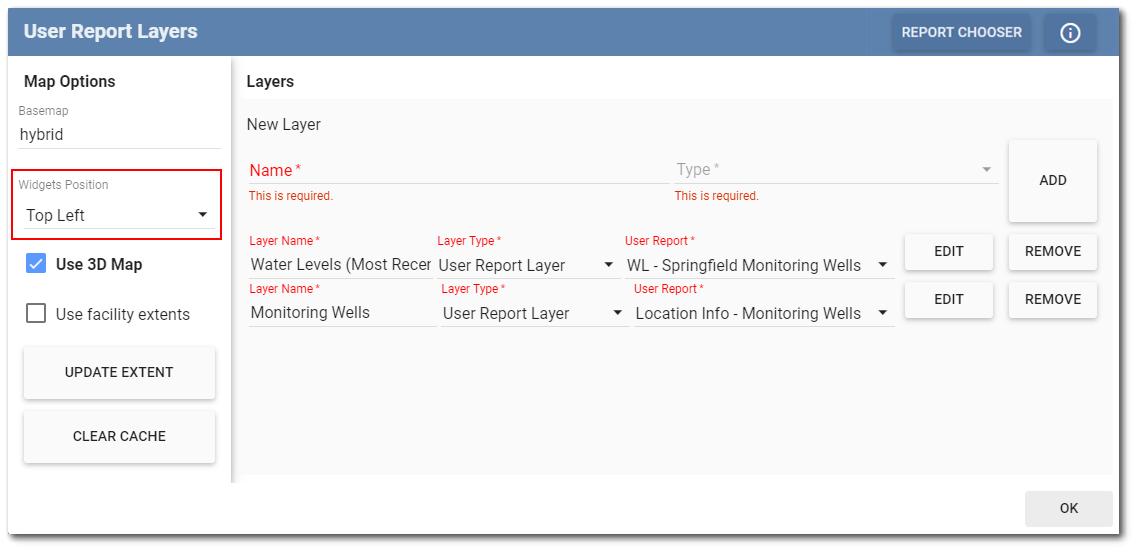
A default map extent to display on the main Map page can be designated by either using the facility extents or by applying the current view extents. To set the default map view extent, select the Setup button on the upper right corner of the Map page frame.

The User Reports Layers window opens. The extent of the map currently displayed on the Map page can be reset and locked by clicking the Update Extent button in the left pane of the window. Click the OK button. The default map view is set to the extent of the map currently displayed.

To use the facility specific map extent, select the Use facility extents check box in the left pane of the window. Click the OK button.
Note: This feature requires that the DT_FACILITY table is populated with XMIN, XMAX, YMIN, and YMAX fields (map extent) for the specified facility. |
Note: Empty the cache and hard refresh the browser page for the Collect map view extent setup to take effect. |
Map View Orientation
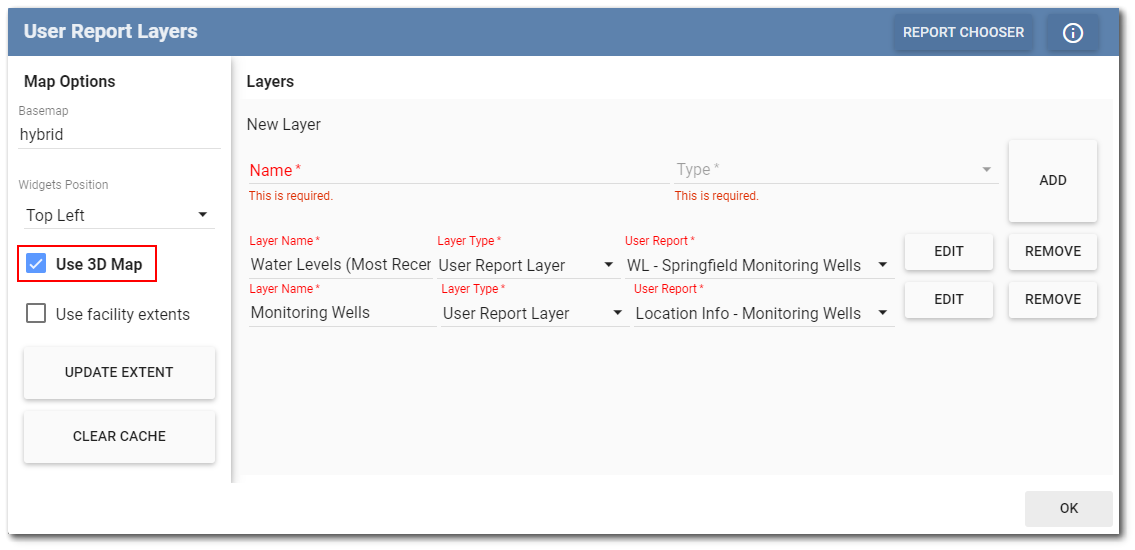
The typical and default map view orientation is two-dimensional (2D) (i.e., plane view). The map can be set to view in three-dimensions (3D). To use the 3D map view, select the Setup button on the upper right corner of the Map page frame. The User Report Layers window will open. Select the Use 3D Map check box in the left pane of the window. Click the OK button. The Map page will refresh with the 3D map view enabled.
Notes: •The layer features work better (do not disappear) in 2D mode, and intermittently work in 3D mode. •The 2D map reloads features when zooming in and out. Thus, the position of features may adjust while zooming in and out. |
Map Navigation Controls
Even when the default map view extent is set, the user can always change the positioning and extent of the map. To move the map around on a PC using a mouse, click and drag the map; for touch screen devices, tap on and drag the map.
To Zoom In or Zoom Out, on a PC either click the buttons in the Map controls or scroll in/out using the mouse scroll wheel. On touch screen devices either click the buttons in the Map controls or pinch and zoom.

Although the map is initially displayed in plan view, the map can be viewed in three-dimensions (3D). The user can toggle between the control to Pan ![]() across the map in 3D view or to Rotate
across the map in 3D view or to Rotate ![]() the map in 3D view.
the map in 3D view.
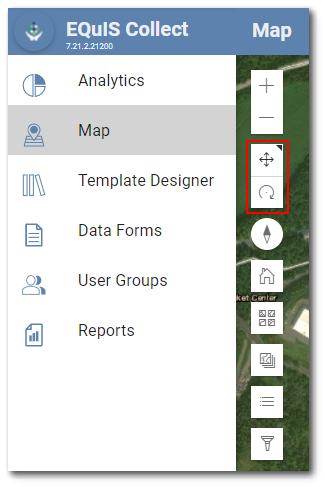
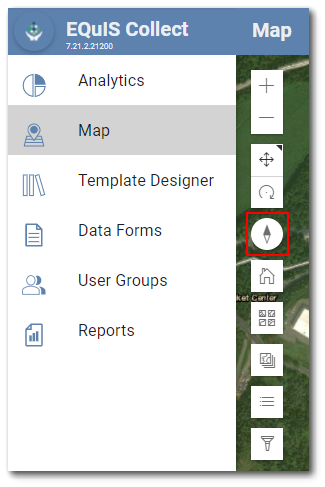
The Reset Compass Orientation![]() control readjusts the map such that North is pointing vertical (↑). This can be particularly useful when rotating the map in 3D.
control readjusts the map such that North is pointing vertical (↑). This can be particularly useful when rotating the map in 3D.
To return to the default map view, select the Home button in the Map controls.

Placement of Map Controls
To facilitate easier viewing on smaller screen sizes, placement of the Map control buttons can be adjusted. Select the Setup button on the upper right corner of the Map page frame. The User Report Layers window will open. Select the desired button placement from the Widget Position drop-down menu in the left pane of the window. Click the OK button.
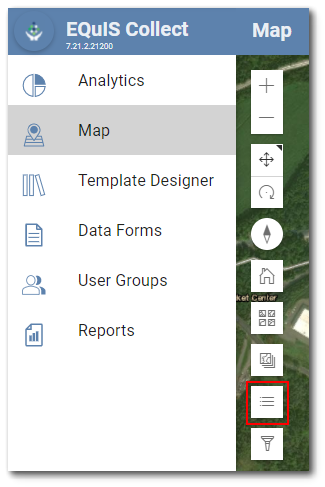
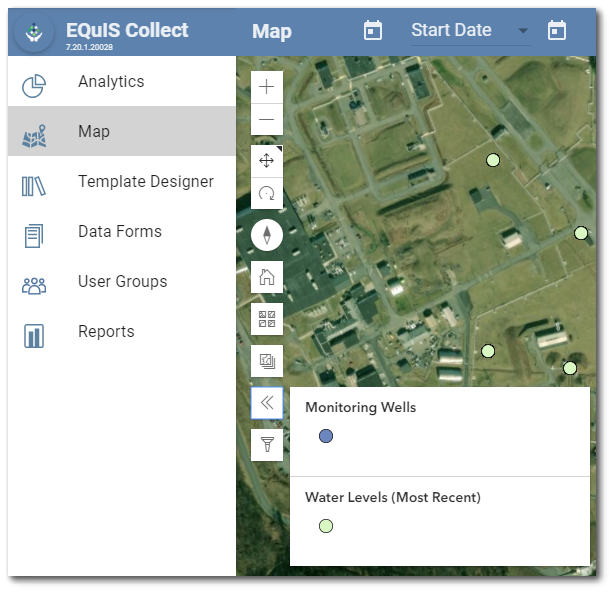
Map and Report Layer Controls
Numerous reports can be added as a map layer. See the Map and Report Layers topic for details on creating a new map layer. Select the Expand Layer button on the map controls to open the drop-down selection of available map layers. Click on the Collapse ![]() icon to close the drop-down menu.
icon to close the drop-down menu.
|
|

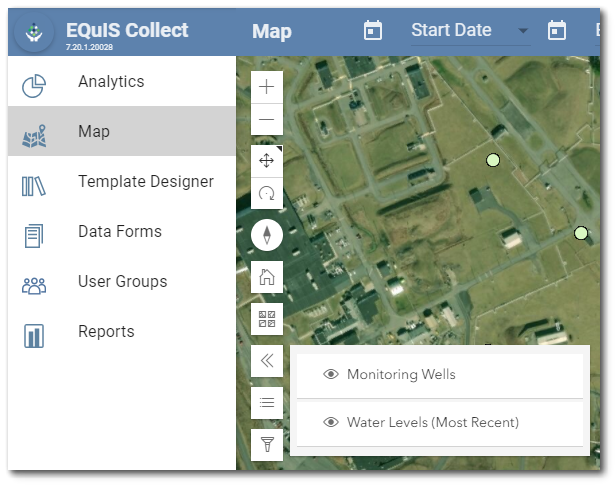
When a map layer is added to the map, the Expand Legend button can be selected to view a drop-down list of map symbols. Click on the Collapse ![]() icon to close the drop-down menu.
icon to close the drop-down menu.
|
|