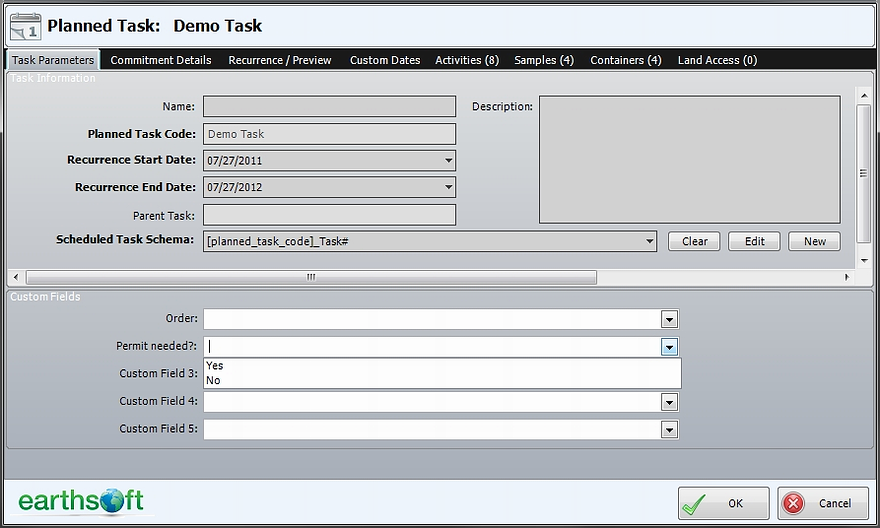
Within SPM, it is possible to change the caption name and add selection fields to the Planned Task 'Custom Fields'. An example of these changes is shown below:
To achieve these customizations:
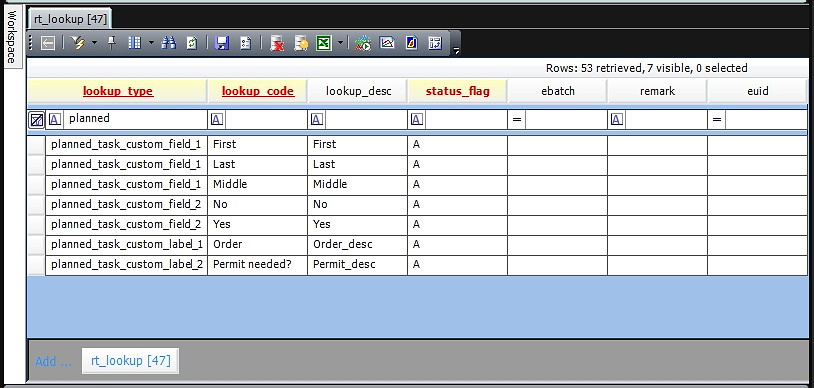
1.Open reference table RT_LOOKUP in EQuIS Professional.
2.To add items to the drop-down list for each Planned Task custom field, add records to RT_LOOKUP with:
a.LOOKUP_TYPE = "planned_task_custom_field_1" or "planned_task_custom_field_2", etc.
b.LOOKUP_CODE = value. This is the text that will be added to DT_SPM_PLANNED_TASK upon selection.
c.LOOKUP_DESC= value. This is the text that will be displayed in the drop-down list in SPM.
i.For example, put values for COMPANY_CODE in the LOOKUP_CODE field and values for the corresponding COMPANY_NAME in the LOOKUP_DESC field. Users would see the company name in SPM, but the company code would be stored in the database for better access to the primary key of that table.
d.REMARK can be added if desired.
e.Add multiple records for each custom field to make multiple values available for selection.
3.To change the label from 'Custom Field 1', etc., in the Planned Task screen, add one record to RT_LOOKUP for each custom field with:
a.LOOKUP_TYPE = "planned_task_custom_label_1" or "planned_task_custom_label_2", etc.
b.LOOKUP_CODE = label name.
c.LOOKUP_DESC and REMARK can be populated if desired.
The image below is an example of both customizing the field's label and adding members to the drop-down list.
4. Save and exit EQuIS Professional.
5. Open SPM/ Plan/ Planned Task to check that the new customizations have saved.
6. When an item is selected in a drop-down, the data is stored in DT_SPM_PLANNED_TASK.CUSTOM_FIELD_1, etc.
The user may wish to change the caption on the DT_SPM_PLANNED_TASK custom fields to clarify what data are stored within the table view of EQuIS Professional.