Overview
Improved functionality for filtering dashboard data was added in the EQuIS Enterprise Build 19300. The definitions for dashboard filters have been moved into the database as report parameters for a special report called “dashboard.filters”. The report is automatically deployed when a new build of EQuIS is installed. Users with access to the database can add, edit, and delete filters.
Using EQuIS Professional to Add a New Dashboard Filter
1.Open Professional and connect to the desired database.
2.Select Tables from the Home ribbon.
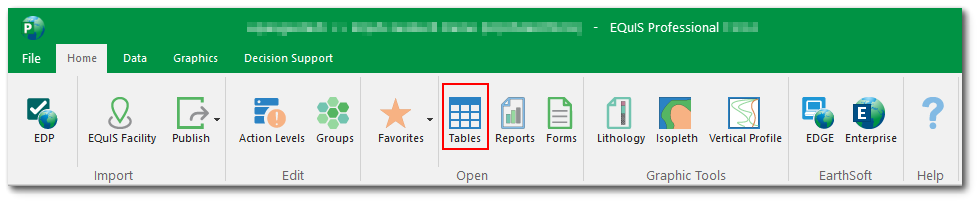
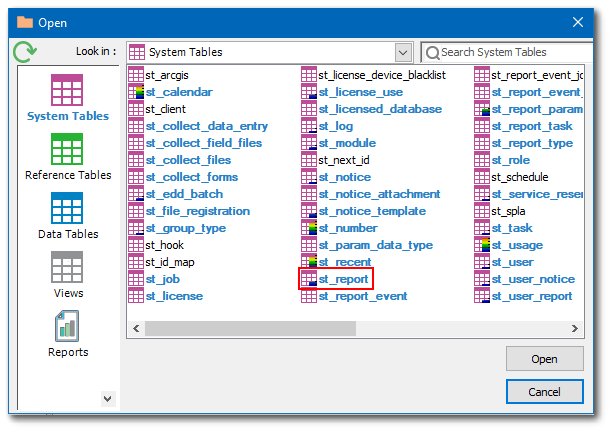
3.Select System Tables and open the ST_REPORT table.
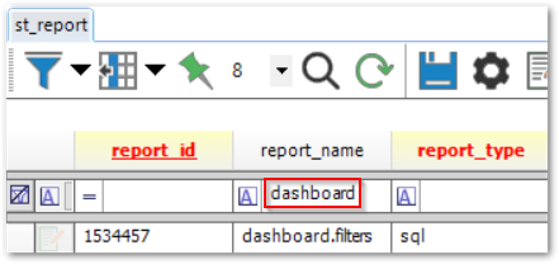
4.With the ST_REPORT table open, click the Filter icon on the toolbar to filter the table results.
![]()
5.Type “dashboard” into the filter textbox for the REPORT_NAME column (field).
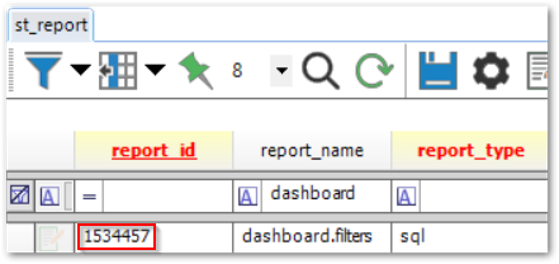
6.Copy the REPORT_ID value for the dashboard.filters report to use in the ST_REPORT_PARAMETER report.
7.Open the ST_REPORT_PARAMETER table.
a.Select Tables from the Home ribbon.
b.Select System Tables and open the ST_REPORT_PARAMETER table.
c.The table fields are listed below and required fields are marked with an asterisk (*):
•REPORT_ID* – Integer value for the report.
•PARAM_NAME* – Name of the filter. The Param_Name must match one of the report parameters defined in the ST_REPORT_PARAMETER table.
•PARAM_TYPE – Value type of the filter, such as “varchar” or “datetime”.
•PARAM_ORDER – Order of the filter in the list of filter values.
•DEFAULT_VALUE – N/A, can be “NULL” or blank.
•CAPTION – Filter title for selection in Filter – List widget.
•DISPLAY_TYPE – Display type for the filter, such as “Date” or “SingleSelect”.
•REMARK – N/A, can be “NULL” or blank.
•VISIBILITY – Boolean for visibility of filter values.
•DATA_SOURCE – Select query for populating filter values.
•REQUIRED_YN – N/A, can be “NULL” or blank.
•PARAM_SETTINGS – N/A, can be “NULL” or blank.
•EUID – Auto populated unique identifier.
d.Filter the ST_REPORT_PARAMETER table to only display the “dashboard.filters” table by pasting the REPORT_ID value from Step 6 into the filter textbox below the REPORT_ID column.
e.Click Add… ST_REPORT_PARAMETER at the bottom of the data table to add a new, blank record to the dashboard.filters table.
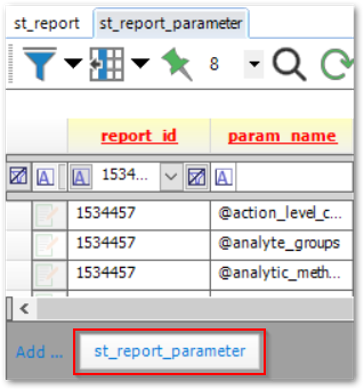
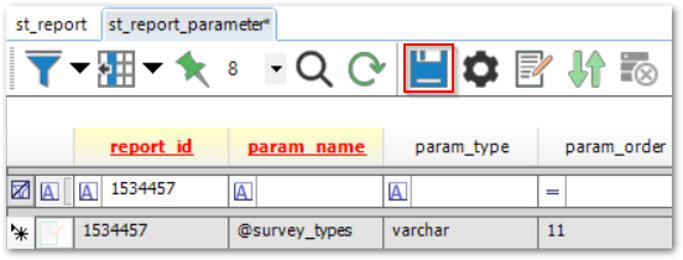
f.Example shows adding “@survey_types” as a new dashboard filter.

•REPORT_ID = 1534457
•PARAM_NAME = @survey_types
•PARAM_TYPE = varchar
•PARAM_ORDER = 11 (order of list)
•DEFAULT_VALUE = blank
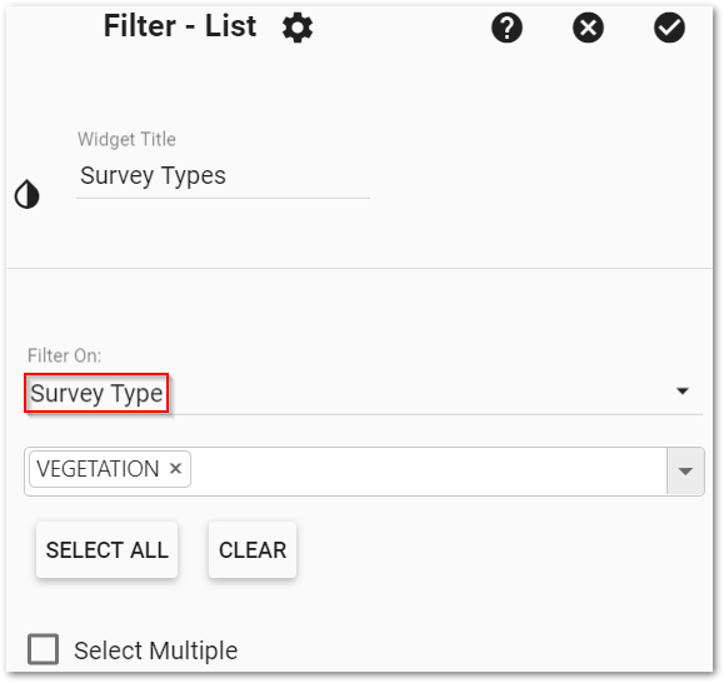
•CAPTION = Survey Type
•DISPLAY_TYPE = SingleSelect
•REMARK = blank
•VISIBILITY = Y
•DATA_SOURCE = SELECT SURVEY_TYPE AS ID, SURVEY_TYPE, SURVEY_DESC FROM RT_SURVEY_TYPE
•REQUIRED_YN = blank
•PARAM_SETTINGS = blank
•EUID = blank, this will be auto populated
Note: The DATA_SOURCE column is expecting three column names listed in the SELECT portion of the query. In the example above, the RT_SURVEY_TYPE table is providing the values displayed when the Survey Type filter is selected, the SURVEY_TYPE column is set as the ID value for the filter, and is also displayed as part of the filter results, as is the SURVEY_DESC field. |
8.Click the Save icon on the toolbar to save the changes made to the ST_REPORT_PARAMETER table.
9.In Enterprise, refresh the Filter-List widget.
10.Open the widget editor to view dashboard filters.
Using EQuIS Professional to Modify an Existing Dashboard Filter
1.Repeat Steps 1 – 7.d in the above section to view the existing filters in the dashboard.filters table.
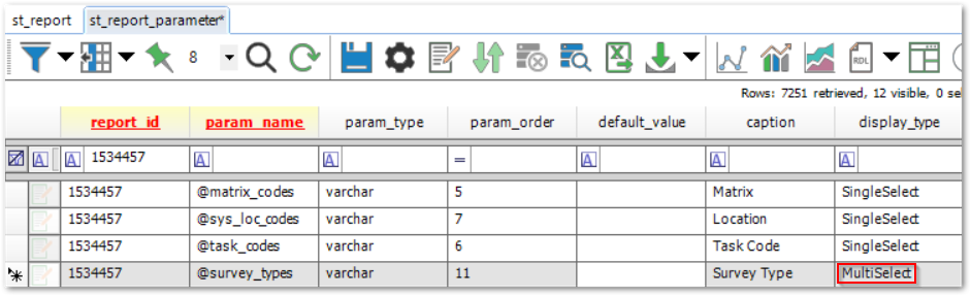
2.Select the filter and field to update.
3.Example showing DISPLAY_TYPE updated to MultiSelect from SingleSelect for the @survey_types filter.
4.Repeat Steps 8 – 10 in the above section to view the changes in the Filter-List widget.
Using EQuIS Professional to Delete a Dashboard Filter
1.Repeat Steps 1 – 7.d in the above section to view the existing filters in the dashboard.filters table.
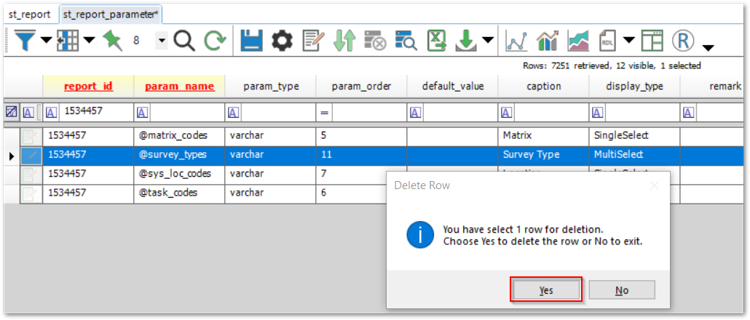
2.Highlight the record of the filter to be deleted.
3.Hit Delete on the keyboard and click Yes to confirm that the record should be deleted.
4.Repeat Steps 8 – 10 in the above section to view the changes in the Filter-List widget.