EDGE provides the ability to load, configure and visualize ESRI shape files.
Configure in EDGE Options
Within EDGE Options are Shape File Synchronization settings. Use the following settings in EDGE to enable shape files.
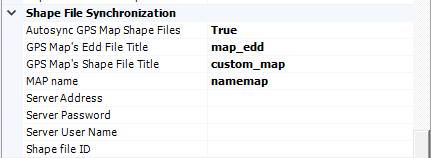
Note: If Autosync GPS Map Shapefiles is set to True, but the Server Address is blank, the following message will appear each time GPS Services is opened: Bad URI: check edge synchronization options |
|---|
Load
1.In EDGE > Form ribbon, select Location. The GPS Location window appears.
2.Click the settings icon in the bottom of the screen
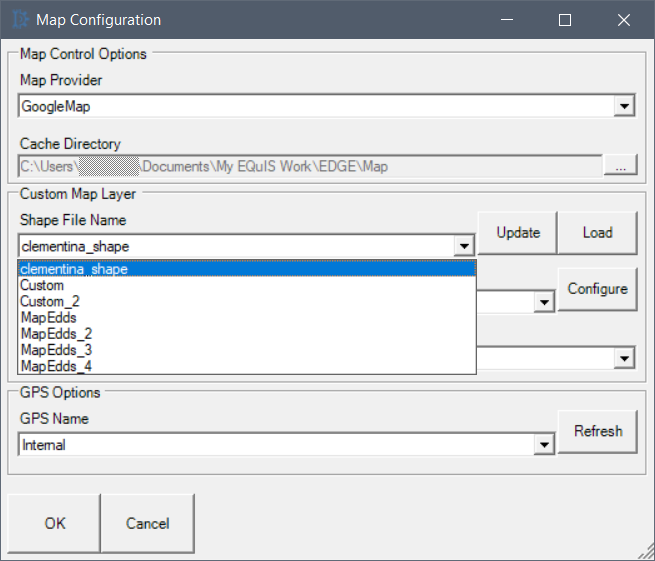
3.Next to Shape File Name, click Load
4.Browse to and select a folder containing shape files
5.Click OK. EDGE copies the shape files into a "Custom" folder in the directory where the map cache is stored. This directory is set in EDGE Options > Map Cache Folder. This allows for access to these files while in the field.
Select
Select the current map to use under the Shape File Name drop-down.
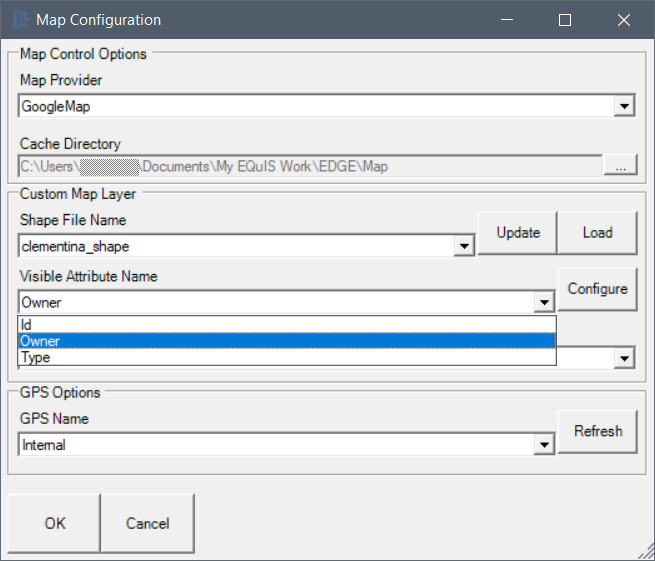
Also select an Attribute Name which will be used to organize information which will be plotted on the map from the shape file.
Configure
Click Configure to set up the coloring scheme used to display the Attribute Name chosen. EDGE automatically displays the correct coloring scheme depending on whether the attribute is discrete or numeric.

Configuring attribute colors

Configuring attribute colors
View
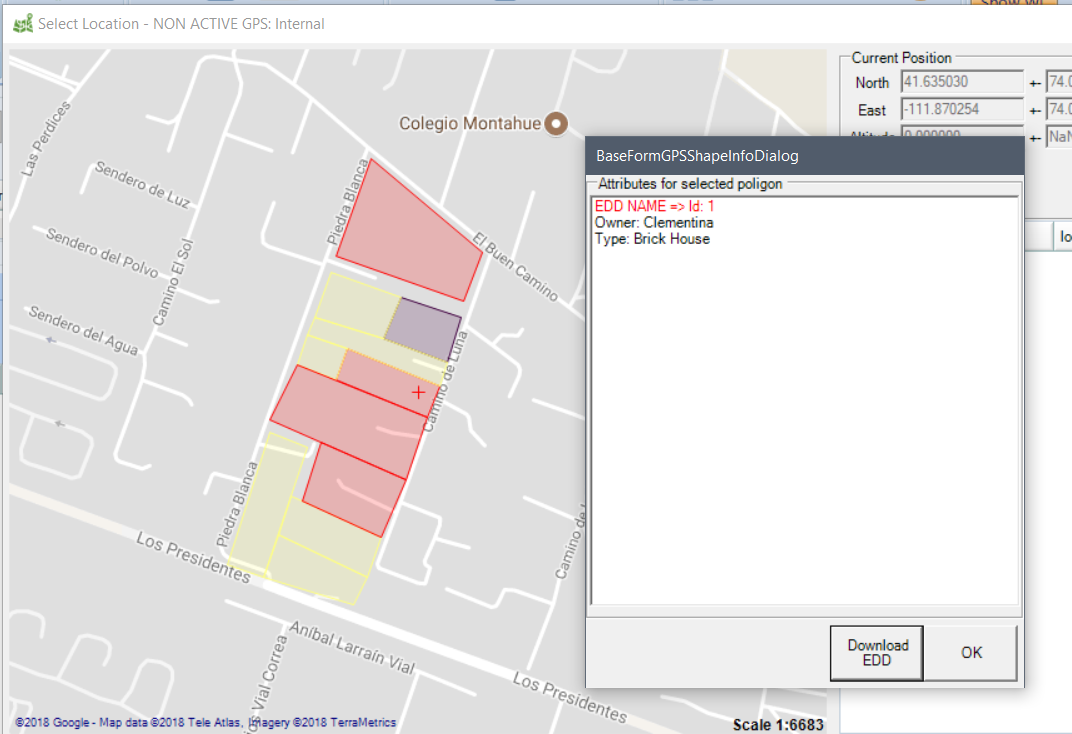
The shape file data are integrated into the GPS Location chooser as a color-coded overlay on the selected map provider. The Show Custom Layer check box toggles whether to show or hide the overlay.
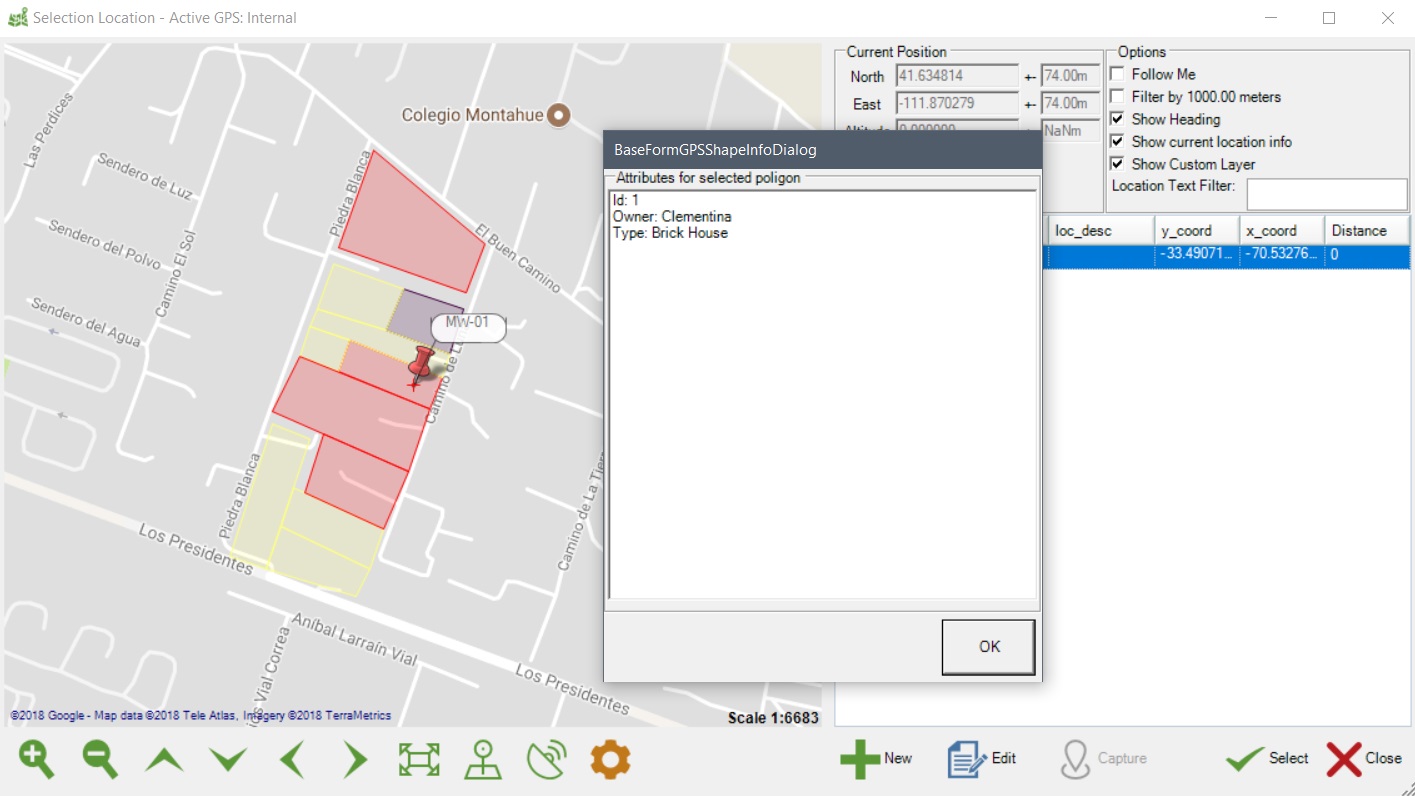
Clicking on any of the polygons will produce a window showing all attributes for that region.
Autoload File Attribute Name
When configured, this option allows the user to select a region overlaid on the map, then quickly open an EDD relevant to that area.
Prepare EDDs:
1.Identify the MapEdds folder within the Map Cache Folder directory (e.g. .\Documents\My EQuIS Work\EDGE\Maps\MapEdds\)
2.Create subfolders within MapEdds which are named after the attribute values you will select from the GPS Location map. For example, if an ID attribute is set as the Autload File Attribute Name, create a folder named for each ID value one would expect to find in the shape file
3.Place the appropriate EDD file within each folder
In EDGE:
1.Go to the GPS Location window's settings
2.Under Autoload File Attribute Name, select the attribute which EDGE should use to locate an EDD
3.Click OK
4.Select a polygon on the map overlay to pull up its attributes. The attribute chosen to be the Autoload File Attribute will show in red text and an "EDD Name" title.
5.Click Download EDD. If successfully found, EDGE will load the EDD appropriate to that region of the map overlay.