In the EQuIS Professional reports interface, a temporary custom date column can be added. After running a report, add the user defined date columns using the following steps within the Report Grid.
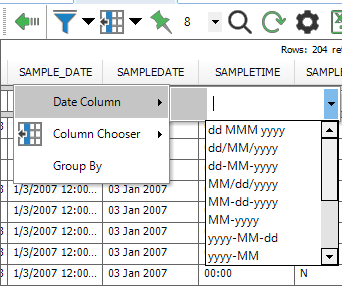
1.Right-click on the SAMPLE_DATE column header.
2.Select the Date Column menu.
3.Select the date format from the menu (HH:mm) or (dd/MM/yyyy) or type in a desired format.
4.Select Enter.
5.A new column will be added to the output called SAMPLE_DATE_<selected format>.
6.Repeat if additional date/time formats are needed.
These added columns will also be listed in the Available Columns in use when creating an EQuIS Crosstab.
Information on the Date and Time formats used within EQuIS can be found here.
Duplicate Columns
When attempting to put in case sensitive format specifiers, such as "mm" (minutes) or "MM" (numeric months), users may receive an error such as "Column 'SAMPLE_DATE_mm' already exists", followed by an "Object reference not set to an instance of an object" error. To avoid running into duplicate column issues due to case insensitivity in this instance, use "mmm" for minutes so that the columns can be differentiated within the Report Grid.